And the Speed Sew Winner is……

Thanks to everyone for your interest in the Speed Sew Giveaway! Don’t forget to watch some of their project videos. They are pretty funny! And all sorts of ideas! I’m sure I’ll have more, but in the meantime, check it out for some crafting entertainment!

NoSewLapDesk-SpeedSew-ImFeelinCrafty

And don’t forget…. If you aren’t the winner below, you can still purchase your own Speed Sew, here!

Now to what you’re waiting for… The Winner is….

drumrollplease1 copy

And here’s my traditional drum rolllllllll……

Comment #2!

Capture1

via Random.org

Yea! duchick! You’re the Winner!

Capture2

And thanks again to Speed Sew for the awesome giveaway! Thank you!

NoSewLapDesk-Main-ImFeelinCrafty

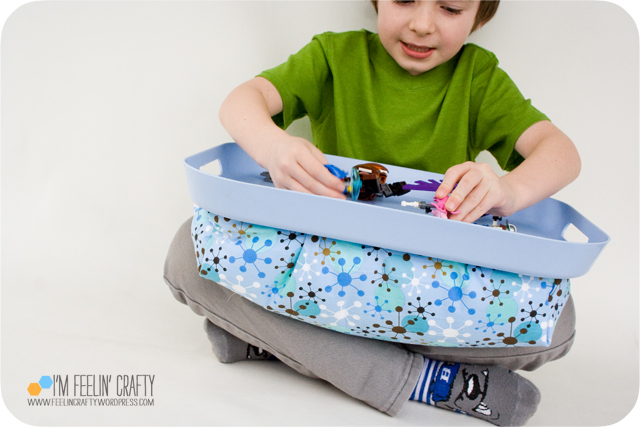
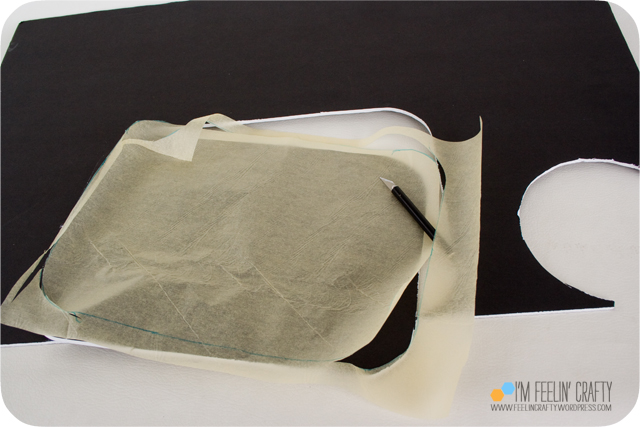
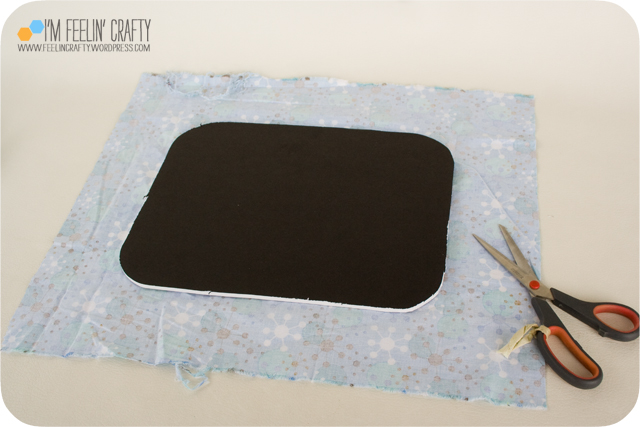
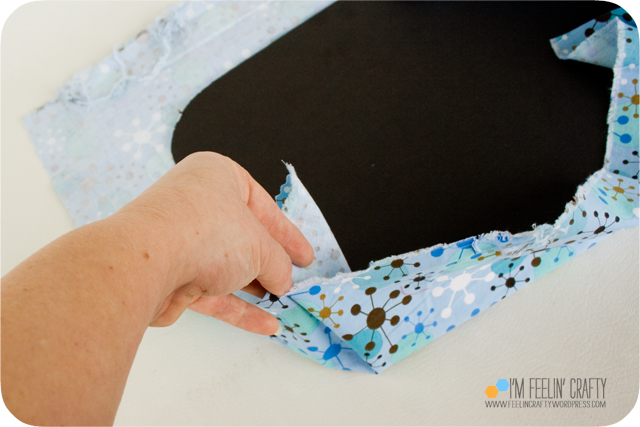
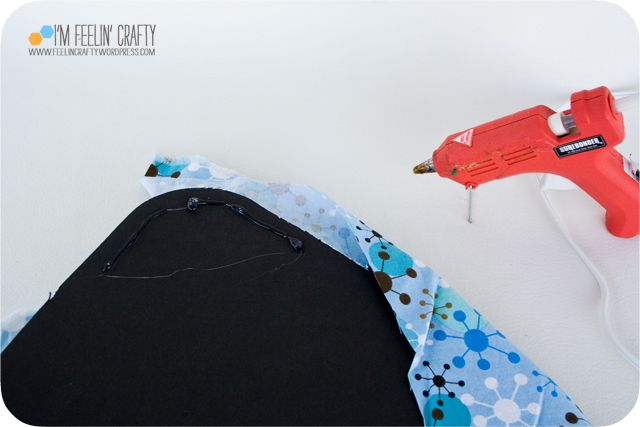
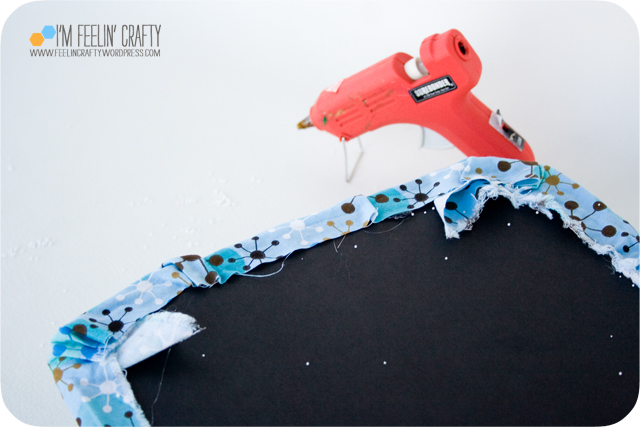
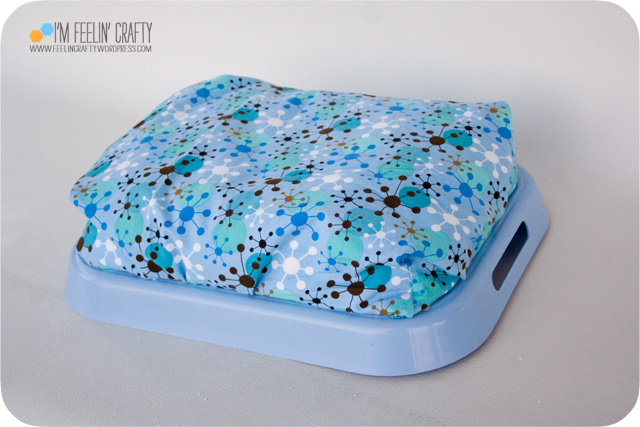
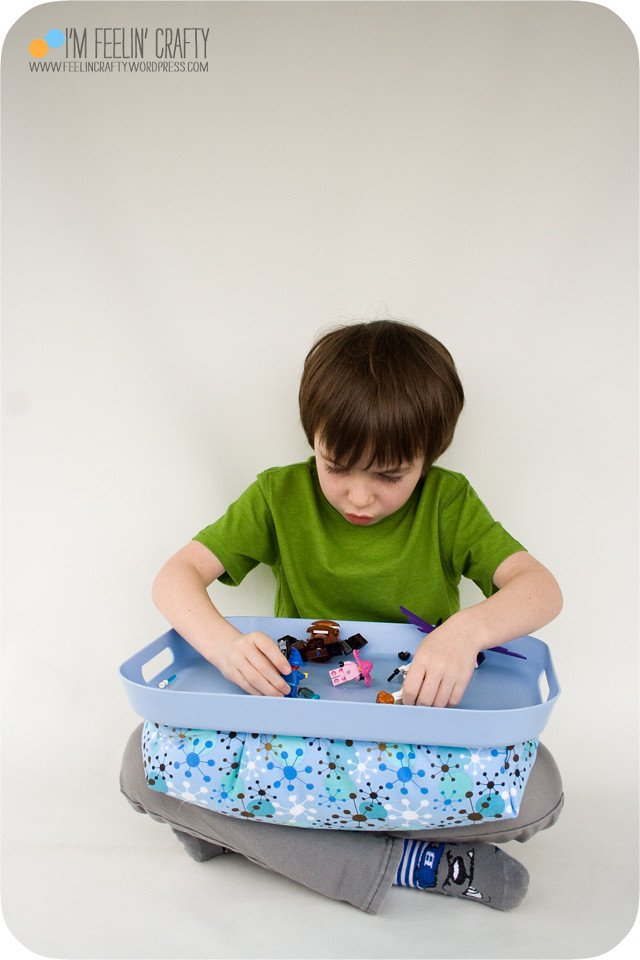
And if you missed the No Sew Lap Desk Tutorial, check it out here!

No Sew Lap Desk Tutorial with a Speed Sew Giveaway!

When we go most places the kiddo leaves with a handful of legos…. Then he drops the legos in the car…

NoSewLapDesk-Main-ImFeelinCrafty

So I wanted to make him a lap desk to hold those legos so they don’t end up all over the car! And that’s what we did!

NoSewLapDesk-Playing3-ImFeelinCrafty

I kept looking for a fun lap desk with sides, but I couldn’t find any since they are mostly made for laptops. Then I was wandering through Goodwill one day and noticed a tray! Oh, yeah! It hit me, I can make it myself. Hello? WHy hadn’t I thought of this before???

NoSewLapDesk-Materials-ImFeelinCrafty

Want to make one? It’s super easy! Of course, I got the tray at our local Goodwill. You’ll also need poly fill microbeads, cardboard or foam core, fabric, speed sew, hot glue and some trace paper.

NoSewLapDesk-Step1-ImFeelinCrafty

First, you’ll want to trace the outline of your tray and then cut it out of your cardboard or foam core. I used the foam core just becuase it’s what I had closest to me!

NoSewLapDesk-Step2-ImFeelinCrafty

Cut your fabric. I cut mine about 3 1/2 inches larger than my foam core on each side. In hindsight, I’d probably go a bit thinner, maybe 2 1/2 inches.

NoSewLapDesk-Step3-ImFeelinCrafty

NoSewLapDesk-Step3a-ImFeelinCrafty

Next, pull up the corners so that you have a triangle of fabric like in the picture above. Pin along the long side of the triangle. Do it for each corner.

NoSewLapDesk-SpeedSew-ImFeelinCrafty

And in comes Speed Sew! Have you used this stuff? It’s little blurb is, Don’t sew it, Speed Sew it!’ You put this glue on the fabric, hold it for a minute and it’s like it’s been sewn together! I love it! I’m trying to figure out how to make a no sew quilt for those readers out there that want to make a quilt but don’t sew! Not sure if I’ll be able to do it, but I’m working on it!

NoSewLapDesk-Step4a-ImFeelinCrafty

NoSewLapDesk-Step4-ImFeelinCrafty

Unpin your triangles and glue along the line between the two right sides. Put the glue on a piece of paper or cardboard and use some sort of spreader to apply the glue. I didn’t have great luck with getting the glue where I wanted it when I applied directly to the fabric. Other people might be better at this than I am, but until you know, stick with a spreader!

Don’t cut the rest of the triangles!

NoSewLapDesk-Step5-ImFeelinCrafty

NoSewLapDesk-Step5a-ImFeelinCrafty

NoSewLapDesk-Step5b-ImFeelinCrafty

Center the cardboard back in the middle of the fabric. We’re gluing the fabric to the cardboard. Start with the corners and gather around. Then do 3 sides. Not all four! Just three! Then go around and make sure you have a nice border of hot glue all around.

NoSewLapDesk-Step6-ImFeelinCrafty

Use a funnel to fill the lap desk with the micro-beads. This can get messy! They kinda fly around…. So SLOWLY fill the funnel. I tried to speed it up and pour directly into the lap desk. But it made a mess! So I recommend the funnel!

NoSewLapDesk-Step7-ImFeelinCrafty

Once the lap desk is filled, hot glue that side closed too! Then push on the lap desk and if you have any holes, micr-beads will start flying! Fill in the gaps if needed!

NoSewLapDesk-Step8-ImFeelinCrafty

Lastly, hot glue the lap desk to the tray! i had to work fast, before the hot glue dried!

NoSewLapDesk-Playing2-ImFeelinCrafty

NoSewLapDesk-Playing1-ImFeelinCrafty

Then give it a test drive! The kiddo was very pleased with it and it ready to take it out on the open road!

NoSewLapDesk-Last-ImFeelinCrafty

What do you think? Would your kiddos like one? I bet they would!! I want one for when I’m crafting in the car on road trips! hmmmm… I might have to make another one!

NoSewLapDesk-SpeedSew-ImFeelinCrafty

And now for the giveaway! 2 tubes of Speed Sew! It dries in minutes, doesn’t wash out and can be used for crafts and fabric repairs. I bet it would be a great way to hem things if you don’t want to sew it! I just thought about that!

When you check out their website, you’ll see a bunch of red icons. Click on these for some silly tutorials with Owen Clark and Josh Rimer.

And their FB page has tons of links to other tutorials! I just had even more ideas!!

Giveaway is closed!

Ready to WIN? You have FOUR ways to enter! And come back and leave a separate comment on this post for each entry!

1. Tell us what you’d use Speed Sew for! Or give me another Speed Sew tutorial idea!

2. My blog followers get an extra entry. Leave one comment. (one entry)

3. Follow I’m Feelin’ Crafty on Instagram at @imfeelincrafty. Leave one comment. (one entry)

4. Follow Speed Sew on Facebook. Leave one comment. (one entry)

That’s 4 possible entries! You must comment on this post to win. Sorry, only open to US addresses. The giveaway will close on March 25th at 12 p.m. PST, and we’ll choose one winner using Random.org.

I have been compensated with either payment or product for this post. All opinions are my own, honest opinions!

An Awesome Sewing Giveaway!

A new thing I’m trying out this year is joining up with some amazing other sewing bloggers to do some fun giveaways! Today starts our very first one! Who doesn’t want store credit at awesome fabric shops like Imagine Gnats, Fabric.com, The Fabric Fairy and patterns from Pattern Revolution??? I don’t know anyone that would say no! So neither should you!


Sewing Giveaway

January’s giveaway is sponsored by:

Straight-Grain * Nap-Time Creations * Fabulous Home Sewn

Fish Sticks Designs * It’s Aways Autumn * Call Ajaire

Pattern Revolution * Serger Pepper * Patchwork Posse * I’m Feelin’ Crafty

A Special Thanks to Imagine Gnats and Pattern Revolution for sponsoring part of the prize pack.

**Giveaway is open worldwide but you are responsible for any extra shipping charges due to your location when using the shop credits**

Winner will be contacted by e-mail from nap-timecreations@hotmail.com and will have 48hrs to claim the prize.

a Rafflecopter giveaway

(on my wordpress site, it won’t host the actual rafflecopter giveaway. You do have to click on the link above!)

The Blue Mountain and $250 Gift Card Winner Is…

Thanks to everyone for your interest in the Blue Mountain giveaway with a $250 gift card!! I honestly can’t believe that there wasn’t more interest in it. I think it’s a fantastic eCard site and I am surprised more readers didn’t want to win the gift card!

bluemountain-logoBlueMountain-christmascards-ImFeelinCrafty

Now to what you’re waiting for… The Winner is….

drumrollplease1 copy

And here’s my traditional drum rolllllllll……

Comment #8!

BlueMountain-random-ImFeelinCrafty

via Random.org

Yea! Linda! You’re the Winner!

BlueMountain-8-ImFeelinCrafty

And thanks again to Blue Mountain for the awesome giveaway! Thank you!

And the My Own Fringemaker Winner is…..

Just in time for Halloween and costume sewing, one lucky reader is about to get their VERY Own Fringemaker!

button


I do have another tutorial to share, but I cracked my laptop screen, so I’m a bit behind! And keep your fingers crossed, I’m going to repair it myself! So stay tuned for more tutorials and my apology for not being able to share more today!

Now to what you’re waiting for… The Winner is….

drumrollplease1 copy

And here’s my traditional drum rolllllllll……

Comment #41!

Capture141020

via Random.org

Yea! Nesta!! You’re the Winner!

Capture141020-2

We can’t wait to see the dance skirts!! And thanks again to My Own Fringemaker for the awesome giveaway!

And if you didn’t win, don’t fret! Remember, Debi has a HUGE sale going on just for you!

50% OFF!!!

HUGE!!! Just click here! 

Lion Mask Tutorial with My Own Fringemaker

There are all sorts of projects to do with the My Own Fringemaker, but in the spirit of Halloween I’m thinking of costumes! Like maybe a Lion costume…..

LionMask-Mask1-ImFeelinCrafty


I was going to make a lion stuffie. Maybe I still will, because our neighbors are having a baby any day now! Anyway, I’ll keep you posted on that! I’ve been wanting to do something lion since I found out about the My Own Fringemaker! Register to win a Fringemaker here!

LionMask-Masks-ImFeelinCrafty

And if you’ve been around here for long, you know I like masks! Especially masks! We’ve done the Mr. Fox and the Arctic Fox and now it’s the Lion. Ready to make your own?

LionMask-Step1-ImFeelinCrafty

You’ll need a fringemaker (register to win here, or buy it here), yarn, felt, 14,5″ elastic, the pattern, pipe cleaners, and cutting materials. For the felt I used four colors, cream, orange, yellow and a brownish yellow.

LionMask-Step2-ImFeelinCrafty

Cut out all your pieces.

LionMask-Step3-ImFeelinCrafty


Sew the elastic to the back piece of the mask.

LionMask-Step4-ImFeelinCrafty

LionMask-Step4b-ImFeelinCrafty

LionMask-Step4c-ImFeelinCrafty

LionMask-Step4d-ImFeelinCrafty

Make the mane! Start by tying off the yarn on the Fringmaker in a knot. Wind the yarn around and around and around! With this one I used 2 kinds of yarn, you don’t have to. Then sew down the middle. I just sewed down once since I knew the yarn would be sewn in the mask. And lastly, Remove the mane from the Fringemaker!

LionMask-Step5-ImFeelinCrafty

Position the main on the back mask and pin it in place.

LionMask-Step6-ImFeelinCrafty

Place the front of the mask in place and the chin/cheeks piece and the middle piece on top and sew around the edges. This part isn’t super easy, so go slow so that everything stays aligned.

LionMask-Step7-ImFeelinCrafty

LionMask-Step7a-ImFeelinCrafty

Embellish! Add the inside of the ear and the nose. These pieces could be glued on, but I sewed mine on. And sew down the chin and the middle pieces. Then add the wiskers. Cut a little slit in the cheeks, insert the whiskers and then sew down on top of the whiskers.

LionMask-Step8-ImFeelinCrafty

Cut out the eyes and sew around the edges.

LionMask-Mask3-ImFeelinCrafty

And your done! Find a sweet kid for the mask!

LionMask-Mask2-ImFeelinCrafty

You’ve got a lion! What mask would you make with the My Own Fringemaker?

Don’t forget to register to win here!

I have been compensated with either payment or product for this post. All opinions are my own, honest opinions!


Introducing My Own Fringemaker and a Giveaway!

Have you seen the My Own Fringemaker?

Fringemaker-HappyMail-ImFeelinCrafty

Earlier this year, I had the opportunity to learn all about My Own Fringemaker! Debi contacted me and asked if I’d be interested in reviewing her Made In America crafting product! At first I was like, well… fringe? I don’t really do fringe… Then I woke up! A new crafty product? Um, oh, yeah!!

Fringemaker-2-ImFeelinCrafty

So she sent me one and I’ve had a lot of fun with it! And I’m not even a ‘fringey’ person! This is the product! As she calls it, it’s an Embellishing System! Totally!  It consists of the base with flip up panels (which makes for nice storage since they flip down.), the 2 bars and the two ends, one of which has a handle.

Fringemaker-Step2-ImFeelinCrafty

It’s super simple to use! You just tie on some yarn… The bars are adjustable to make different lengths of fringe!

Fringemaker-Step3-ImFeelinCrafty

Then spin… And spin and spin….

Fringemaker-Fringe-ImFeelinCrafty

Then you remove the bars and the end pieces and sew down the center. You can sew tight to a bar or down the center depending on the finished fringe you are looking for!

Tails-2-ImFeelinCrafty

Remember how I said I wasn’t a real fringe person? I don’t see myself putting traditional fringe on too many things. But how about a kids costume? Let’s say maybe a cat tail? My first project was a bundle of cat tails for a friends birthday party!!

Tails-1-ImFeelinCrafty

I’ll tell you soon how I made the tails! The possibilities of the My Own Fringemaker are endless! Really! If you’re more into traditional fringe projects or going crazy and making all sorts of things!

Stay tuned this week for more projects I’ve made!

So are you ready to get one for your next crafty products? I have some special news!!! Debi is giving away one My Own Fringemaker to one lucky reader! And if you can’t wait, She’s offering my readers a HUGE discount! 50% Off!!! She told me that and I said WHAT???? That’s awesome!

Ready to WIN? You have Four ways to enter! And come back and leave a separate comment on this post for each entry!

1. Visit My Own Fringemaker and let us know your favorite project! What do you want to make first? Leave one comment. (one entry)

2. ‘Like’ Debi’s My Own Fringemaker Facebook Page. Leave one comment. (one entry)

3. My blog followers get an extra entry. Click on the links to the right to follow. Leave one comment. (one entry)

4. Share the giveaway on your own social media, like FB, Instagram, your blog, twitter…. Leave one comment. (one entry)

That’s 4 possible entries! You must comment on this post to win. Open to US readers only. Product ships UPS, so no PO Boxes please. The giveaway will close on October 19th at 11 p.m. PST, and we’ll choose one winner using Random.org.

And another extra! The winner will receive 2 skeins of yarn after you post your first project on the My Own Fringemaker Facebook page!

Leave comments below to win your own!!!

Fringemaker-Cover-ImFeelinCrafty

And the Verilux Winner is…..

Thanks to everyone for your interest in the Lighting Makeover from Verilux!!! I had an awesome time working with Verilux and love the lighting!

Verilux-Bulbs-ImFeelinCrafty

Now to what you’re waiting for… The Winner is….

drumrollplease1 copy

And here’s my traditional drum rolllllllll……

Comment #7!

Capture2

via Random.org

Yea! Juliet! You’re the Winner!

Capture

And thanks again to Verilux for the awesome giveaway! Thank you!

And if you didn’t win, don’t forget to use the promo code for your 25% off Brookfield desk lamp!! Use Promo code: BROOK25, for your 25% off Brookfield desk lamp. (Promo Code valid until 8/15). Awesome!!

Healthy Lighting Workspace Makeover Giveaway from Verilux

I have been working on lighting in my craft room/sewing room with Heather, my new friend at Verilux for the last few months! And have we got a great giveaway for you today!!

Verilux - The Healthy Lighting Company

We redid our basement about 6 years ago and I think we might have put in the wrong size can lights, because they warm the upstairs floor. The basement, or what we call the 1st Floor, is where we spend a lot of our time because it’s our room, my son’s play room and it’s our craft room! And the lights that seem to be a problem are the ones in the craft/sewing room. So my husband and I were talking about how to fix it. And I’m not kidding, literally, a couple of days later I get this email from Heather asking if I could try out some of her lights!!! Would I like to revive the lighting in my craft and sewing room??? It was like she heard us talking…. So of course I said yes!

Verilux-Bulbs-ImFeelinCrafty

Next step… Happy Mail! Yea!!

Verilux-SewingRoomBefore-ImFeelinCrafty

So this is my room before the lighting revision. And yes, I have a bunch of stuff. Trying ot work on that… Remember my finish along.. We’re just talking lighting here! heheh!

Verilux-SewingRoomAfter-ImFeelinCrafty

And then after…. Can you see the difference? I didn’t edit my pictures at all, so I’m hoping you can see it. I can totally feel it! And see it! the colors are more real. And I don’t know exactly what it is, but it feels better to me.

Verilux-SewingRoomLED-ImFeelinCrafty

Originally we tried the LED lights in the work room… Not so much. I have to say though, at first I was in love. the color for everything was right on. I didn’t feel like I got that yellowy color. But after a day or two, we all realized they just weren’t bright enough. My son even asked me to turn up the lights! So then Heather and I started chatting and realized yes, the LED are fantastic, but not what we needed in the craft room.

natural spectrum vs. conventional light

Have you ever used special lighting to enhance your creative endeavors?  When working on a project, it can be a frustrating to find that colors appear differently indoors and outdoors, as well as even under different lamps.  Verilux lighting products emit a broader spectrum of wavelengths, so colors appear truer.   So much so, museums have used their lighting to better illuminate works of art. Verilux fixtures and bulbs emit spectrally enhanced natural spectrum light, which research shows helps  us see better, reduces eye strain and fatigue, as well as improves our ability to process information, which is great for crafting, sewing and for the family work space! The graphic shows the Verilux difference compared to conventional lighting in the eye.

Moreover, just as we feel can feel better on a day full of sunshine, consumers often use Verilux lighting products to increase energy levels and elevate mood.  If you’ve ever heard of light therapy for seasonal affective disorder or the “winter blues,” you know that light can make a huge difference for people.

Verilux-FabricBefore-ImFeelinCrafty

Verilux-FabricAfter-ImFeelinCrafty

You can see the different between the fabric colors. The before on top, the fabrics have that yellowy look where in the after picture below, the colors are more real.

And remember about how I was saying the LED lights didn’t work in the craft room? Well check them out in my bathroom!

Verilux-BathroomBefore-ImFeelinCrafty

Here’s the lighting before!

Verilux-BathroomAfter-ImFeelinCrafty

And after! My bathroom is a very light blueish grey color. Not a taupey yellow…. The after is right on! It’s not as bright as before, but it makes the room the right color! I love it! I remember growing up, my mom had a make-up mirror with the right color bulbs for putting on her ‘face’ as she calls it. Now my whole bathroom is that way!

Verilux-Pagelight-ImFeelinCrafty

One more goodie to tell you about before I share the giveway! As a little bonus, I got this fantastic PageLight! I love it! In my house, I usually stay up later than everyone else crafting and blogging and such. But then when I go to bed, yes I do sleep, I like to read a little. I’m tried so many flashlights, etc. I had been using my iphone flashlight, but it was so bright and lit up the whole room almost. This is perfect. The light levels are adjustable and it only lights the book! Did I mention I love it????

And now what your really waiting to hear about is the giveaway and discount code, right???? Verilux has graciously agreed for one reader to make their very own Healthy Lighting Workspace Makeover! One lucky reader will get to enjoy the benefits of healthy lighting in your workspace with a Brookfield Desk Lamp or your choice of up to 6 bulbs to convert current lighting fixtures or lamps!!!

And every reader can start thier own  make0vers with 25% off Brookfield desk lamp!! Use Promo code: BROOK25, for your 25% off Brookfield desk lamp. (Promo Code valid until 8/15).

Ready to WIN? You have Three ways to enter! And come back and leave a separate comment on this post for each entry!

1. Visit Verilux and let us know your favorite product! Leave one comment. (one entry)

2. My blog followers get an extra entry. Click on the links to the right to follow. Leave one comment. (one entry)

3. Share the giveaway on your own social media, like FB, Instagram, your blog, twitter…. Leave one comment. (one entry)

That’s 3 possible entries! You must comment on this post to win. Open to both US and Canadian readers only. The giveaway will close on August 3rd at 11 p.m. PST, and we’ll choose one winner using Random.org.

Thank you Verilux!! I love everything and I know my readers will too!!! Yea!!!


I have been compensated with either payment or product for this post. All opinions are my own, honest opinions!

‘Gator Quilt Blog Hop- Me Again and a Giveaway!

Yes, it’s the last day of the blog hop… So sad! I’ve loved seeing what everyone has made with the ‘Gator quilt. It was such fun and is inspiring me to make another one!

GatorQuilt-Main-ImFeelinCrafty

Well, I did make another one, but this is actually my very first one! 

GatorQuilt-Gator2-ImFeelinCrafty

This was actually my original one. My first test. I just happened to make it while our Modern Quilt Guild was preparing for our Binary quilt show, meaning quilts with only 2 colors.  I made the large ‘gator block. Then I realized, hey! It’s only two colors, I could make this into a quilt for the Binary show. I was only using shades yellow and green. Perfect!

GatorQuilt-BackgroundDtl-ImFeelinCrafty

Then I realized I was out of yellow! So my quilt guild pal that took over my spot at the fabric shop was kind enough to bring me what I thought was the right yellow. But…… It wasn’t. At first, I was wondering how I was going to make it work. Then I started piecing some other blue greens and yellows in and it’s perfect! I love it!

GatorQuilt-Back-ImFeelinCrafty

I wish I had used some of the animal fabric from my other ‘gator quilt on the back of this one, but I was nervous about running out, so I didn’t! I love a fun pieced back!

GatorQuilt-Gator-ImFeelinCrafty

I did make a few changes to the pattern after this. Mostly in the piecing, but also in the teeth! My very first tester suggested more teeth, so I made more! They are hard to see here, but there are only 3 white teeth. I do like them better with more, but you can alter the pattern for as many teeth as you’d like!

You can purchase the pattern in my Etsy shop here.

GatorQuilt-Last-ImFeelinCrafty

And for the giveaway! I’ll give away 2 patterns to 2 readers!  I know, usually you do that at the beginning of the blog hop… I had intended to do it with the testers pictures post I did on Friday. But if you follow me on Instagram, you know our pup was viciously attacked by a pit bull on our morning walk last week. And since then I’ve been a mess! So it took me a week to get the giveaway together! Ready?

Ready to WIN? You have Three ways to enter! And come back and leave a separate comment on this post for each entry!

1. Tell me what you’d make with the pattern! The whole quilt, a pillow, a bag? Leave one comment. (one entry)

2. My blog followers get an extra entry. Click on the links to the right to follow. Leave one comment. (one entry)

3. Follow I’m Feelin’ Crafty on Instagram. Leave one comment. (one entry)

That’s 3 possible entries! You must comment on this post to win. Open to both US and International readers. The giveaway will close on June 25th at 5 p.m. PST, and we’ll choose one winner using Random.org.

AlligatorQuilt Cover-sm

BlogHopButton

June 10th- I’m Feelin’ Crafty

June 11th- A Quilter’s Table

June 13th- Marci Girl Designs

June 14th- I’m Feelin’ Crafty– showing off other Testers work!

June 15th- Made By Amanda Rose

June 16th- Wombat Quilts

June 17th- Wips and Tuts

June 18th- Shaffer Sisters

June 19th- Crafty Shenanigans

June 20th- I’m Feelin’ Crafty