I can’t believe another season of Sew Ready to Play is coming ot an end! Today’s guest is Anneliese from the Aesthetic Nest where she blogs about the beautiful clothes she makes for her girls. She also knits and throws really beautiful parties! When I first found her I remember thinking about what beautiful style she has! The clothes she makes her girls look like they came from a high end boutique. Just fantastic! She also recently launched her own pattern line, Wee Muses Sewing Patterns, starting with the The Bateau Neck Top.
Welcome Annaliese!

Thank you, Louise, for inviting me to participate in this series. I always love a good challenge! My girls are young enough, and I guess I am impatient enough, that we don’t spend a lot of time with board games. Unless you count pulling out the pieces and using them for more imaginative play. We opt instead for coloring, crafts, legos and other things that involve creating or moving around.

But we love word games, songs and rhymes. Especially if they involve bouncing or tickling. “This Little Piggy Went to Market” is one of my favorite. Perhaps because I have played it on my babies’ toes when they were so young they were still learning to smile. And because crying “wee, wee, wee all the way home…” with a tickle still elicits loud laughs.

So I opted to sew something inspired by this English rhyme. I started with this gorgeous “Nursery Versery” linen fabric by Heather Ross for Kokka and a pattern I think of as classic and childlike.
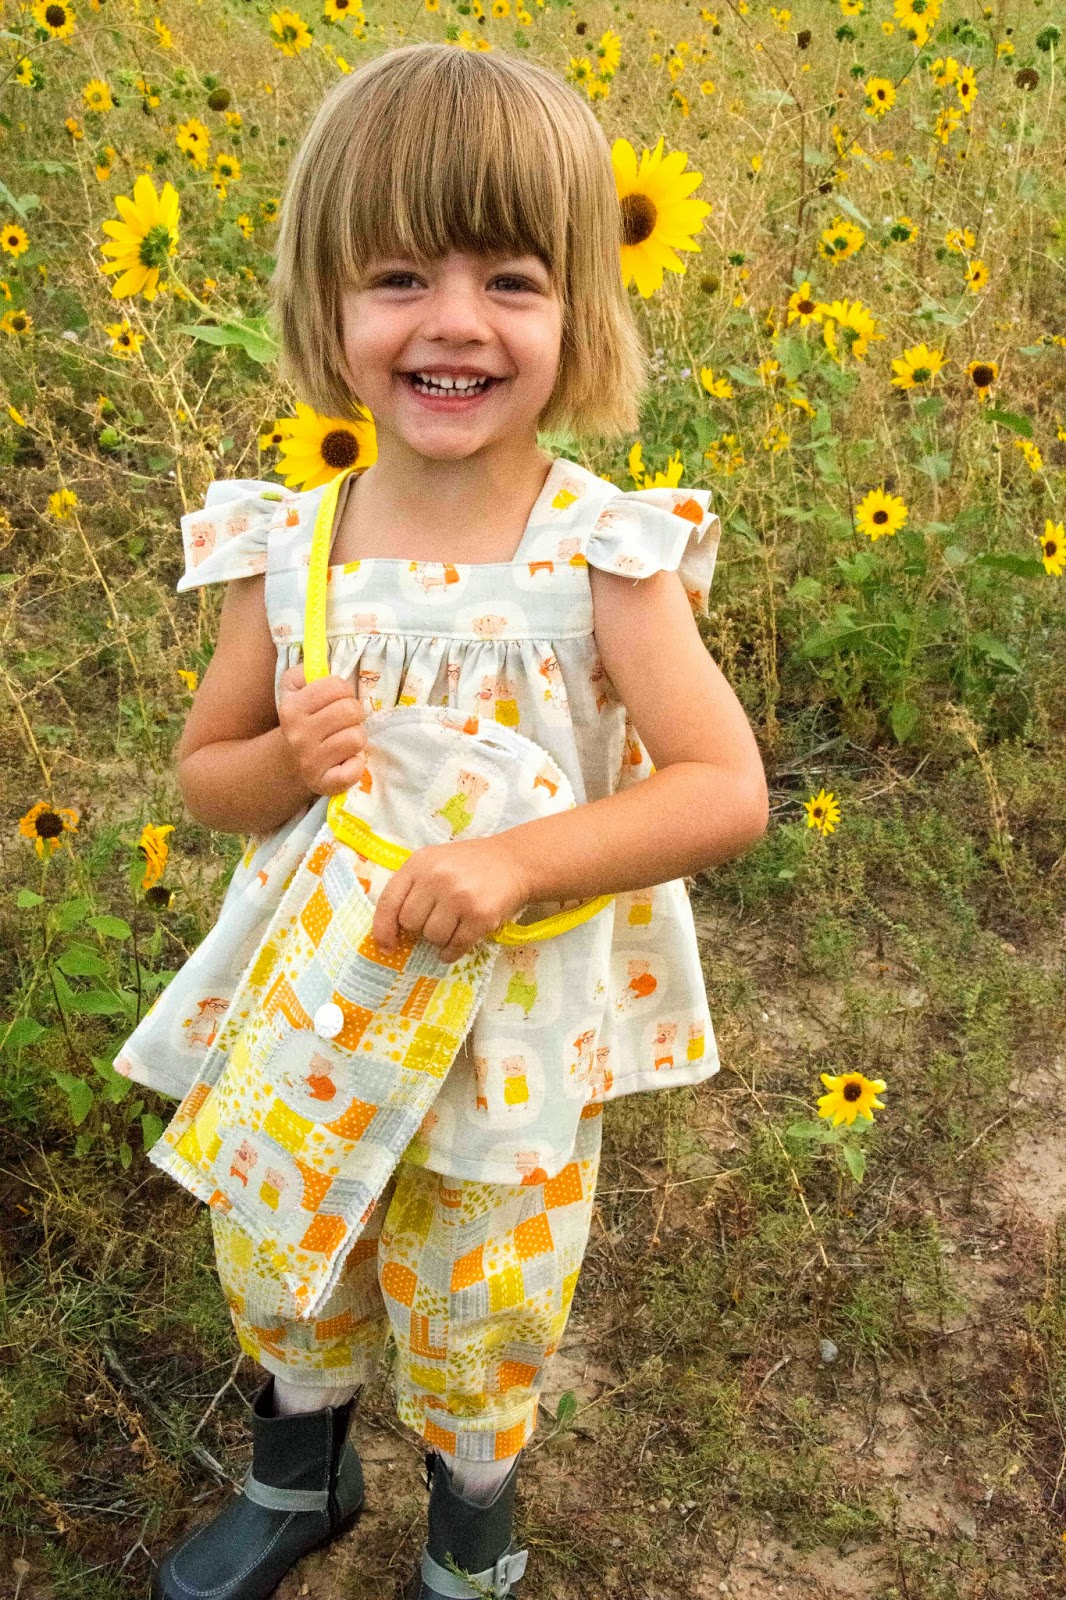
But I wanted to come up with something more, and something to share, so I sewed a quilted Little Piggy Pouch complete with piggy appliques. Heather Ross’s illustrations of these five little piggies are so cute!

This is kind of a scrappy bag with a little bit of batting and some zigzag finished, exposed seam allowances. I put four little piggies on the front–the one who goes to market, the one who stays home, the one who has roast beef, and the one who has none–and the last little piggy, who cried “wee wee wee all the way home” on the back.


I thought Tess could recite the rhyme and point to the piggies on her bag and then play like the little pig and run him home…

…to the inside of the bag.

My Tess loves carrying bags of all types. This Little Piggy Pouch is a fun shape into which she can stick her arm hunting for treasures…


…like lollipops from her mother….


But it also would work to carry her small earnings to market, or for collecting things she finds on her way.

Scale it down a bit and it would be a great pencil pouch too! Here’s the how-to.
THIS LITTLE PIGGY POUCH TUTORIAL

You’ll need:
- 1/3 yard of two fabrics, one for the outside of the pouch and one for the inside (or fat quarters would work if the print is oriented the way you’d like it)
- 1/3 yard of cotton quilt batting
- 2 yards of 1/2″ single fold bias tape (purchased or made–this is used for the strap)
- coordinating thread

The pouch is constructed with a back piece that folds over the front to form the flap. Cut out:
- a back piece measuring 5.5″ wide and 12″ tall (cut 1 from your outer fabric, 1 from your inside fabric, and one from your batting)
- a front piece measuring 5.5″ wide and 9.25″ tall (cut 1 from your outer fabric, 1 from your inside fabric, and one from your batting)
If you want to make this pencil-pouch sized, cut the back piece 4.5″ wide x 10.75″ tall and the front piece 4.5″wide x 8″ tall)

Round off the corners from the top edge of the back pieces. Fold them in half lengthwise and trim off the corners at once to make them symmetrical.

Create a stack of back pieces and a stack of front pieces in this order:
- on top (facing you), the right side of the outer fabric
- cotton batting
- on the bottom, wrong side of the inner fabric
So you are sandwiching the cotton batting between the outer and inner fabrics with the wrong sides of these fabrics against the batting.
Stitch these stacks together by sewing around all sides using a .5″ seam allowance.

If you are using appliques now is the time to stitch them on.

I pinned on the appliques and used a zigzag stitch around the edges.

The batting gives these a nice bit of dimension.

Now zigzag stitch around the edges of your back and front pieces. I used the widest zigzag possible but not too tight as I wanted some of the raw edges to show.
Pin the front to the back “inside” fabric together, aligning the sides and bottom edge.

Stitch the bottom and sides together with a .5″ seam allowance.

To add the strap, take your 2 yards of bias tape and fold it in half to double it, with the folded edges against each other. It will now be 1 yard long. Zigzag stitch the entire length to finish it.
Now overlap the ends under the pouch flap. Place this right above the top of the front of the pouch. Be sure the loop of the strap isn’t twisted. Use a zigzag stitch to attach the strap to the pouch by sewing over the strap from one side of the pouch to the other.

Sew a buttonhole on the bottom of the front flap and sew on your favorite button.
Now you have a Little Piggy Pouch!


Thank you for hosting this fun series!
It’s adorable! I particularly love the little top, and the fabric used for it is just so playful!
Sheree
It’s all so cute, but yes I agree about the top! The whole thing is just adorable, isn’t it!?
Reblogged this on heArtsonnet blog.
Oh my adorable! The shirt is so sweet and classic and the pants so fun. The little pouch is perfect with the appliqué and button.