Let the Games Begin!!!

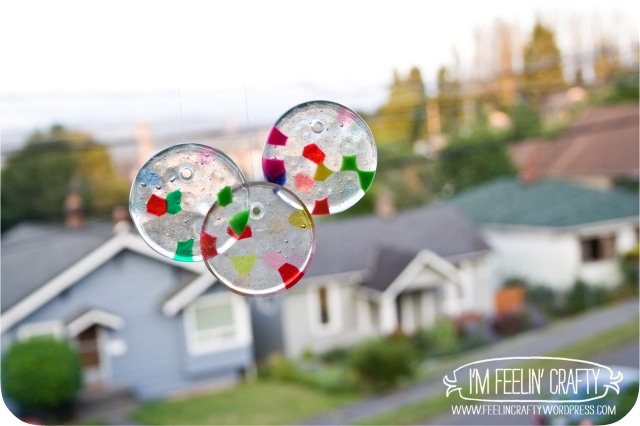
We started our Olympic excitement with a Melted Bead Ring Wind chime and Medals! As I was hanging the pieces to make our little wind chimes the other day, it came to me… Olympic Rings!! My son is really into gymnastics right now, so we’ve been watching the USA Team Trials on OnDemand and are really excited to see the team in action!

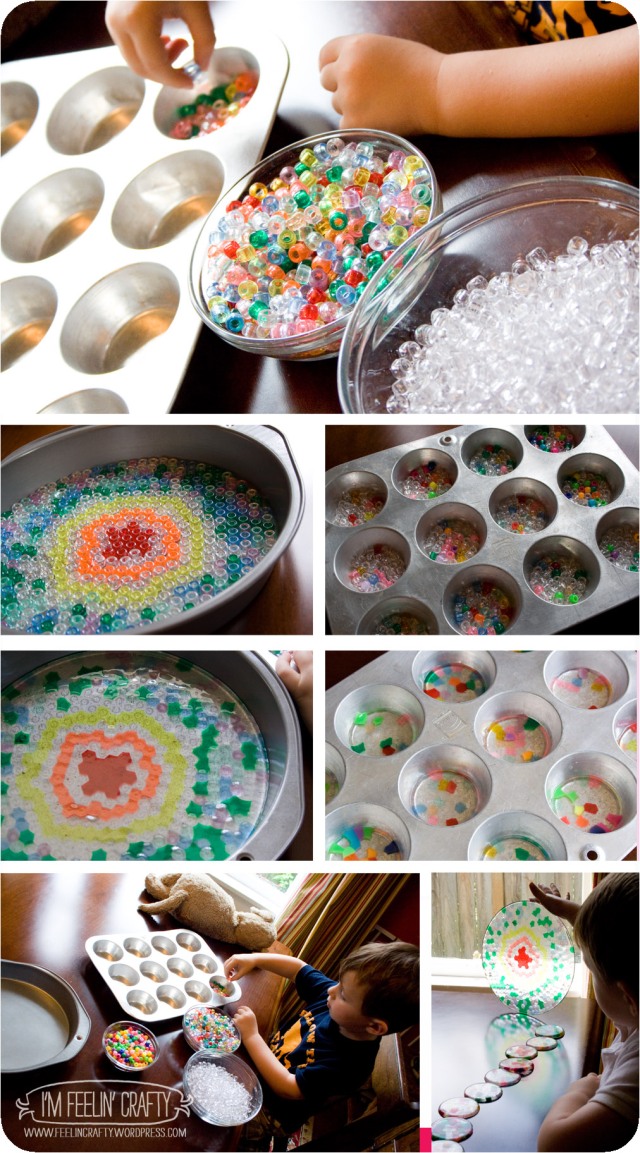
So using the same technique we used to make the sun catchers, we made the Olympic Rings and medals. Put the beads in a muffin tin, cook at 400 degrees for 25 minutes (with the fan on), pop out of the tin and drill holes. Yep, easy as that!

The wind chimes make a great little tinkling sound as they bounce around in the wind. And trust me… I heard a lot of it as I tried to take these pictures on a beautiful, yet windy, day

And then the medals!!! What kid doesn’t want their own medal? And the are fun to make!! Ok, I think I’m having more fun making the melted bead projects than my 3-year-old. He loves playing with them, but making them… He kinda looses interest. Like he ditched me and my bead craft for a water balloon battle with Dad… hmmm….

The Gold, Silver and Bronze! Ok, so the silver is actually clear, but I didn’t have any clear grey or silver beads…

The kiss of Gold! Sweet Victory! What’s your favorite sport??? We’re so excited about gymnastics… Did I mention that already?? Go USA!

Shared with these Link Parties!

Curtains are so Easy Tutorial

If you are a sew-er you already know how easy curtains can be! If you are starting to sew, let me tell ya something… Curtains are so Easy! When friends ask for a sewing favor, I’m always happy to help with curtains. Why? because they are so easy!

Some friends once asked me to make cushion covers… It took me a couple of years. They were big and they intimidated me. They did finally get their cushions, but just think… If only they had asked for curtains! Anyway… Once again I digress!

Do you want to know how I make curtains?? Well, since you’re hear, I’m gonna tell ya!

Step 1: Gather materials. easy. Fabric, thread and a cutting utensil are all ya need!

Step 2: Cut! Which also means measure… You need the width and height of your window. The width is the easy part, double the width! So if your window is 20 inches, you need 40 inches of fabric. If you want 2 panels, you’ll have (2) 20 inch panels. For the height, add 7 inches to the desired finished height. The 7 inches is for a typical skinny curtain rod. If your rod is thicker, then you’ll need to add more length depending on the thickness of the rod.

Step 3: Sew sides. Fold over a 1/2 inch and fold over a 1/2 inch again. I use hair clip to hold the hem in place, but you can pin if you’d like. Mostly I don’t do either, but this is a longer curtain, so it helped. And then stitch.

Step 4: Sew top. Like the sides, you want to start with a 1/2 inch fold over and another 1/2 inch fold over. Stitch that hem. Then fold over 1 1/2 inches and stitch again. A little tip…. When I’m sewing a wide hem, I always put down a piece of painters tape to help me stay straight!

Step 5: Sew the bottom. Fold the hem over 2 inches and turn the corners over 45 degrees. Then fold it over 2 inches again. And stitch. I like to add a little rectangle detail at the corners to help keep down the 45 degree fold.

And Wah-la! Now see… so Easy!!

ok, I have to admit something… These curtains aren’t actually made for this window! You were probably thinking they look a little short, huh??? Well, yes, for this window they are short. But for the window they are actually made for, they fit perfect! I can hear the sigh of relief….

Hopefully this helps you overcome any fear of curtains. They really are soooo easy!


Shared with these Link Parties!

Happy National Hot Dog Day!

Join me in celebrating National Hot Dog Day over at Cook, Clean Craft where I’m sharing a tutorial on making a Hot Dog Bun vest!

Boys own style

Have you ever dressed your kiddo up like a hot dog??


Shared with these Link Parties!

Weekend Whims- Suncatchers!

We are loving making these sun catchers from melted beads! I saw this project the other day on The Artful Parent and got really excited! Have you tried it yet???

The directions tell you to cook the beads in the oven on 400 degrees for about 25 to 30 minutes. Those directions were updated to use a gas grill outside or a toaster over outside because of the smell of the melting beads. So I was excited about the project, but also a bit nervous about the project.

I don’t have a toaster or a gas grill, so we had to resort to the oven. But I do have an oven vent and doors and windows that open… So we decided to try it out inside in the oven. And luckily, and to my surprise, the smell wasn’t bad at all! It did smell a little, but honestly, not nearly as bad as my curry dish I cooked later that day. GROSS!!! I’m sure the melting plastic is worse for you to sniff than the curry, but it didn’t feel that way to me that day!!!!

We decided to make a wind chime with the big one. we had this froggy wind chime that we’ve had for quite some time and had fun with, but it’s been broken for a while, so we decided to repurpose it into our own wind chime! And I used my Dremel to drill holes in the melted bead sun catchers. I tried to do it with a toothpick as soon as I got it out of the oven, but that didn’t work for me.

And for the little ones, we painted a wooden dowel with our ice cube paints and tied them on the stick in groups of three! These are going to make cute little gifts!

I see these again in our near future! Think Olympics…. hmmmmm…..

Shared with these Link Parties!

Disclaimer: I am not a scientist and I didn’t come up with this project. I have never used a gas oven or a grille! I have only made these as I described above and don’t really know what other temperatures or times. Please be safe and do not cook around children! Please see blog disclaimer below!

Pet Rock Carrier Tutorial

You might remember this one… A couple months back I shared this tutorial on Stephanie’s Blog, Hugs Kisses and Snot! I thought I’d share it here on my blog today! But if you haven’t, please check out Stephanie’s blog!

Today is just a day of hunting for pet rocks with me and the kiddo. And what do you need on a pet rock hunting mission? A pet rock carrier, of course!

Would you like to know how I made it? Great! ‘Cause that’s why I’m here! To show you how I made it…

Step 1. Materials

Fabric

Clear Vinyl

Interfacing

Thread

Scissors and/or Rotary Knife

Pinking Shears

Step 2- Cut pieces.

Circles- Cut (2) 4.5″ diameter circles for the bottom and (2) 5″ diameter circles for the lid. These dimensions include the seam allowances.

Trim pieces- Cut (2) 2.5″ by 13.5″ strips for the bottom and top trim pieces. Cut (2) 2.5″ by 14.5″ strips for the lid trim pieces.

Clear Vinyl- Cut (1) 9″ by 13.5″ piece of vinyl. Yes, there is actually something in the picture, but it’s kinda hard to photograph clear vinyl, so you’ll just have to trust me on this one!

Strap- Cut (1) 4″ by 30″ piece for the strap.

Interfacing- How much of this you use depends on the weight of your fabric. I used it for the top trim on the bag and between the bottom and lid circles. I didn’t use it on the lid trim or the bottom trim because of the heavy weight of the fabric I was using.

Step 3- Prepare the top trim piece. First iron on the interfacing. Then iron the strip in half. Next iron the edges over 1/4″.

Step 4- Sew the top trim piece to the vinyl. Insert the vinyl all the way into the folded and ironed trim. Top-stitch.

Step 5- Prepare the strap. Iron the strip in half and then fold over the edges to the inside fold. You’ll end up with a 1″ wide strip.

Step 6- Set up the bottom trim piece and strap. I use hair clips instead of pins. Love this!! I use it for quilting, too. Anyway…. Layout the bottom trim pieces, right sides towards the vinyl, 1″ from the bottom edge of the vinyl. Next, layout the straps. I located mine as shown above.

Step 7- Stitch along the bottom trim.

Step 8- Fold over the bottom trim and top-stitch. I didn’t iron the bottom trim pieces back, but you can if you want. The vinyl can be iron, just be sure to use a low iron setting and use a piece of fabric between the vinyl and the iron. It doesn’t take much heat to distort or melt the vinyl.

Step 9- Sew down the strap. Sew up from the bottom to about 1″ away from the top trim. You don’t want to sew them all the way to the top or else the lid won’t be able to fit on! I added a little rectangle piece at the top, just for a little extra strength and design! The second piece of this is to also continue to sew up one side of the strap to close the strap.

Step 10- Fold over the bag body, right sides together and stitch together!

Step 11- Add interfacing to one layer of the bottom circles and sandwich them together wrong sides together.

Step 12- Pin the bottom to the bag body, right sides together. The bottom piece that will be on the outside of the finished bag, will be inside the bag at this point.

Step 13- Sew the bottom and the body together. Use pinking shears to trim the exposed edges.

Step 14- Turn the bag right sides out. This will probably wrinkle and maybe even put some kinks in the vinyl. NO fretting! Iron it out like I mentioned in Step 8 and you’ll be fine! The bag is done! You can stop here or continue on (kinda like those Choose Your Own Adventure books back in the day… Do they still have those? They do!!) OK, sorry, back to the tutorial at hand!

Step 15- Ahhh… You’ve decided to continue on with this adventure, have you… Great! The lid! As with the bottom, add the interfacing to one layer of the lid. Then sandwich the two layers together.

Step 16- Sew the ends of the trim pieces together and iron open.

Step 17- Pin the two strips to the lid circles. Pin them to each side, right sides together.

Step 18- Sew the pieces together.

Step 19- Fold the trim pieces over and topstitch along the top.

Step 20- Fold over the raw edges about a 1/4″ and pin.

Step 21- Top stitch the edges together. And Wahla! You’re done!

Now it’s off to take our pet rocks to the rock yard to add to the family!

Enjoy your pet rock carrier with whatever you want to carry in it! And thanks again, Stephanie, for having me!!

Shared with these Link Parties!

Seattle Modern Quilt Guild Exhibit

I can’t believe it’s already been a week and half since the family packed up for an evening on an island to see the Seattle Modern Quilt Guild Exhibit! Family, ferries, good food, quilts and a beautiful sunset all make for a great Friday night in my book! THe family headed to Vashon Island to the Island Quilter to see the show.

Do you remember my Row Row Row Your Boat quilt??? I submitted it to be in the exhibit and was SOOOOOO excited when I heard back and it had been accepted into the show!  Yea!!

It was an honor to be featured alongside all the other fantastic quilts! I want to share with you some of the other quilts…

There was a wall of baby quilts, most of them collaborative efforts of the group and quilted by Sandi Holtman. The one on the far end was done by Amber Dawn Arnold.

Two other baby quilts were down by Allison Parrott Thompson and Grace Lainhart. Grace’s star quilt was one of my favorites! I’ve been wanting to do a star quilt and I just loved this one.

This one is called Arkansas, Traveled by Ara Jane Olufson. First I was drawn to it by the colors. Then I saw the ‘ghost block’, as she called it. Love the missing piece!

A cool wonky nine patch by Becca Jubie.

I just love this picture. And the quilt too, of course! ok, and here’s the thing… I got pictures of the names of every single quilt in the show, except this one. So please, if anyone reads this and knows who it is by, please let me know!!

Update!! The quilt is by Noelle Powers! Check out the comments below for more details about it!

I love the colors in this one by Emily Cier, too. It reminds me of the book I was recently reading called Transparency Quilts.

This one by Krista Withers called ‘Down the Rabbit Hole,’ is not my typical style, but I’m so amazed by it!! It’s just amazing! All the pieces. The quilting. Man! And I love that pieces of the octagons pop into the grey border. I spent a lot of time up really close to this one….  Love it!

I was really drawn to this beautifully simple black and white piece by Season Evans.

And these two were done by Sandie Holtman and Kathy Del Beccaro. The thing about these two that interested me, was that they are more traditional patterns, but done with modern fabrics that gives them a more modern feel.

The piece on the left is called Breezy by Sandi Holtman. The other two pieces are both by Katie Pederson, one of the co-authors of the newly released and awesome book, Quilting Modern: Techniques and Projects for Improvisational Quilts.  The blue one has been in my flickr favorites FOREVER

I took a ton more pictures!! Please check them all out on my flickr page! Which one is your favorite???


Shared with these Link Parties!

Weekend Whims- Thrifted Quilts

OK, you could probably say I’m a bit obsessed at this point… I want to go to every thrift shop and garage sale to see if they have any quilts for me!!!

Last weekend I found two great quilts at a yard sale down the street. They had a bunch, but I restrained myself and only bought two! I’ve mentioned before that my favorite quilts are a bit more modern, but my husband likes more traditional patterns. So I snatched up this red white and blue one! It’s in great shape with only a couple of little spots on it. Beautifully hand quilted and nice and bright!

I don’t know what it is about this yellow and white one, but I loved it. It’s not in good shape at all, but I loved the hand embroidery on it. It’s a light yellow fabric with white sqaures and orange embroidery. There are some pretty big holes in the back. the weirdest thing is that it looks like someone cut off the ends and added a random piece of fabric to the top and bottom. I love that each quilt has a story and seeing these alterations just makes me wonder more about its life! Debating about how to fix it, if at all….

The last one I found for 1.30! It’s bright and it’s polyester. I can only imagine it was made from someone’s old clothes. It’s handmade and even though it’s poly on top, the underside is a soft flannel.

Have you thrifted any quilts lately??? I can’t wait to find more!!!


Shared with these Link Parties!

Winnie the Pooh…. Kinda

Every time I take my son to the fabric store with me, he always wants to get a fat quarter, or as he calls them, ‘little pieces of fabric.’ When I tell him we’re going to the fabric store, he always asks if it’s the one with the little pieces of fabric. Usually he gets one! I try to say no, but I feel like I am hindering his creativity, so I usually end up getting him one. So what does all this have to do with Winnie the Pooh, you ask…

The last piece of fabric, a brown polka-dotted piece that he got, he decided to he wanted to make a Winnie the Pooh doll with it. I agreed and tried to find pattern for a Winnie the Pooh doll, but found that they aren’t easy to find. As in, I couldn’t find one…. And I am usually pretty good at finding patterns online…. I decided to use this bear pattern from Cut Out + Keep. I didn’t realize when we started that it’s actually for a jointed bear. I didn’t make him all jointed, but it was the most hand sewing I’ve ever done for a little stuffed animal!

I did convince him to make the body out of yellow fabric, like Winnie the Pooh. And that’s about as close to Winnie the Pooh as we got! No red shirt, we had to use his new piece of fabric for the shirt. The kiddo really wanted to use buttons for his eyes and nose. I tried to convince him that we should use something smaller, but he wasn’t into it. I also tried to get him to wait until the next morning to add the mouth and eyebrows so we could get some embroidery thread. But no. We had to finish his face before bed.

The kiddo actually really helped me make Winnie! He was making all the detail decisions, picking out the right buttons, getting the pins and thread I needed, and stuffing. I love the very last picture, If you’re waiting on a stuffie to be made, you can always use the legs for a phone call… When we got to the hand stitching, I did kinda loose him to a computer game, but I was totally impressed with how long making this stuffie kept the 3 year olds attention!

I colored his shirt red to see if that helped him look any more like Winnie the Pooh… Kinda, but not really…

I think he looks more like a mouse than Winnie the Pooh, but the beauty is, I made him with my 3 year old son and he loves him and keeps telling everyone that he’s Winnie the Pooh! We have store bought versions of Eeyore and Tigger, but now the kiddo wants to make Piglet, Kanga and Roo. If you have any ideas where to find a pattern for these guys, please let me know!


Shared with these Link Parties!

and this one, too…

No Cut Cuff Hem Tutorial

Does that title make any sense to you??? My husband had a pair of pants that he needed hemmed. I was soooo excited to try this tutorial for hemming pants legs and keeping the original hem stitching by Just Something I Made. We have a bunch of pants hemmed in our house and the new hem line always bugs me. No matter what thread I use, I still can’t make it look like the original!

As I was pinning my husbands pants he told me that he wanted them hemmed, but long enough to wear them turned up with the cuff. But he also didn’t want them turned up the 4 or 5 inches that he was wearing them!

Soooo…. I couldn’t use the tutorial I wanted to try out, but then it hit me… I could take her idea and use it with a cuff and this is how I did it!

Materials: Too long Jeans, sliding gauge ruler, pins and clear thread and a navy tread (I used the darker thread in the bobbin)

Step 1: Iron the cuff at the length you want the finished pants to be.

Step 2: Fold the extra fabric down into the cuff.

Step 3: Adjust the folded over fabric so that it is the same height all the way around and pin. Align the fold directly beneath the original hem.

Step 4: Sew! Sew as closely to the top of the fold as you can.

Step 5: Iron again and Wah-la!! A folded over cuff look, but no worries that it’s going to fall out! My husband isn’t growing anymore, but if you do this with kids pants, you can let it out as the kiddo grows.

When my husband tried them on, I think I heard him say, ‘They fit perfect. Just how I wanted them.’  Something like that, anyway… Yea!


Shared with these Link Parties!

Weekend Whims- The Water Blob and Ice Cube Paints

Did y’all have an awesome 4th of July?? We did for sure! And part of that fun was thanks to Pinterest. We filled up the kiddie wading pool like we usually do during the summer, but we also tried out a couple of pinterest fun ideas I’d found.

The first one that was a ton of fun was the Water Blob! Ends up I’d pinned this twice… So obviously I’d been wanting to try it out! The first pin was from Go Kid Yourself and the second from Clumsy Crafter. Both tutorials were the same, duct tape a really large sheet of plastic sheeting together with a the hose sticking inside and turn on the water! Super easy! And great fun! I used 4 mil plastic sheeting, not the super thin stuff you find on the painting aisle of Lowes. This stuff was on another aisle, but kinda by itself…

And yes, it leaked. Especially the corners. Just keep the duct tape handy. Once you see a squirter, just add more duct tape. At first I was trying to fix every leak I saw. But I ended up only hitting the big ones. And the leaks just added more fun! When they jumped on it, there was more splash!

We added food coloring and gummy worms and fish. the first day I filled it up so that it was about 3 inches thick. the next day some of the water had evaporated out and some had leaked, so it needed to be refilled. I kinda forgot I had the water running and it ended up being closer to 6 inches thick and, man, it was soooo much MORE fun!!! So go for thick!

Then we made Ice Cube Paints! Ok, here’s the scary thing…. I don’t think I made this up… I thought I’d seen it on pinterest, but I can’t find it again… I should be too young for senior moments like this… Right??? (This is where you nod nad say Yes, Louise, You’re too young to be having ‘senior moments’) So, I’m not linking to the inspiration ’cause I can’t find it, not because I’m trying to call this my own idea. But at this point, I don’t even remember, maybe it just came to me…. Who knows at this point!

Anyway, the important thing is that we made them and had fun with them!

We just added food coloring to an ice-cube tray and very carefully added the water. I then covered the tray with aluminum foil and added the sticks (cake pop sticks in our case). Freeze, remove and paint! Then freeze again!

Perfect summer fun for the 4th of July!