A Halloween Banner Garland

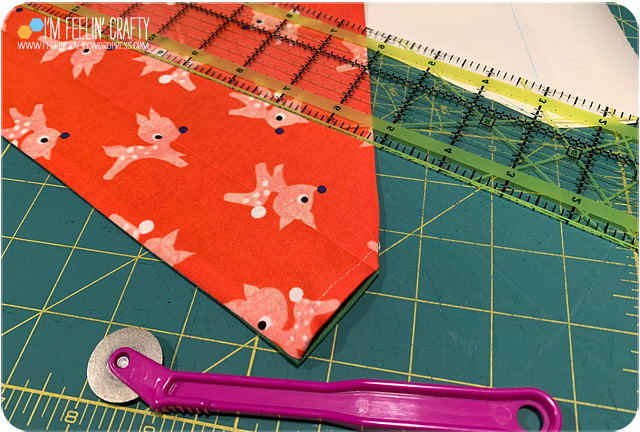
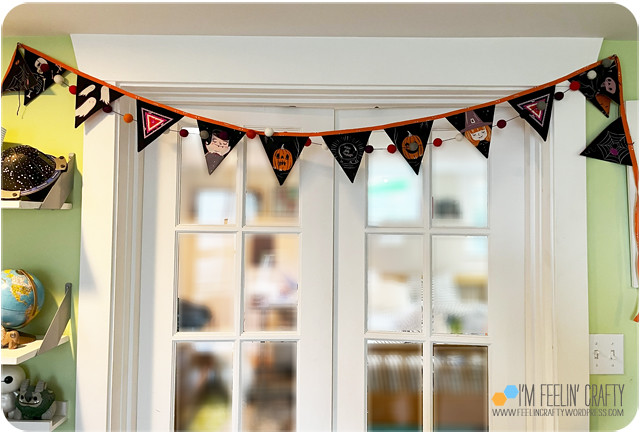
I started this banner last year. I cut out the pieces and then stashed them with my Halloween fabric scraps stash. I almost forgot about it until I was looking for an easy project to do without actually having to move around too much (recovering from ankle surgery!).

HalloweenBanner-TriangleCabins-ImFeelinCrafty
HalloweenBanner-TriangleCabin-ImFeelinCrafty
I realized that I wanted to make this banner garland when I was participating in the Mini Series Sew Along last year. I made one Mini Series Triangle Cabin block and knew it would fit perfectly in this banner. Then I decided I needed two!

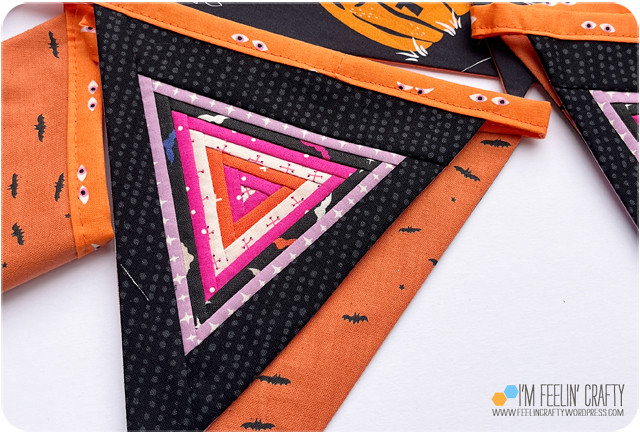
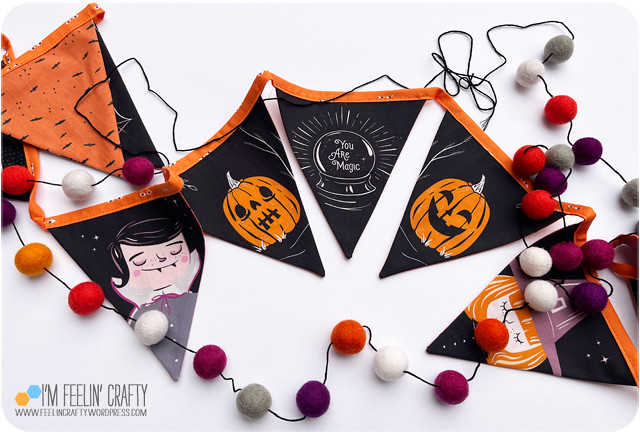
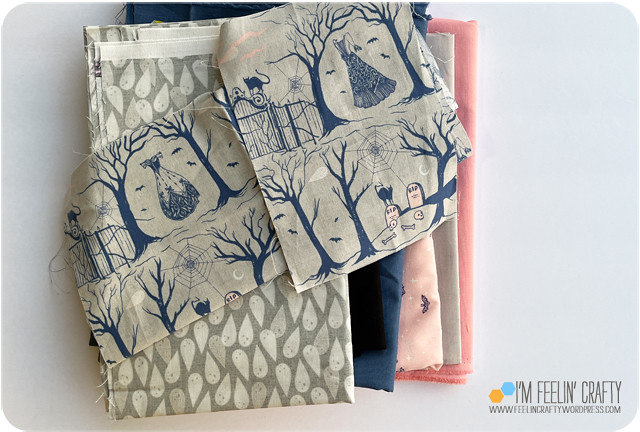
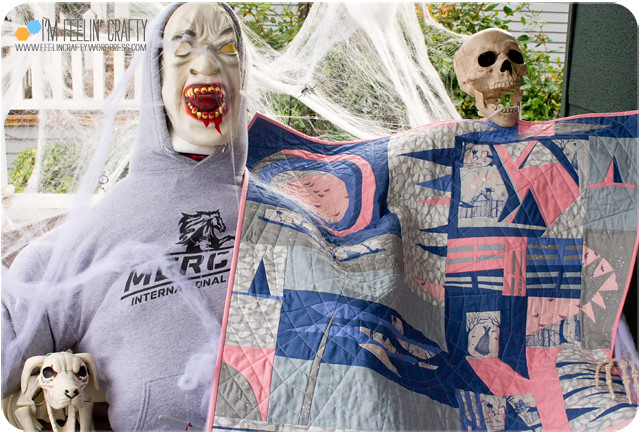
The banner garland fabrics came from this banner from the Spooky and Sweeter Line from Art Gallery Fabrics. I love this line of fabric. I have a really horrible addiction to Halloween fabric, even though I mostly sew with solids! ha! I also have a penchant for panels in the Halloween fabric lines. I got this panel not knowing what I would do with any of it. I’m really glad I did. I love the Banner garland! The link above the look book has some other fun ideas of what to do with the other pieces. This was a fabric from a couple of years ago, but I think you can still find it around! There’s a fun table runner that they made with the three pumpkins that I’m tempted to make!

HalloweenBanner-BannerWhole-ImFeelinCrafty
HalloweenBanner-Banner02-ImFeelinCrafty
HalloweenBanner-Banner01-ImFeelinCrafty

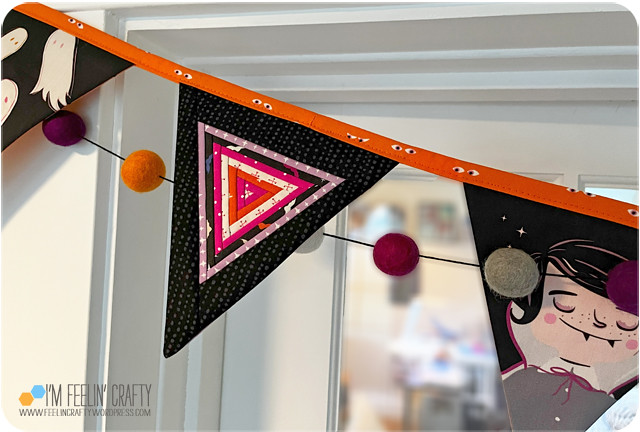
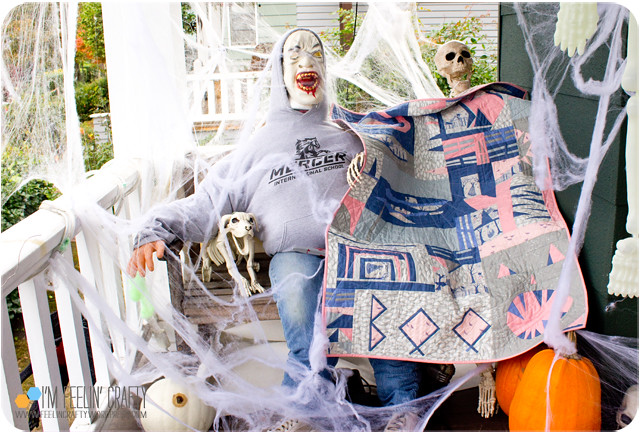
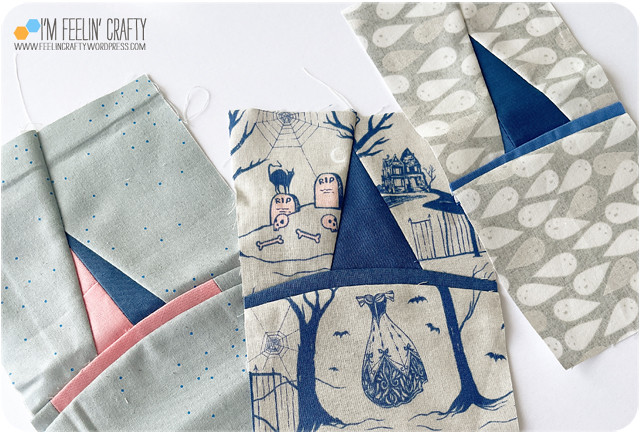
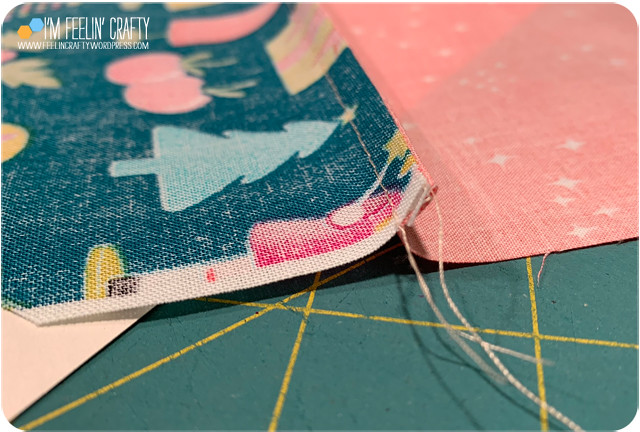
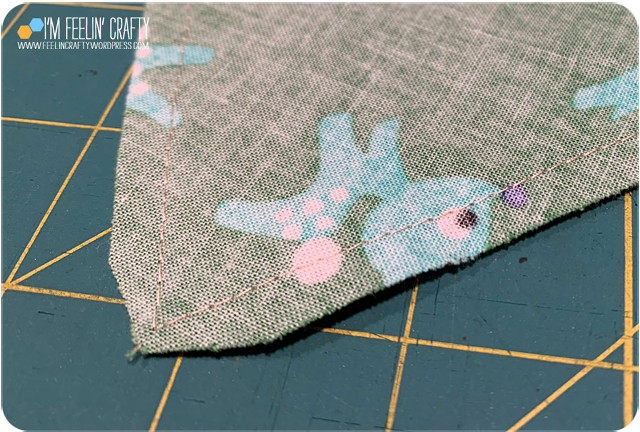
Isn’t it cute! It’s super easy to make! Sew the front and back triangles together on the long sides only. Chain piecing will get it done in no time. Turn right side out and iron flat! Perfect! I made the double fold binding using 1 3/4″ fabric strips out of some Tiny Frights fabric. The colors of the eyes work perfectly with the Spooky and Sweeter Fabric!

HalloweenBanner-BallGarland-ImFeelinCrafty
I also made the felt ball garland! Last year this little collection of balls was on sale at Fabric Bubb. I actually got it to make a garland for Thanksgiving, because I actually made another one for Halloween last year. As I pulled this bag of felt balls out with of my Halloween fabric scrap box, I realized it they are the same color as the banner garland! Perfect!
HalloweenBanner-Last-ImFeelinCrafty
It was a fun little project to do and it just worked out perfectly to have not made it last year. Recovering this ankle surgery and being non weightbearing on one leg, makes it hard to move around to sew and iron, etc. It also means I can’t get down my traditional Halloween decorations and decorate this year. So now I have this to put up.

The STAR Block!

I had a fun response to my Star block that I posted on IG last week, so I decided that as a Christmas in July (last minutes of July) gift, I’d share it with you for free for the rest of the summer!

StarPattern-SolidsMain-ImFeelinCrafty

I’ve made the pattern quite a few times so far and it’s a quick and easy pattern for a foundation paper piecing pattern.

StarPattern-SolidsDetail-ImFeelinCrafty

You can see the sewing lines in the solid versions easier than in the improv pieced version! There are 3 main sections. The top and middle sections only have 3 pieces and the bottom section has 5 pieces.

StarQuilt-CloseUp-ImFeelinCrafty

Last winter I made this as a gift for a Holiday party. We play the White Elephant game and each year we have a theme. Last years theme was to look up. Stars were the first thing that came to mind, so I whipped this up! For this version, I improv pieced larger sections of stripes, then use those pieced sections as the background and star sections in the pattern. The pattern does not have the stripes included!

StarQuilt-back-ImFeelinCrafty
StarQuilt-Label-ImFeelinCrafty

For the back I mostly used left over scraps from the improv stripes on the front!

StarQuilt-Leather-ImFeelinCrafty
I finished this one off as a wall hanging, just like I did the heart Valentines I made last year! A little piece of leather, some metal cap rivets and a wooden dowel make for a fun wall hanging!

You can download the pattern here for free!

StarPattern-Solids2-ImFeelinCrafty
StarQuilt-CloseUp2-ImFeelinCrafty
There are so many options of how to make this block! And enjoy the Christmas in the last few minutes of July gift! And be sure to tag me if you make it and share on social media! Can’t wait to see what you create!

Quiltober- A Halloween Sew Along

It’s time for Christmas sewing and I’m all in, but I’m back tracking a little to Halloween. This year I started two projects with the intent that they would both be blocks for Halloween placemats. Neither project turned into placemats. The blocks from both the sew alongs became mini quilts.

Quiltober-Fabric-ImFeelinCrafty

This project all started with a scrap of Halloween fabric! I traded my quilty neighbor friend some Halloween fabric. I almost didn’t take these scraps, but I’m really glad that I did. I just happened to all the coordinating fabric, so I knew it was meant to be!

Quiltober-Cover01-ImFeelinCrafty

Nicholas Ball from Quilts From The Attic was hosting a Quiltober Sew Along and I thought it would be fun to play along! Every couple of days he’d post a new prompt. Some were much harder to come up with than others. the prompts were:

Crooked

Buried

Moon

Spell

Bones

Carve

Spiky

Mummified

Teeth

Tome

Witch

Shadow

Rune

Can you find all the blocks in my Quilt???

Quiltober-Front-ImFeelinCrafty
Quiltober-CrookedSpiky-ImFeelinCrafty

Crooked and Spiky. Crooked was the first block. This one I just made a block with crooked lines in the block. Spiky is just improv spiky triangles!

Quiltober-Buried-ImFeelinCrafty

Buried…. The ghost is buried beneath the log cabin block and tombstone.

Quiltober-Moon-ImFeelinCrafty
Quiltober-MoonProcess-ImFeelinCrafty
Quiltober-MoonRing-ImFeelinCrafty

Moon. I had this block in mind, but my idea was to do inset circles like I’ve done over and over. Instead I tried to follow the Rings improv method from Nicholas’s book, Inspiring Improv. I did not follow directions very well and made it way more work than it should have been. But I liked the end product, so I finished it and moved on!

Quiltober-SpellTome-ImFeelinCrafty
Quiltober-TomeProcess-ImFeelinCrafty

Spell and Tome. For spell I made a magic wand with the spell flying off the wand! Channeling my inner Harry Potter!

Tome. First, I admit, I had to look up the word! A tome is a book, especially a large, heavy, scholarly one! I started this one with a flat open book. I didn’t like that so I folded it at an angle and made it not quite so flat. Much better! I also wanted it to look like spells were coming out of it, but I tried a couple of different ways to make it work and I didn’t like any of them. It ended up just the book!

Quiltober-BonesShadow-ImFeelinCrafty

Bones and Shadow. The bones blocks came from a sketch I had done eariler this year based on my legs bones that I broke last year. I really want to make a full quilt of this!

Shadow. I had all sorts of ideas for this one, but I ended up with this image. When you see someone standing in a doorway, lit from behind, you usually see a shadow on the floor. But do you see a ghost’s shadow? So this is kinda a Non Shadow kinda Shadow block.

Quiltober-CarveRunes-ImFeelinCrafty
Quiltober-Carve-ImFeelinCrafty

Teeth, Carve and Runes. First came the teeth block. I could not figure out the carve block for a while. I didn’t want to go the knife route, but I couldn’t figure out what else to do. Then it hit me, what do I carve on Halloween??? A pumpkin! So the teeth became part of the Carved pumpkin. I was going to get more literal and make it the shape of a pumpkin, but decided not to go the literal route!

I was totally just going to skip the Runes prompt. Until my friend Debbie shared the link to the Viking Runes translator from the PBS website. I spelled out BOO. Pretty legible translation!

Quiltober-Mummy-ImFeelinCrafty

Mummy. Not exactly what I had planned, but it’s all made from scraps from the Spiky block!

Quiltober-Witch-ImFeelinCrafty
Quiltober-Witch3-ImFeelinCrafty

Witch. For the witch prompt I made witch hats. I made a few small witch hat blocks. I also ended up making some more bones blocks and sewing scraps to fill in the blanks to make the quilt top.

Quiltober-Back-ImFeelinCrafty
Quiltober-BackDtl-ImFeelinCrafty

The back is a bit simpler than I’m usually do. I used most of my scraps on the front, so they didn’t make it to the back! I did have fun improv quilting this quilt with a spider web design. You can see it really well on the back!

Quiltober-Label-ImFeelinCrafty

It was really nice of my very, very skinny friend to hold the quilt for me!

Quiltober-FrontLast-ImFeelinCrafty
Quiltober-Cover03-ImFeelinCrafty

I am still following the hashtag for Quiltober and I can’t wait to see everyone else’s finished quilts as well! This was a fun exercise! I’m glad I was able to get my done before the friends on my porch left for the season.

Happy Easter Bunny Pillow

Another craft I’ve taken up recently is punch needle. This is another easy project type for a beginner! There are also a lot of kits you can get for starter projects. This project is not from a kit, though. I just made it up as I went along!

PunchNeedleBunnyPillow-Main2-ImFeelinCrafty
PunchNeedleBunnyPillow-Class-ImFeelinCrafty
PunchNeedleBunnyPillow-ClassProject-ImFeelinCrafty

Back in February 2020, before we had a clue all of our lives were about to change dramatically, my kiddo and I took a punchneedle class at Wyldwood Creative with Andie Solar of Myra & Jean. Now I say it’s a fun easy craft project. Andie was a good teacher, but she does some amazing art that I haven’t been able to figure out and that does not look easy!

PunchNeedleBunnyPillow-Start-ImFeelinCrafty
PunchNeedleBunnyPillow-Process-ImFeelinCrafty
PunchNeedleBunnyPillow-Complete-ImFeelinCrafty
PunchNeedleBunnyPillow-Tail-ImFeelinCrafty

After the class I had the punch needle tool I needed and a random stack of yarn. I ordered some monks cloth and set to work on my bunny project! I changed the length of the punch needle to be longer for the tail! One tip I learned in the class was to not go in straight lines, to get a more organic feel and to not see the ‘lines.’

PunchNeedleBunnyPillow-CompleteBack-ImFeelinCrafty

Once I was done, I finished the back with a layer of thin fusible interfacing.

PunchNeedleBunnyPillow-Back-ImFeelinCrafty
PunchNeedleBunnyPillow-Pillowcases-ImFeelinCrafty
PunchNeedleBunnyPillow-Zipper-ImFeelinCrafty

For the back I upcycled two pillowcases by using the contrasting hem of the pillowcases. And I added a hidden zipper! Surprise!

PunchNeedleBunnyPillow-GoodSide-ImFeelinCrafty
PunchNeedleBunnyPillow-BadSide-ImFeelinCrafty

When I was trying to figure out how to sew the front and back together, I found two schools of thought. Some tutorials said to use a zipper foot and sew right up to the punch needle edge. The other side said that you don’t need to do that and to just use a regular foot and to sew over the edge of the punch needle edge. I went with option 2. I got two perfect edges and two not so perfect edges… Next time, I’m using the zipper foot method to see if it helps get a better edge!

PunchNeedleBunnyPillow-Last-ImFeelinCrafty

Have you tried punch needle??? It’s really quite fun and relaxing!

Disposable- An Upcycled Quilt

Or as they say on Project Runway, an Unconventional Challenge.

Not too long ago I saw a call for the UW Recycling Trash Art Contest. As soon as I saw the call, I knew what I wanted to do. I had to make a quilt from all the disposable masks.

Disposable-Materials-ImFeelinCrafty

When the pandemic hit, I made a ton of masks. I HATE the nature of the disposable masks. I’m that person that also hates to buy anything that is individually wrapped. No single servings pre-packaged for our lunches. And the same with the masks, no one time use in this house. Then I went to work in a hospital and the disposal masks are required as a way to slow the spread of Covid. But honestly, it makes me cringe to see all these disposable masks strewn about the streets. In addition to the disposable masks I also used a neighbor’s worn out scrubs and disposable gloves. Not a single bit of new fabric was harmed in the making of this quilt!

Disposable-MyMasks-ImFeelinCrafty

For the round blocks I used my used masks and my neighbor’s scrubs. I cut the masks in half and made a quick template for the outer piece. The problem I realized with these materials is that the masks melt if you try to iron them. So, no ironing the seam allowances!

Disposable-Otherblock-ImFeelinCrafty

I made this block out of my husband’s masks, the neighbor’s scrubs and a disposable glove. I love the secondary shapes the masks make. In the end, as much as I love this block, I didn’t love it as part of the quilt, so it ended up being left out of the quilt.

Disposable-HST-ImFeelinCrafty

And the half square triangle blocks made with disposable masks and disposable gloves. I sewed together two masks and cut out about a 5.5″ square and sewed the two together around the edge. Then cut down the middle to get 4 HSTs. Or course, no ironing here either!

Disposable-Front-ImFeelinCrafty
Disposable-Quilting-ImFeelinCrafty

The quilting inside these masks represents the germs bouncing around inside the masks, but not being shared with those around me. The circular quilting around the masks represents the germs staying on the outside, another reason we wear the masks. I quilted the circular blocks first, then the mask blocks. It was a pure, happy accident how this quilting came together in the corner.

Disposable-Detail-03-ImFeelinCrafty
Disposable-Detail-02-ImFeelinCrafty
Disposable-Detail-01-ImFeelinCrafty

One of the questions for the Trash Art contest was to explain how this art piece is relevant to my personal and/or UW campus waste? 

This quilt is relevant to my personal experience in so many ways!  For the last 10 years I have worked as an architect in the healthcare industry in local hospitals, including UWMC and Harborview. I have always grappled with the irony of all the disposable items used in healthcare to keep our patients safe and healthy versus the amount waste these same items make in order to also keep our patients safe and healthy. When I transitioned to an employee at UWMC last year, I had to give up my handmade, washable face masks for the disposable one time use masks. Every day on my walk to work, I pass mask after mask disposed of on the ground of the UW campus. This quilt is literally made of my own personal, disposable trash being upcycled into a work of art.

Disposable-Back-ImFeelinCrafty

And the back….

Disposable-BackDtl-ImFeelinCrafty

I used the last ‘larger’ piece of the scrubs on the back. And in good upcycling fashion, I just happened to have these blue and white striped sheets in my stash waiting to be used.

Disposable-Lable-ImFeelinCrafty

ok, maybe I didn’t tell the truth… I did use one small piece of new fabric. The label is new. The binding is, again, worn out scrubs.

Disposable-Last2-ImFeelinCrafty
Disposable-Last-ImFeelinCrafty

I had this idea to take these pictures hanging on the side of a building next to a dumpster. That situation didn’t exist where I thought it did. But my husband spotted this recycling dumpster and it was perfect for my photo shoot. It did make it a little hard to get the color perfect in the pictures though.

Undercover Maker’s Mat

I made this one a while back and never shared!

I made this for a swap that I did with the Seattle Modern Quilt Guild back pre-pandemic! I don’t honestly remember too many reasons behind my design choices, but I like it and I think it’s a great gift for your sewing friends and family! It’s a very easy sew! The tutorial is by Lillyella and it’s free on her website here.

UndercoverMakerMat-Pockets-ImFeelinCrafty

The Undercover Maker’s Mat is intended to do two things, the first being a way to keep your most needed item nearby. I could really use it. I’m always moving my scissors and then not having them when I’m actually sewing… And secondly, it’s a sewing machine cover.

UndercoverMakerMat-ButterflyPocket-ImFeelinCrafty
UndercoverMakerMat-Butterfly-ImFeelinCrafty

I also love the little butterflies! Both of these are free patterns from the same Lillyella website, here. She also has awesome sets of hummingbirds and moths. Very cool!

UndercoverMakerMat-ThreadCatcherMain-ImFeelinCrafty
UndercoverMakerMat-ThreadCatcher-ImFeelinCrafty

The pattern also includes a thread catcher that can stand on it’s own or hang from the makers mat itself. I meant to make myself even just one of these thread catchers!

UndercoverMakerMat-Ties-ImFeelinCrafty

To make it the sewing machine cover, you just add some ribbons and it ties on the sides of the machine.

UndercoverMakerMat-Label-ImFeelinCrafty

As usual, my typical label picture! ha! I’m not sure why I always add a picture of the label, but I do and now it’s become a habit… As you can see from this label, it’s a slightly older project like I mentioned before.

UndercoverMakerMat-Top-ImFeelinCrafty
UndercoverMakerMat-TableWithHelper-ImFeelinCrafty

A couple of photos of it ‘in action’ under my sewing machine. Since it was a gift, I obviously didn’t use it. Ha! And doesn’t Lulu (the dog) look like she’s saying, ‘That’s not yours and you can’t keep it.’

UndercoverMakerMat-Last-ImFeelinCrafty

Have you ever made one of these? Do you have a sewing friend who would like one for Christmas? There’s still time. It’s really easy to make!

Superhero Teacher Pouches

This year for Teacher Appreciation Week, we made Superhero pouches. Ok, there was no we. It was me…

Does this look familiar? I started using this printed fabric that I designed when the kiddo was in preschool, and I’ve used it every year since. We started with totebags back in 2015…

TeacherTote-KiddoBags2-ImFeelinCrafty

What a silly little kid! You can find the tutorial and the printable gift tag here. Then a couple of years ago we made a one hour basket using the same superhero fabric! I designed the fabric when then whole tradition started. You can even order it here from Spoonflower. It’s sized to make the fold over pocket on the totebag.

This year I changed it again and went with quilt as you go pouches!

TeacherAppreciationPouches-Main02-ImFeelinCrafty

I just happened to have a large pile of colorful 7″ zippers, so the pouches became about 5×7 inch pouches. Perfect for holding a gift card. I didn’t add a tag, but I’ll have to come up with something clever for when I do this again next year! Stay tuned!

TeacherAppreciationPouches-Backs-ImFeelinCrafty

The front has a little quilt as you go. Then you turn them over and there’s more quilt as you go! To make the pouches there are a million tutorials out there to use. I went with Sotak Handmade’s QAYG pouch tutorial for a reminder. I’ve made pouches a million times (ok, maybe slightly less than that), but I always like to skim over a tutorial before I do it to make sure I remember how. ha! Not sure why, but I do!

TeacherAppreciationPouches-FavoriteBacks-ImFeelinCrafty

These are my two favorite backs. The funny thing is, they are QAYG, but I didn’t add any quilting on top on either of these. I did on all the others. So I think it’s funny that my favorites don’t’ have quilting to show. and just like my quilts, sometimes I like the backs better!

TeacherAppreciationPouches-Inside-ImFeelinCrafty

I also order my quilt labels and my ‘everything else’ labels from Spoonflower. The little ones are slightly hard to read. But I’m using them anyway!

TeacherAppreciationPouches-Last-ImFeelinCrafty

The Teacher’s are Superheros fabric has so many more options than just tote bag pockets. It was fun moving outside the ‘bag’ (Ha! Get it…) and trying something else with the labels. Teacher Appreciation week has passed, but it also works for end of the year thank you gifts and holiday gifts.

Should I make pouches again next year? Or try something new?

Coral (scrap) Pillows!

Ok, are you tired of my pillows yet??? I hope not, because I have one more beachy batch of pillows left to share!

Seahorses, Sailboats and Coral, Oh My! So why am I calling them scrap pillows, you may be wondering… Well, back in the day I used to make a bunch of pillows and handbags and sell them around town at shops here in Seattle. I had a neighbor who worked for a very small company that did upholstery for boats. They would have bags and bags of scraps. Every couple of months I would go pick up a few bags to bring home and sort through. Based on the scraps, these boats they were sewing for are boats I will probably never ever spend time on unless I win the lottery! This fabric was in one of the bags! Just a pile of scraps…

My mom spotted the fabric and took it. When we were downsizing her house, I found it and took it back. I knew she wanted to do something with it, but probably never would. So I took it back and made her pillows.

ShellPillows-Square-ImFeelinCrafty

I made two square pillows. The unfortunate thing about this fabric, is that you could see the embroidery through the white fabric where is wasn’t behind the coral itself. So, to fix that, I lined the coral fabric with a dark grey fabric behind it. You can’t see any of the threads! For these I used my go to, middle lined with a thin line and then a wider border technique! Just like the seahorse and sailboat pillows!

ShellPillows-SquareBacks-ImFeelinCrafty

The border and back fabric is also fabulous scraps from my neighbor’s shop. It almost looks quilted, but it’s more like a sort of embossed fabric. I’m not exactly sure what it is, but it’s beautiful! The sand dollar just really pops!

ShellPillows-SquareZippers-ImFeelinCrafty

This is an early attempt at an invisible zipper. Not quite there, but it’s close!

ShellPillows-Rect-ImFeelinCrafty

I also made two rectangular pillows. Same coral fabric, but these were longer pieces that I was able to capture these little corally, rose-ish swirls on the edges!

ShellPillows-RectEdge-ImFeelinCrafty

For these I tried putting on a binding, just like I would a quilt. It turned out nicely. I don’t know if it’s the ‘correct’ way to do it or not, but it went together just fine. And I’ve used this technique again since I made these pillows.

ShellPillows-RectBacks-ImFeelinCrafty

ShellPillows-RectZippers-ImFeelinCrafty

For these pillows I switched up the back and the zippers! I ran out of large enough pieces of the embossed fabric, so I went with this quilting cotton on the back. This was not scrap fabric, but it went perfectly with the colors of the coral so I couldn’t pass it up! And for the zipper, I did a lapped zipper rather than the invisible zipper. I had to change the zipper since I was doing the binding on the edge. That wuoldn’t have worked with an invisible zipper at the bottom.

ShellPillows-Last-ImFeelinCrafty

These were very well received by my mom! I hope she is still enjoying them. She did not like me taking the fabric back from her, but I think she made out on top in the end!

And I can’t believe summer is almost over and it’s already September!


Doggy Bandana Tutorial- Holiday Edition

Ok, there really isn’t any other edition other than the holiday edition! But you can make these dog bandanas for any occasion you’d like!

They are super simple, reversible and just fit over the collar so that there’s not another thing around the pups neck!

DogBandana-Lulu-ImFeelinCrafty

DogBandana-LuluReversible-ImFeelinCrafty

Oh, and did I mention stinkin’ adorable???

DogBandana-withCollar-ImFeelinCrafty

DogBandana-ReversewithCollar-ImFeelinCrafty

Here’s the story… I’m kinda obbessed with my dog and follow a lot of big white Great Pyrenees on IG (mine’s a mix, but very much a pyr in her own right!) and I see so many with these cute bandanas. Then the other night, when I was supposed to be making Christmas presents, this whole bandana thing popped in my head as a super easy thing to do. So I made two!

I put the kiddo and pup to bed and took Lulu’s collar. She was soooo not happy about me taking her collar! I don’t know why. And she seemed very happy to have it back the next morning.

I’ll show you how I made mine.

DogBandana-Tutorial-01Cut-ImFeelinCrafty

First step is kinda obvious… You have to cut the pieces out! You can download the pattern here. And cut out two pieces.

DogBandana-Tutorial-02FrenchSeam-ImFeelinCrafty

Along the top edge, the squared off edge, sew a French seam. First, sew along the top with a very scant 1/4″ seam, fabrics wrong sides together. Then fold the fabrics over at the seam, now right sides together and sew a 1/4″ seam. Easy peasy, but if you would prefer a more detailed French seam tutorial, they are all over the internet.

DogBandana-Tutorial-03Sew-ImFeelinCrafty

Now you are going to sew a 1/4″ hem along the short, straight side. (the sides perpendicular to the French seam. Sorry, not a great photo for this step.) Fold over a 1/4″, then fold over another 1/4″ to hide the edges and stitch.

Then fold over, right sides together, and stitch along the triangle edges.

DogBandana-Tutorial-04Trim-ImFeelinCrafty

Be sure to trim the edges at the point of the bandana to avoid bulk before turning right side out.

DogBandana-Tutorial-05TurnTopstitch-ImFeelinCrafty

Turn it right side out through the collar holes. Next I marked my stitching line from corner to corner, about 1 1/2″ from the French seam.

DogBandana-Tutorial-6Topstitch-ImFeelinCrafty

Then topstitch and you’re ready to insert the collar!

DogBandana-Last-ImFeelinCrafty

DogBandana-Lulu4-ImFeelinCrafty

Look at that model pose!

DogBandana-2-ImFeelinCrafty

They really are super cute and quick! Now this one is sized for about a 65/70 pound dog with a 1″ collar. You can resize for a smaller dog and use the same process.

DogBandana-Lulu2-ImFeelinCrafty

DogBandana-LuluKiddo-ImFeelinCrafty

I ended up giving the reindeer one to her cousin before she had a chance to model that one. I might just have to make another one! A quick and easy sew for a festive pup! Let me know if you have any questions!


Harry Potter Pillowcases

Last week was Harry Potter’s birthday and I decided to drag it out a bit with another Harry Potter project. Who doesn’t prefer to celebrate for a week instead of a day, right???

I was at our last quilt retreat and someone was making pillowcases using the ‘Burrito Method.’ Of course, I went home and googled it.

HarryPotterPillows-Front-ImFeelinCrafty

There are plenty of tutorials on this, so I’m not going to post a full tutorial. I started with using the tutorial from The Seasoned Homemaker. The problem with most of the burrito pillowcase tutorials is that they don’t make their pillowcases using directional prints. And of course, my nature is to not make things easy, so of course, I chose a directional print. The burrito method uses one long piece of fabric for the edge of the pillow, one long piece for the trim and another piece for the main pillowcase. To use a directional print, you have to piece two pieces together to make the main fabric piece.

HarryPotterPillows-Vertical-ImFeelinCrafty

The tutorial I used uses a 27″ by 40″ piece for the main fabric. For directional fabric you need to cut (2) 27″ by 20 3/4″ pieces. Then sew these together using a French seam tutorial. I made mine with a 1/4 inch seam and then a 1/2″ seam. Then I have a 40″ long piece of fabric for the main fabric.

HarryPotterPillows-Detail-ImFeelinCrafty

I love the mix of fabrics on this! I made 6 sets of pillows because this method is so easy! One set for the kiddo and two sets for two best friends. I did end up with some scraps and almost gave them away, but I held on t them and got to use them in the pouch I shared earlier this week.

HarryPotterPillows-Last-ImFeelinCrafty

Have you used the burrito method? I really love it. It makes It so easy to make pillowcases!