The Jack and Jill Shirt turned PJ’s

Last month I was a lucky lady who got to work with a fabulous woman (who you probably all know), Shannon, the woman behind the blog, Little Kids Grow. Shannon has recently started a pattern line called Peaches and Peanuts. And I got to test her first pattern, the Jack and Jill Color Block Shirt.

JandJ-main-ImFeelinCrafty

The pattern is a unisex pattern with all sorts of options in sizes 4 through 12! You’ll have to check out Shannon’s story on why she started her new pattern line. It totally makes sense! And so far, she’s on the right track!

Jack-and-Jill-Pattern-Cover-template

Jack-Jill-Tester-Collage-700x700

Our shirt is a little wacky, so I thought I’d show you how the other testers made theirs. Theirs are a bit more reserved. And it just goes to show how lovely this pattern can be. When I saw Shannon’s son in the shirt, I knew I was in love! He’s adorable! It’s just a lovely shirt that can be very dressy, casual and as I’m showin’ ya, very casual!

JandJ-full-ImFeelinCrafty

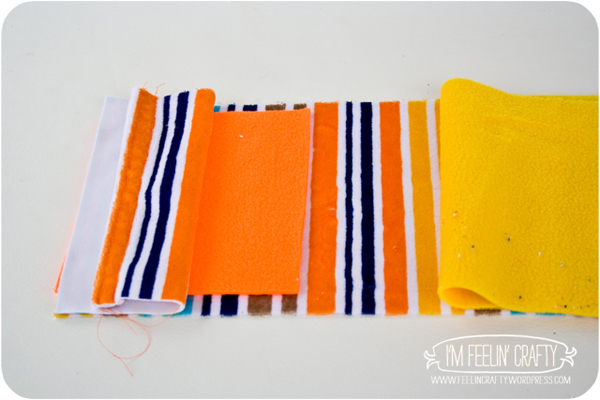
I chose kinda crazy fabric for a couple of reasons. One, that’s the way the kiddo and I roll. Bright and Crazy! And Two, I knew I wanted the shirt for some PJ’s. I think Shannon was looking more for the not so crazy, but she was sweet about our craziness just the same!

JandJ-Back-ImFeelinCrafty

The pattern has a few details that make it stand out from other boy’s shirts patterns. I’ll start with the back detail. The back pleat is a nice detail that I think makes the shirt a bit more comfy. From the front it looks like a slightly fitted shirt, but you know there’s some real room to run and play in it!

JandJ-Sleeve-ImFeelinCrafty

The sleeve detail is also a refreshing change from the usual. I got a bit confused by it. But that’s why I was a tester and Shannon quickly updated the pattern (before publication) based on my confusion so you won’t be confused! Look how cute it looks once I figured it out!

JandJ-Collar-ImFeelinCrafty

I’ve always been a bit confused about dress shirts and collars. But that is a confusion of the past! After working her pattern a light went off and I have figured it out and am no longer afraid of dress shirt collars!

JandJ-Pocket-ImFeelinCrafty

And what do you think about that pocket? The long pocket is fun! Especially since my monsters fit perfectly for the size of the pattern!

JandJ-Fun-ImFeelinCrafty

The pants are not part of the pattern. They are my own pattern that I made using my tutorial for Comfy Pants.

JandJ-Jump-ImFeelinCrafty

So, I asked the kiddo to model his pj’s and it was like pulling teeth to get him out there. I said, ‘you know you love it once I’m taking pictures.’ And he said I could only take 3 or 4 pictures. But do these pictures look like he hates having his picture taken? Um. No. He even made me take more and more! What a ham!

JandJ-Top-ImFeelinCrafty

Be sure to check out Shannon’s Jack and Jill pattern for your kiddos! I know one kiddo who’s happy to have it!

do Good Stitches Swap

As you know, I’m a quilter in the Nurture Circle of do Good Stitches quilting bee. We make quilts all year and then take off the months on November and December. So this year, I thought a fun way to thank ourselves for all of our hard work and get to know each other a little bit better was to have a little swap!

DoGoodSwap-Both-ImFeelinCrafty

So we did! We could tell our partner if we wanted a holiday themed gift or not!

DoGoodSwap-ToGive-ImFeelinCrafty

My partner said she’d like something other than holiday and a mug rug seemed to be of interest to her. So…. That’s what I did!

DoGoodSwap-ToGive-Detail-ImFeelinCrafty

And I tried out the quilt as you go technique from Stitched in Time’s blog (fitting since she runs the do Good Stitches bee!, huh?). Loved it! It’s a great technique for small quilts or mug rugs! And I guess it is for big quilts too, but I haven’t tried that yet. Oh! But I just had an idea of when I’m going to try it on a big quilt!!! OK, I got off track there! So you start with the your block size batting. I quilted down my middle piece by stitching around the buildings and then you sew on a piece, fold over iron and then quilt it. Then repeat with one piece after another! Love it! Did I say that already?

DoGoodSwap-ToGive-Back-ImFeelinCrafty

And I had another success with machine binding! Yeah! It can be hit or miss with this and I was pretty happy with it this time!

DoGoodSwap-Recieved-ImFeelinCrafty

I didn’t have a preference for holiday or not, but I did mention that my holiday colors were more of the bright green, pink and blue. and I received this adorable wall hanging from my partner, Debbie of Tweety-Bee Stitches.

DoGoodSwap-Recieved-Detail-ImFeelinCrafty

The shutters actually open and close! It’s too cute! We have it hanging with the other Christmas art!

Merry Christmas and Happy Holidays

From our family to yours!

MyCardsm

I’ve been busy in my workshop! Last night I made a pile of gift bags and fabric gift card envelopes, embroidered spidey eyes on a red hat, stamped gift bags to deliver cookies in and made a dog cape (hope it fits!). It seems like something else happened, but I can’t even remember now! So I’m taking a blogging break. We’ll see if any more work gets done in the workshop tonight… But either way, I’ll be back in a few days so show you all the fun things we did!

Wishing everyone Happy Holidays and warm smiles with your loved ones!

Peace!

Fabric Gift Bag Tutorial

Have you wrapped all your gifts yet? I’m about to get back to it! We just got back from a fabulous vacation to Palm Springs!! So I need to get back to wrapping.

aGiftBag-Main-ImFeelinCraftyI try to use as little paper as possible. About three years ago I posted a tutorial for fabric gift bags and each year I make a few more, but for the most part I just pull the bags out of the box and the presents are wrapped! My son and I were wrapping the other day and I looked over and he had his head in the box and bags were flying all over while he was looking for the right size bag! Too funny!

aGiftBag-Done2-ImFeelinCrafty

Since I love these so much, I thought I’d update my tutorial for ya!

aGiftBag-Step1-ImFeelinCrafty

Step 1: Gather your materials, Fabric, ribbon, a cutting device and the present.

aGiftBag-Step2-1-ImFeelinCrafty

aGiftBag-Step2-2-ImFeelinCrafty

Step 2: Measure for the right size bag.  For the length, I measure about half the width of the present on the bottom and about half the width of the present on the top plus about 3 inches on top. Then I wrap the fabric around the present for the right width. Honestly, I’m not real exact when it comes to measuring mostly because who knows what will be in the package next year!

aGiftBag-Step3-ImFeelinCrafty

Step 3: Cut!

aGiftBag-Step4-ImFeelinCrafty

Step 4: Sew the top, fabric right sides together. Iron flat the top seam.

aGiftBag-Step5-ImFeelinCrafty copy

Step 5: Fold the bag so that right sides are together. Right side of lining to right side of lining and right side of outside fabric to right side of outside fabric. Leave a hole in the lining seam.

aGiftBag-Step6-ImFeelinCrafty

Step 6: Rotate the fabric so that the seam is centered on one side of the bag. Sew the bottoms of both the inside and outside fabric. (bag is still inside out)

aGiftBag-Step7-ImFeelinCrafty

aGiftBag-Step8-ImFeelinCrafty

Step 7: This step isn’t required, but I like it. Sew the corners. Pinch the bottom corners to create triangles. The side fold and the bottom seam should be aligned. Sew across the corners and trim.

aGiftBag-Step9-ImFeelinCrafty

Step 8: Pull bag through the hole.

aGiftBag-Step10-ImFeelinCrafty

Step 9: Sew the hole closed.

aGiftBag-Step11-ImFeelinCrafty

Step 10: Turn the bag inside itself, iron the top edge and topstitch.

aGiftBag-Step12-ImFeelinCrafty

Step 11: Add the ribbon. I stitch the ribbon on for 2 reasons. 1. Next time I or whoever else uses the bag won’t have to look for ribbon. And 2. It makes it easier to keep the bow in place! Tack it down about 3 inches from the top at the seam on the back.

aGiftBag-Done1-ImFeelinCrafty

And there, a reusable gift bag!

aGiftBag-Tree-ImFeelinCrafty

Our tree is full of these little guys!

aGiftBag-End-ImFeelinCrafty

I hope you can make a few to put under your tree a well. Get rid of a little bit of paper each year!

Christmas Pot Holder Tutorial

So today let’s take yesterday’s quilt block and turn it into a mug rug or pot holder!! Who doesn’t need a pot holder? Especially with all the holiday baking?? mmmm!

PotHolder-end-ImFeelinCrafty

I recently started making pot holders for gifts and realized they are so simple!! And fun! And prettier than the ones in the stores!

I’ll show you how simple they are to make!

PotHolder-Materials-ImFeelinCrafty

For the materials, you’ll need your front and backing fabric, a piece of batting and a piece of insulated batting. All these thing are available at the shop, so come on in and we’ll get you are ready!  For the front of mine, I used the tree block I described here.

PotHolder-Step1-Stack-ImFeelinCrafty

Stack your pieces. Start with the backing right side down, then your insulated batting (follow your insulated batting directions, but mine specifies to have the insulated side facing the heat source so I have mine stacked with the insulated side down), then the batting and lastly your top with the right side facing up.

PotHolder-Step2-Quilt-ImFeelinCrafty

Quilt the pieces together

PotHolder-Step3-Trim-ImFeelinCrafty

Trim. I made mine a 8×8 inch pot holder, but you can make it any size you’d like.

PotHolder-Step4-Binding-ImFeelinCrafty

Cut your 2″ binding and add an additional 3 inches to your binding piece. This additional 3 inches is for your hanging hook.

PotHolder-Step5-Hook-ImFeelinCrafty

Make your hanging hook. Fold the 3 inch piece in half, right sides together and sew a quarter inch seam. Then flip right side out. Done!

PotHolder-Step6-Binding-ImFeelinCrafty

Add your binding. And don’t forget to insert the hanging hook at the top side while you are adding on the binding.

PotHolder-mugrug-ImFeelinCrafty

And it’s done! It also works for a mug rug…

PotHolder-Main-ImFeelinCrafty

And the real question… Are you going to keep it? Or give it away?

Christmas Tree Quilt Block Tutorial

Remember yesterday when I had that random mug rug in the picture with the Pillows?? Well, today I’m going to re-share the tutorial on making the block! Back in July at the Fabric Shop I was working in, we had a Christmas in July celebration and everyone made a block! I decided to make a Christmas Tree block! So in case you missed it….

TreeBlock-Main-ImFeelinCrafty

It’s not a complicated block at all, would you like to try to it?

TreeBlock-Materials-ImFeelinCrafty

I started with fat quarters of each of the 4 prints and just a 2.5 inch strip of the solid.

TreeBlock-Step1Cut-ImFeelinCrafty

Step 1: Cut out your pieces. You’ll need a 2.5×4 piece for the inside of the tree, an 1×18 strip for the outside of the tree, a 1.5 inch square for the tree trunk, and a 2.5×12.5 inch strip for the ground. For the background you’ll need (2) 4×7 rectangles, a 1.5x 6.75 strip, a 4×6 rectangle and a 7.5×10.75 rectangle.

TreeBlock-Step2Tree-ImFeelinCrafty

Step 2. Make the tree. Trim the inside of the tree so the bottom is 2.5 inches wide. Trim the 18 inch strip into a 4 inch piece and (2) 7 inch pieces. Then sew on the bottom piece, then one side and then the other. Lastly, trim the tree. Ha! Trim the tree…

TreeBlock-Step3Tree-ImFeelinCrafty

Step 3: Sew the (2) 4×7 pieces onto each side of the tree. Then trim. Start by trimming along the straight edge of the bottom of the tree. Then the sides so that you end up with a 4×5.5 block.

TreeBlock-Step4Trim-ImFeelinCrafty

Step 4: Trim a 1.5 inch strip from each of the scrap pieces of the side of the tree.

TreeBlock-Step5Bottom-ImFeelinCrafty

Step 5: Sew the strips from Step 4 to the tree trunk pieces.

TreeBlock-Step6Piece-ImFeelinCrafty

Step 6: Piece the background. Start with sewing on the trunk to the tree. Then add the 1.5×6.75 strip to the left side of the tree. Next sew on the top square, the 4×5.5 piece. Then the large side is to be sewn onto the right side of the tree. And lastly, sew on the ground.

TreeBlock-Step7Trim-ImFeelinCrafty

Step 7: Trim to a 12.5 inch square.

TreeBlock-Block-ImFeelinCrafty

And viola! You’re done! Yea! What are you doing to do with yours?

Envelope Pillow Tutorial

Like I mentioned in my post last week for the Stay Put Scarf, I’m bring home some of my Go to Sew posts from the last year. And I’m starting with some that I think would make great last minutes gifts. So today, I’m sharing the envelope pillow tutorial!

EnvelopePIllowGift-Main-ImFeelinCrafty

I made quite a few of these in the last week for holiday gifts! (more will be coming on the random pot holder in the picture)

EnvelopePIllowGift-A-ImFeelinCrafty

The A is an antique mall find that I remade into a ‘Bama gift pillow! I made a grey and red striped background and then sew-ed the A on top!

EnvelopePIllowGift-CB-ImFeelinCrafty

I was doing a little shopping at CB2 and I saw these pillows with white and silver and red. I loved them! And I knew I just happened to have some fluffy white fleece and some silver vinyl. So I went to town making the pillows. I made three for myself and then I made four others for a handmade FB swap I said I would do in January! Their $30 ones look fabulous! But I am also pretty proud of how my ‘from my stash’ ones turned out as well!

So here’s the easy peasy tutorial!

EnvelopePillow-Main-ImFeelinCrafty

You can do anything with it! You can make your kid one out of one of their favorite shirts that they’ve outgrown… Or did you find some fancy fabric, but if was so fancy you really know you should only buy a half yard… Perfect for a pillow! Or you can do a quick little quilting job and have a baseball inspired pillow!

EnvelopePillow-Materials-ImFeelinCrafty

So what you’ll need is easy… A Pillow! Fabric, thread, cutting implements, and some batting if you want to do a little quilting.

EnvelopePillow-Step1-ImFeelinCrafty

First you cut! Cut out the front roughly a half inch larger than you pillow. For the back you’ll cut two pieces. I cut them to overlap by about three inches. For instance, if you pillow is 14 inches wide, I’ll cut two pieces 10 inches wide. If you’re going to be quilting, cut a piece of batting and a cover for the batting, both the same size as the front piece.

EnvelopePillow-Step2-ImFeelinCrafty

Hem the edges on the back two pieces.

EnvelopePillow-Step3-ImFeelinCrafty

If you’re going to do quilting on the front, go for it! Then cover the back of the quilting with you extra piece.

EnvelopePillow-Step4a-ImFeelinCrafty

EnvelopePillow-Step4b-ImFeelinCrafty

Stack them all together! Back of the quilted piece, right side down. Front of the pillow, right side up. Then stack the two back pieces, right sides down.

EnvelopePillow-Step5a-ImFeelinCrafty

EnvelopePillow-Step5b-ImFeelinCrafty

Hem the edges on all four sides. I like to back stitch over the overlapped back pieces. You’re going to be pulling at it here when you stuff the pillow in, so a little extra stitching helps!

EnvelopePillow-Step6-ImFeelinCrafty

Then trim the corners.

EnvelopePillow-Step7-ImFeelinCrafty

I like to trim the edges with a pinking shear. Or you could use a serger.

EnvelopePillow-Step8-ImFeelinCrafty

Turn it right side out. (yes, my back is not even, like I mentioned above, but it is overlapped like I mentioned.)

EnvelopePillow-1-ImFeelinCrafty

Then stuff that pillow in and enjoy!

See? Super simple! Quick and a sweet gift! I made mine for a friend that wanted a St Louis Cardinal pillow…

Capture

I’m not much for using fabrics with team logos and such, so I took their colors and logo and made mine.

EnvelopePillow-3-ImFeelinCrafty

EnvelopePillow-2-ImFeelinCrafty

What do you think? Does it say St Louis Cardinals without literally saying St Louis Cardinals? I hope so! I didn’t do a bird. But I did baseballs (don’t look at the basballs too closely, it’s my first time doing little bitty circles!), the yellow bat and the blue outline…. Crossing my fingers that she likes it!

And the Winner of the West Seattle Fabric Company Giveaway is…

Thanks to everyone for your interest in the West Seattle Fabric Company giveaway! If you are local, and I saw a few who were, you’ve got to stop by and meet Monica and see the shop. And if you’re not, bookmark her website for your next online fabric order!!!!

GADay-WSF-ImFeelinCrafty

Now to what you’re waiting for… The Winner is….

drumrollplease1 copy

And here’s my traditional drum rolllllllll……

Comment #237!

Capture

via Random.org

Yea! Lynn D! You’re the Winner!

Capture-name

And thanks again to West Seattle Fabric Company for the awesome giveaway! Thank you!

A Simple Dog Bed Tutorial for Go To Sew

One of my things to sew on my holiday list was a dog bed!

DogBed-Title-ImFeelinCrafty

I have a simple tutorial, hopefully using what you have on hand, to make a little dog bed at Go To Sew! Check it out and see a little pic of our pup!


The Stay Put Scarf Tutorial

I’m bringing some of my Go To Sew tutorials home this month! And I’m starting with this Stay Put Scarf Tutorial because it’s freezing here and I just stole this one from my son and I love it! (Yes, he has another one… Don’t loose any sleep fearing that he’s out in the freezing cold without the necessary warm things) Also, it’s a quick and easy holiday gift idea!

GoToSew-Scarf-title-I'mFeelin'Crafty

My son has been eyeballing scarves, but they are either too expensive, too long for a 4-year-old or something that I know that I can make. So I decided, I’ll just make one! And I’ll make it with a couple of easy enhancements. Every scarf needs a pocket to stash treasures that you find out and about. And a little strap so it stays in place… Hence, the Stay Put Scarf.

GoToSew-Scarf-pocket-I'mFeelin'Crafty

Materials: fabric, cutting materials and tread! I used fleece and minky fabric. That’s it!

GoToSew-Scarf-Materials-I'mFeelin'Crafty

Step 1: Cut the fabric.

GoToSew-Scarf-Step1-1-I'mFeelin'Crafty

You’ll need:

2 strips of 8×38 inch fabric for the front and back of the scarf.  I made mine for a small 4-year-old, you might want to make yours longer for a larger kid or an adult.

A 2.5×8 inch strip for the strap.

Two pieces of 7×6 inch fabric for the fringe.

And one piece of 7×8 inch fabric for the pocket.

GoToSew-Scarf-Step1-2-I'mFeelin'Crafty

Step 2: Make the Strap.

GoToSew-Scarf-Step2-I'mFeelin'Crafty

Sew the strap together, with right sides together and then pull it through itself.

Step 3: The pocket.

GoToSew-Scarf-Step3-I'mFeelin'Crafty

All you need to do here is hem one of the 8 inch long sides.

Step 4: Assemble.

GoToSew-Scarf-Step3-1-I'mFeelin'Crafty

Layout the front side of the scarf, right side up. Center the fringe piece right side down. Add the pocket, right side down. And lastly, add the back side of the scarf, right side down.

GoToSew-Scarf-Step4-2-I'mFeelin'Crafty

Pin in the strap. I pinned mine 6 inches toward the pocket from the center. Does that make sense? Find the center. Then measure  6 inches toward the pocket end. That’s where the strap goes. Again, like I said earlier, this one is for a small 4-year-old. The placement of the strap might change based on the size of the kiddo.

GoToSew-Scarf-Step4-3-I'mFeelin'Crafty

Next layer on the other end fringe. Again, right sides together.

GoToSew-Scarf-Step4-4-I'mFeelin'Crafty

Pin all the layers together for the whole scarf.

GoToSew-Scarf-Step4-5-I'mFeelin'Crafty
I have this little problem of forgetting to leave holes when I’m sewing things together, so I’ve started adding double pins where I want to leave a hole. Just a little reminder!

Step 5: Sew it all together. (Except between those double pins!)

GoToSew-Scarf-Step5-1-I'mFeelin'Crafty

Step 6: Trim the corners and pull it all out through the hole you left.

GoToSew-Scarf-Step5-2-I'mFeelin'CraftyGoToSew-Scarf-Step6-I'mFeelin'Crafty

Typically I’m a top-stitcher. I love to top stitch. EVERYTHING! But not this one. You can, but for some reason on this one, I didn’t feel like it needed it. But do sew the hole closed!

Step 7: Make the fringe.

GoToSew-Scarf-Step7-1-I'mFeelin'Crafty

I originally told you to make the fringe 6 inches. Now’s the time you decide how long the fringe is actually going to be. I made mine 2.5 inches!

GoToSew-Scarf-Step7-2-I'mFeelin'Crafty

Then trim the fringe, by cutting into 1/2 strips, but stop the cuts about 1/2 to 1 inch from the end of the scarf.

GoToSew-Scarf-StepDone-I'mFeelin'Crafty

And that’s about it! Nice and simple and completely your own!My son and I made this one together. He had his idea of all the colors he wanted in an outfit I was making for him, but we didn’t have orange, so we picked it up here in the scarf. And like I said, it’s all his (well, and mine too now!). His ideas, the colors he picked out and now it fits him perfectly! Much more fun than buying one already made. I hope you enjoy making one as much as we did!