You’re Cool, Valentine! Printable Penguin Valentine Tags

Who loves penguins??? We do! Who loves stuffies? We do!

I like to make class Valentines about something the kiddo is excited about and not just about candy! Once we did Astro-Ordinary crayons. And another year we did Legos.  We also did Pokémon Valentines, but I lost the pictures of those… I need to find them… Anyway… Back to the penguins!

PenguinValentine-Sharing-ImFeelinCrafty

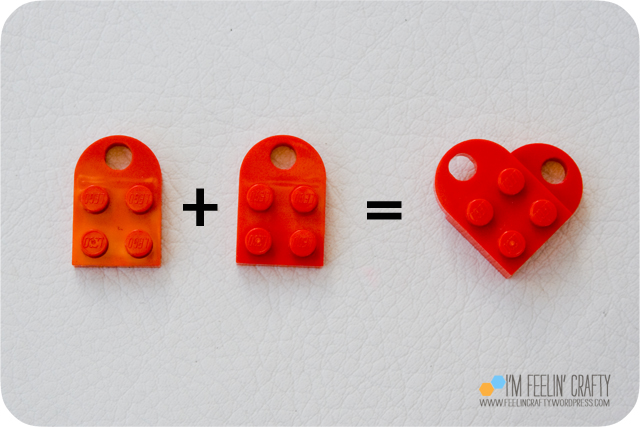
We didn’t want to do a penguin with a heart sewn on it or glued on it. And we wanted him standing up, so we finally narrowed it down to a Christmas penguin.

PenguinValentine-Before-ImFeelinCrafty

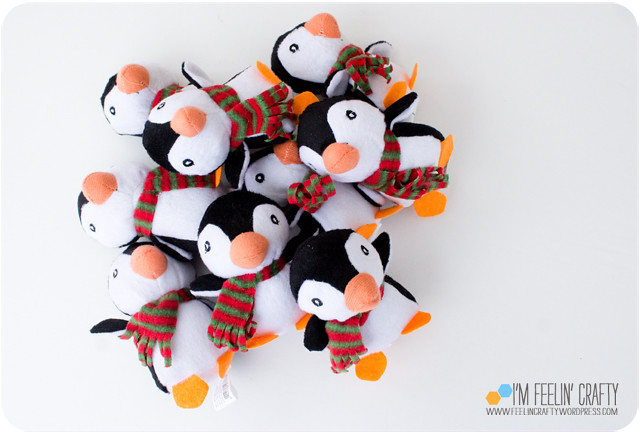
We ordered these little guys online. But of course, their scarfs would not do for Valentine’s Day. Nope! So we took them off. They were sewn on, but only with one stitch or so. Easy to get off. We used the Christmas scarf as our template for the red Valentine’s Day scarfs.

PenguinValentine-Card-ImFeelinCrafty

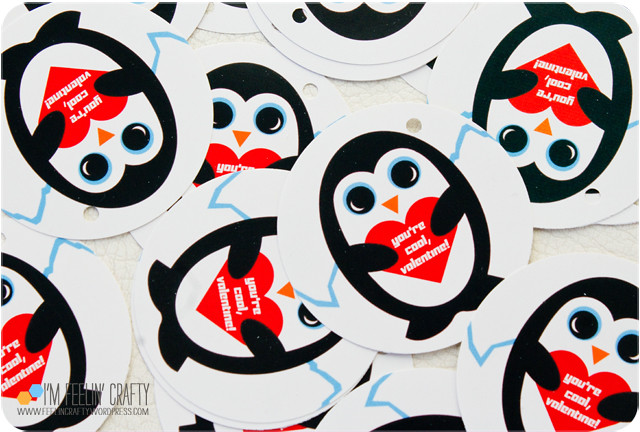
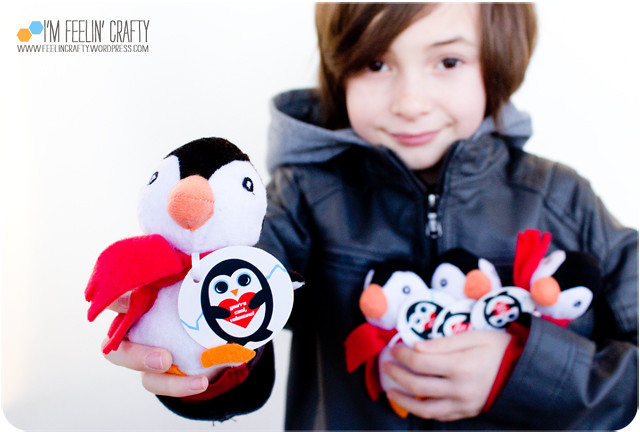
And I designed the tags. You’ve probably seen my Quilt Design a Day ‘sketches’. To make those I use an app called Assembly, so I thought it would be fun to try to design the Valentine tag in the app as well. And we loved the way it turned out!

PenguinValentine-Before2-ImFeelinCrafty

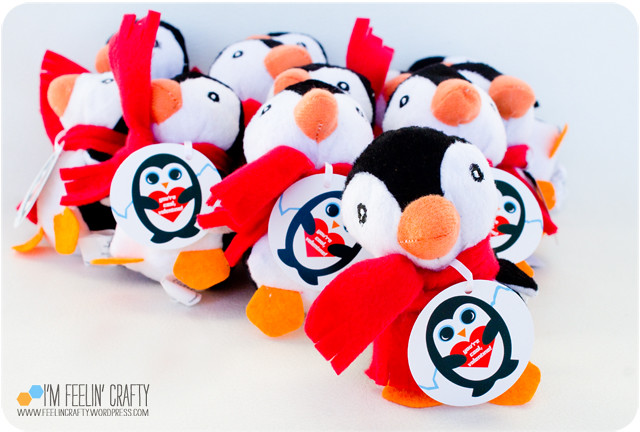
Then came the assembly line. We actually added a tiny ribbon to the tag, slipped the scarf through it and then double knotted the scarf on the penguins!

PenguinValentine-After-ImFeelinCrafty

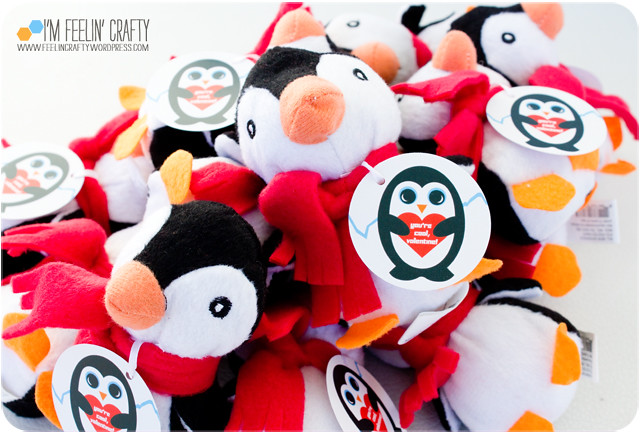
Soon enough we had a ton of Valentine’s Day gifts for the whole class and some special others.

PenguinValentine-Printable-ImFeelinCrafty

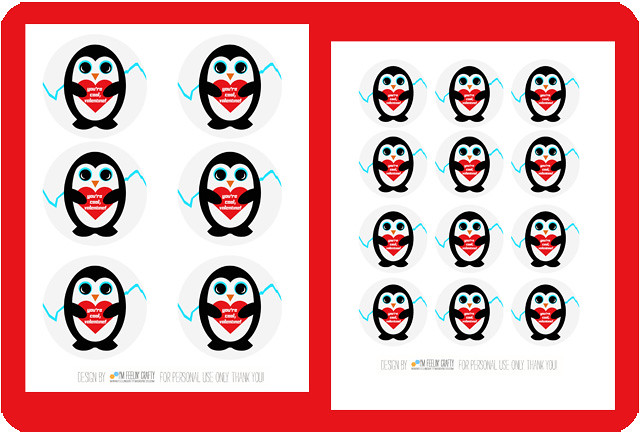
You can download the penguin Valentine tags for yourself here. I have two sizes. First I made the 3″ tags (9 to a page) and then realized it was just too big. So then I made a 2″ tag (12 to a page) and they were just right!

Download the 3″ Penguin Valentine’s Day Tags here.

Download the 2″ Penguin Valentine’s Day Tags here.

These are for personal use only! Thank you!


PenguinValentine-SharingEnd-ImFeelinCrafty

Have you decided on your Valentine’s for this year?

Happy 4th of July!

Happy 4th! Hope everyone is having a relaxing day with friends and family!

PerlerFireworks-Perler-ImFeelinCrafty

Have you ever checked out the Perler Bead website? they have tons and tons of fun patterns. For some reason I went looking a couple days ago and found these fun firework patterns!  So last night the kiddo and I made red, white and blue fireworks! We didn’t actually have the large pegboards we needed so we made due and just used the patterns as inspiration. The idea was that they were to red, white and blue, but the kiddo kinda went rouge and just made his pattern with is own colors!

PerlerFireworks-Last-ImFeelinCrafty

Who sees cool quilt patterns in these too??? Me!

PerlerFireworks-RWB-ImFeelinCrafty

Gotta run get some food on the BBQ! And make some strawberry and blueberry yum! mmmm… That’s the kiddo’s favorite summer dessert, angel food cake (Or pound cake), strawberries, blueberries and reddi whip! mmmmm…. Have a good one!

Easter Egg Decorating- A New Technique to Us

Have you ever used the shaving cream technique to decorate Easter eggs?

We tried it! You might have seen it on Pinterest or other places around the internet, but we tried it! I thought it was fun. The kiddo not so much. He’s not one to get very messy…. The result is a very pastel egg…

Here’s what we did:

EasterEggs-Main-ImFeelinCrafty

We did them two ways… The traditional PAAS way and the shaving cream way. The used shaving cream, food coloring, a pan and a BBQ skewer. And of course, don’t for get the eggs because it ‘s very hard to dye eggs without eggs!


EasterEggs-Step1-ImFeelinCrafty


EasterEggs-Step2-ImFeelinCrafty

EasterEggs-Step3-ImFeelinCrafty

Pretty easy…. Line the pan with shaving cream. Add food coloring. Swirl the shaving cream and food coloring combo with s bbq skewer (or anything for that matter). And lastly roll eggs around in the shaving cream.

EasterEggs-Messy-ImFeelinCrafty

It is messy. If you don’t want to color your fingers, this project might not be for you! The kiddo thought it was the worst idea for decorating eggs ever and said he’d never do it that way again! He said, ‘Who came up with this idea anyway?’ Ha!

EasterEggs-Waiting-ImFeelinCrafty

Then you just let them sit. I let mine sit for about a half hour. Maybe if you let them sit for longer, they might become more vibrant… I didn’t have the patience to leave them fro too long!

EasterEggs-Yellow-ImFeelinCrafty


EasterEggs-YellowWaiting-ImFeelinCrafty

I decided to try it in yellow… Don’t recommend only yellow for this technique!

And the results:

EasterEggs-Done-ImFeelinCrafty

EasterEggs-YellowDone-ImFeelinCrafty

Pretty? Yes. Vibrant? Not so much… Fun experiment? I say so! there may be people who disagree (and I might just live with one of those characters!)

EasterEggs-Traditional2-ImFeelinCrafty


EasterEggs-TraditionalDone-ImFeelinCrafty

The kiddo went back to the old fashioned way that he loves. And you can see the results are much more in your face. I guess it depends on the look you are going for.

How do you decorate eggs?


Pinterest Try Tuesday- Eraser Dot Halloween Shirts DIY

I am so excited that it’s October! And that means Halloween!! We love Halloween around here! AND… It’s been a while since I did my Pinterest Try Tuesday projects. So this month we’re doing Halloween themed Pinterest Tries. Starting with the eraser dot tshirts.

EraserShirt-Main-ImFeelinCrafty

Have you seen these around? WAY back, before my blogging days, I had a baby shower for a friend and I used erasers and paint to make the invitations and envelopes and all sorts of things. So when I saw these bat shirts, I knew I had to make some with the kiddo! Looking more into Cutesy Crafts, where my ‘pin’ originated, it appears she does these for every season! Be sure to check out her page! This would also make cute tote bags, too!

EraserShirt-Fun-ImFeelinCrafty

This pinterest try was a real win! It’s quick and easy. Doesn’t require many materials. Fun!

EraserShirt-FreezerPaper-ImFeelinCrafty

So you start with a freezer paper stencil. Since I got an orange shirt, my son said it had to be a pumpkin! So a pumpkin we made! We actually picked pieces for the pumpkin from online then put it together in photoshop to be exactly how he wanted it!

EraserShirt-Materials-ImFeelinCrafty

Then you just need fabric paint and a pencil or two.

EraserShirt-Dots1-ImFeelinCrafty

EraserShirt-Dots2-ImFeelinCrafty

EraserShirt-Dots3-ImFeelinCrafty

Here’s how easy it is. Dip the pencil eraser in the paint and then on the shirt! Let it dry and remove the freezer paper!

EraserShirt-Last-ImFeelinCrafty

What design would you make? I was also thinking of a ghost in glow in the dark paint! Yep!

EraserShirt-LastLast-ImFeelinCrafty

The kiddo really like it. He was quite curious why we didn’t just use a paintbrush, though. But once we started he got into it! It got worn to school today and the plan is to wear it on Halloween FOR SURE! At least before trick or treating anyway!


Pinterest Try Tuesday- Super Balls…

We were very sad… Today I present another installment of Pinterest Try Tuesday, but this week we have a Pinterest Fail… Sad….

PinterestTry-SuperBalls-Blue-ImFeelinCrafty

This week we decided to make super balls. Which I think are the plastic balls that bounce. We weren’t completely sure, but we decided to try it anyway.

3f9dcf2d88762393476ff719b6932b47 copy

We followed the tutorial from Making Memories with Your Kids. Check out the original tutorial for the details (because you don’t want to follow mine if it’s super balls you are looking for!!) Her’s look amazing! Ours…. Not so much!

PinterestTry-SuperBalls-Materials-ImFeelinCrafty

The tutorial calls for glue, food coloring, borax, cornstarch and water. All the materials we had at home, so luckily this was a free one for us!

PinterestTry-SuperBalls-MixGlue-ImFeelinCrafty

We seemed to follow the directions correctly. First we mixed the glue and food coloring.

PinterestTry-SuperBalls-MixBorax-ImFeelinCrafty

Then we mixed the cornstarch, borax and water.

PinterestTry-SuperBalls-MixAll-ImFeelinCrafty

And we mixed the two concoctions together. Still following the directions to a tee!

PinterestTry-SuperBalls-Goo-ImFeelinCrafty

We pulled out our goo. Looks pretty much exactly like Making Memories goo….

PinterestTry-SuperBalls-Blue-ImFeelinCrafty

PinterestTry-SuperBalls-Orange-ImFeelinCrafty

Then we started to roll them into a ball. And we rolled. And we rolled some more. But they never really changed into a ball. Now if you are looking for a way to make brains for your halloween party… This would be great prop! It even felt kinda like brains. Or how I imagine brains to feel like, since I’ve never actually rolled brains around in my hands….

PinterestTry-SuperBalls-Fail-ImFeelinCrafty

So we called this a fail and cleaned up the mess!

I saw this done on another blog, following the same tutorial, and it worked for them. I have no idea what I am doing wrong. I want to give it another try, but I’m on my own. The kiddo is done with it. For a little boy that loves making art, he does not like to get very gooey! If I have better luck next time, I’ll let you know!

Have you ever tried this? Did it work? If you see I did something wrong, please let me know!


A Walk Down Memory Lane!

This weekend was totally sunny and felt like summer here in Seattle. The rain has come back, but in the meantime I was reminiscing about some of the fun summer projects the kiddo and I have done together! I thought I’d re-share some of my favorites that I want to do again this summer!

the water blob- I'm Feelin' Crafty

I really can’t believe we haven’t made another water blob! It was so much fun! Totally on the list for this summer!

ice cube paints- I'm Feelin' Crafty

We made the ice paint at the same time as the blob! I’d love to see what kind of paintings the kiddo would come up with this time!

GlueShirts-Main-ImFeelinCrafty


OK, I think might be one of my most favorite projects! The glue shirts were super cool! We’re so doing this again this summer!

TdayTurkey-Turkeys-Last-ImFeelinCrafty

Yes, this is a little fall like, but we love the salad spinner art. I think it would be fun to come up with a whole zoo of salad spinner animals. I wonder what other animals this would work with? What about a parrot? Or a peacock? hmmmm….What else???

Melted Bead Sun Catchers-I'm Feelin' Crafty- Windchime

And lastly, the melted bead projects. A great summer project, since I use my stove I need to open the house and send the kid outside while they melt. It’s a pretty popular post on the ‘ole blog, too. If you want to do it, read all the comments too, there’s a lot of questions answered and tips from other readers!

What projects do you have on the list for the summer?

No Sew Easter Egg Placemats- a Crafty Tutorial

I was all prepared to do a bunch of crafty Easter decorating, but I can’t kick this horrible cold. Needless to say, I haven’t gotten as many projects done as planned! But we did some sunny spring weather and we headed outside to do an Easter craft!

EasterPlacemats-Main-ImFeelinCrafty

First we did a fun and totally kid friendly project with stamping with toilet paper rolls. Then we glued them together with Speed Sew to make placemats!

EasterPlacemats-Eggs2-ImFeelinCrafty

EasterPlacemats-Eggs1-ImFeelinCrafty

With eggs and without!

EasterPlacemats-Materials-ImFeelinCrafty

Want to know what you need? Fabric for the front and back of the placemats, fabric paint, a bunch of toilet paper rolls, Speed Sew (you can sew these too, but I chose to use the Speed Sew). I also use toothpicks to spread the glue around, but they were MIA for the photo!

EasterPlacemats-Step1-ImFeelinCrafty

First step… Cut your fabric into 13×19 inch rectangles.

EasterPlacemats-Step2-ImFeelinCrafty

Put out the paint and get those rolls in there!

EasterPlacemats-Step3a-ImFeelinCrafty

EasterPlacemats-Step3b-ImFeelinCrafty

EasterPlacemats-Step3c-ImFeelinCrafty

How to get the egg shape? Just pinch one end. Or put a little more pressure on one side of the roll to squeeze the round shape into an egg shape. It takes a little getting used to, but it’s not hard!

EasterPlacemats-Step4-ImFeelinCrafty

EasterPlacemats-Step4b-ImFeelinCrafty

Then stamp! At first I thought we could use both ends of the toilet paper roll, but you can’t. You’ll want to use the top to add pressure to get your paint on evenly.

EasterPlacemats-Step4c-ImFeelinCrafty

I was going for a more graphic look. But my little helper went all artistic on me and started painting Easter Egg Heads! I was specifically told that this one CAN NOT become a placemat. It will be hanging on the wall!

EasterPlacemats-Step5-ImFeelinCrafty

Iron a 1/2″ hem on each side.

EasterPlacemats-Step6a-ImFeelinCrafty

EasterPlacemats-Step6b-ImFeelinCrafty

Now comes the Speed Sew! No sewing involved! (You can sew if you prefer, but now I have a way to not sew!) This step doesn’t need much glue. Just a little to tack it down.

EasterPlacemats-Step7a-ImFeelinCrafty

EasterPlacemats-Step7b-ImFeelinCrafty

EasterPlacemats-Step7c-ImFeelinCrafty

Glue the top and bottom together, wrong sides together. This step, I made sure to get really good glue coverage along the edges. Do this along each edge.

EasterPlacemats-Done-ImFeelinCrafty

EasterPlacemats-Back-ImFeelinCrafty

And you’ve got some placemats! Yea!!

EasterPlacemats-Corners-ImFeelinCrafty

EasterPlacemats-Last-ImFeelinCrafty

We had fun making these! I wish I had had some cardstock with me to make cards, too. It would have been a great project for some easter cards, but we ran out of time before our family date night! What do think? Look like fun?


A Printable Lego Valentine for You!

My son is all about legos, crayons for book making and magna blocks. I don’t have any more to say about magna blocks except that they are awesome. But I do have a lot more to say about legos, crayons and valentines!

LegoValentines-Main-ImFeelinCrafty

So what did we decide to do for classroom Valentine’s this year?

LegoValentines-Kiddo-ImFeelinCrafty

Give legos and crayons in the shape of legos!

LegoValentines-Hearts-ImFeelinCrafty

My favorite part of the Valentine is the lego hearts! These aren’t easy to find! I called the local Lego store and asked if they carried these, 2×2 coupling plates. They said no, those are pretty sought after. Why I asked. Because people like to make them into hearts! Oh…. Yep! That’s why I’m one of those people searching for them!

LegoValentines-Hearts2-ImFeelinCrafty

I looked and looked for these, but none of the tutorials I found, told me where to get the pieces. So I finally found them at Brick Owl. The website is pretty cool. You can pick your country, your brick and your color, then sort by seller and their shipping rates and minimum order requirements. Very cool!

LegoValentines-Crayons-ImFeelinCrafty

The kiddo’s favorite part is the lego crayons we made!

LegoValentines-Crayons1-ImFeelinCrafty

They are so easy to make. The hardest part was finding the old crayons! I reached out to our neighborhood parenting groups and gathered up everyone’s rejects! Loaded up the silicone molds that I got on Amazon.

LegoValentines-Crayons2-ImFeelinCrafty

Leaded them in the oven on 350 for about 10 minutes. Of course, temps and times vary per oven. Just keep an eye on it.

LegoValentines-Crayons3-ImFeelinCrafty

Take them out of the oven, let cool for a few minutes and then freeze! Freezing is the key!

LegoValentines-Crayons4-ImFeelinCrafty

Then pop them out!

LegoValentines-Crayons5-ImFeelinCrafty

The kiddo loved putting a little of every color in each mold. They turn out pretty muddy. I wanted them all one color. We compromised and just used 2 or 3 colors per mold!

LegoValentines-Cards1-ImFeelinCrafty

And then we put them all toegther! You can download the card here.

LegoValentines-Cards2-ImFeelinCrafty

I debated doing a lego heart shape on the front, but decided to leave it off the part and add it to the back.

LegoValentines-Cards3-ImFeelinCrafty

We can’t wait to give them out! We’ve got a few more to make and load up before the big day. But I think we’ll make it! Anyone else have a lego lovin’ kiddo?


Cone Turkeys Thanksgiving Craft Tutorial

Today I’m bringing home a post I did last year for Thanksgiving. I don’t do a lot of decorating for Thanksgiving, but this is a fun one!  I’m excited to share a fun craft my son and I created for you and your families! This is a great project to do today or even with the whole family while you’re waiting on the real turkey to cook on Thursday!

TdayTurkey-Main-ImFeelinCrafty

We call these funny little guys the Salad Spinner Ice Cream Cone Turkeys! hehehe! Or just Spinner Art Turkeys for short!

TdayTurkey-Turkeys-End-ImFeelinCrafty

We love salad spinner art and made a lot of it a while back. Then just recently my son found the spinner again and got it out and we’ve been loving it again! So after we were playing with it, I knew we had to incorporate this into a Thanksgiving craft. Hence the turkeys were born!

TdayTurkey-Materials-ImFeelinCrafty

What you’ll need is fall colored, acrylic paints, paper plates, waffle cones, googly eyes, glue, a little bit of yellow fabric and a little bit of red fabric, and scissors! And of course a salad spinner!

TdayTurkey-Paint1-ImFeelinCrafty

We LOVE making salad spinner art! As you may be able to tell from the paint build up along the sides! We found a used, cheap one at Goodwill for our art. I don’t recommend using the same one you use for your tasty salads. I’ve found that there’s usually a good collection of used ones at our local Goodwill or thrift shop.

So first you insert your plate in the spinner and add the paint. I try to get it in circles, but sometimes (most of the  time) it ends up in little dots!

TdayTurkey-Paint2-ImFeelinCrafty

TdayTurkey-Paint3-ImFeelinCrafty

Then spin!!! The fun part!

TdayTurkey-CutCones-ImFeelinCrafty

While the plates are drying, let’s work on the rest of the turkey. First off, you want to, very carefully, carve a little slit in the back of the cone. They are fragile and you might loose a few cones. You just want about a 1/2″ slit about 1″ up from the top of the cone.

TdayTurkey-Cut-ImFeelinCrafty

Next, cut out the beak and the ‘snood’. The beak is a little triangle and the snood is kinda like an mix between a l and a S.

TdayTurkey-Glue1-ImFeelinCrafty

TdayTurkey-Glue2-ImFeelinCrafty

TdayTurkey-Glue3-ImFeelinCrafty

And glue! The beak, then the snood and lastly the fun googly eyes!

TdayTurkey-CutFeathers-ImFeelinCrafty

Once the plates are dry, cut them in half with a little tab in the middle.

TdayTurkey-TailFeathers1-ImFeelinCrafty

TdayTurkey-TailFeathers2-ImFeelinCrafty

Insert the plate in the back slit of the cone. It’s going to want to flop around, so add a little glue and it will stand up straight!

TdayTurkey-Done-ImFeelinCrafty

You can try to make just one… But once the salad spinner is out… Good luck with just one!

TdayTurkey-Turkeys1-ImFeelinCrafty

I’ll bet you’ll end up with a ‘rafter‘ (a little Turkey Day trivia for ya) of turkeys! Make as many as you want for your Thanksgiving table! How many will you make???

MyArtsi Review and Giveaway!

Not too long ago, I was contacted by MyArtsi about reviewing one of their products. And the kiddo and I said YES!

Plusheez-GotIt-ImFeelinCrafty

MyArtsi is company that creates fun, easy craft kits for girls ages 6-13. (Yes, girls, but boys can play along too!) The company is comprised of 3 unique brands; Stickeez, Plusheez, and Glitter Petz.

Plusheez-MyArtsi-ImFeelinCrafty

The Stickeez is a fun product that comes with something, like a clutch or scrapbook, and a whole bunch of stickers to decorate it with. The Glitter Petz is a little animal toy that is totally ready to be covered in the bling stickers that come with it. And then there are the Plusheez! The one we picked to check out ‘cuase we love stuffies around these parts!

Plusheez-GotIt2-ImFeelinCrafty

Now don’t be confused by the kiddos fake smile in this picture! After he picked the Bella the Owl, (there’s also a heart, butterfly, fox, everyday he was asking when it was going to be here. ‘Is it here yet? Did my owl come today? When is my owl going to be here?’ Luckily, for us both, they mailed it right away and it came within a couple of days! We just happened to be home sick the day the mailman brought it our door. And boy was this kid excited even though it doesn’t show it well in this picture!

Plusheez-Contents-ImFeelinCrafty

The Plusheez animals come with the stuffie doll, a poker tool and a bunch of little fabric pieces to add to the stuffie to make it your own!

Plusheez-LineItUp-ImFeelinCrafty

It super easy to put together. You line up the fabric piece with a little pre-cut hole.

Plusheez-Punch-ImFeelinCrafty

Then poke it in! That’s it!

Plusheez-HappyDance-ImFeelinCrafty

See the happy dance? He’s coming to life once I got it all out of the box!

Plusheez-Owl-ImFeelinCrafty

You can follow the suggested color locations, or make it your own! I was a little worried that if he didn’t stay with the right colors in the right places, he might run out of the little fabric pieces. But no worries, it comes with extras!

Plusheez-Working-ImFeelinCrafty

Plusheez-Excited-ImFeelinCrafty

But either way, whether you follow the colors or make it all your own, the kiddo loved it! He only had one request about how he’d change it… ‘The next one we get, needs to be a boys design.’ So I’m not sure if MyArtsi has any plans of crossing into craft toys for boys, but when they do, I know who their first costumer will be! He really did love it!

Plusheez-Done-ImFeelinCrafty

See? Check out this smile!

And the lovely friends at MyArtsi are also offering one to one of my readers! You can pick any one toy from any of the three lines! Cool! So if you’re kiddo is more into bling than stuffies, there’s something here for them too! And if you can’t wait for the giveaway the product lines are already on the shelves of Walmart, Jo Ann’s, Meijer, AC Moore, and more!

Ready to WIN? You have Three ways to enter! And come back and leave a separate comment on this post for each entry!

1) Check out MyArtsi’s website and let us know your favorite  craft toy!

2) Become a fan of MyArtsie on Facebook.

3) And an extra entry for I’m Feelin’ Crafty subscribers. Just click to the right to subscribe.

That’s 3 possible entries! You must comment on this post to win. The giveaway will close on Sunday, December 8th at 11:59 p.m. PST, and we’ll choose one winner using Random.org.

I have been compensated with either payment or product for this post. All opinions are my own, honest opinions!