La Petite Pouch

La Petite Pouch! The name just sounds so fancy doesn’t it??? Ah, it makes me smile!

PetitePouch-Main-ImFeelinCrafty

You might remember this one from last year. It’s a Go To Sew Tutorial that I’m bringing home!

I needed a little special something to send to someone and I thought and thought about it. I almost just bought something. but then realized the error of my ways and decided to make something. And that’s where the La Petite Pouch was created!

I’ll tell you how I made it! It’s pretty simple! Ready?

PetitePouch-End-ImFeelinCrafty

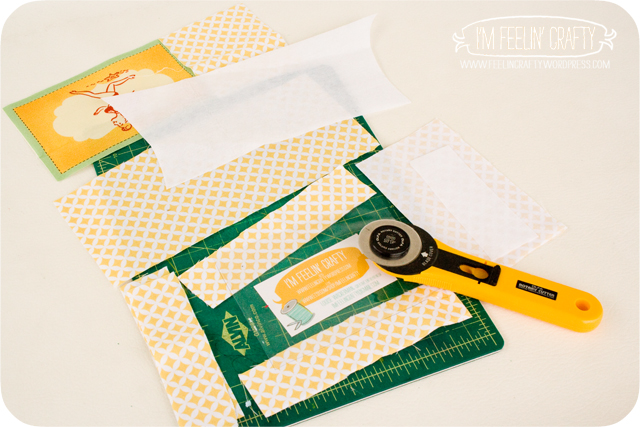
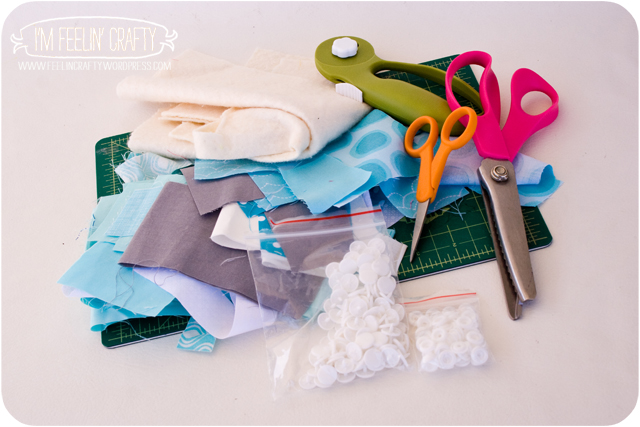
Let’s get our Materials: Fabric, thread, snaps (or buttons or Velcro…) and a cutter. You can also use interfacing to give it a little more stability.

PetitePouch-Step1-ImFeelinCrafty

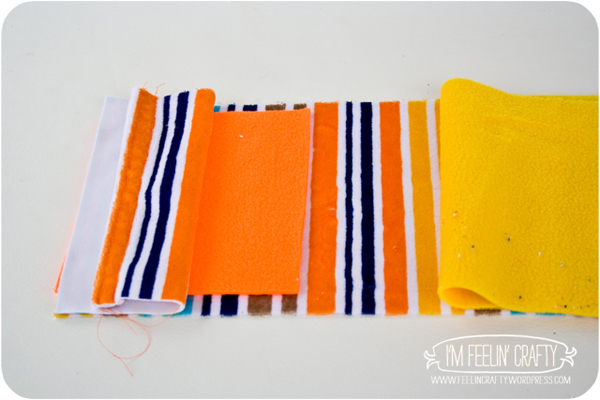
Step 1: Cut your pieces. 2 pieces for the flap that are 3in x 6.5in. And 2 pieces for the pouch that are 4.5in x 16.5in.

PetitePouch-Step2-ImFeelinCrafty

Step 2: Assemble the flap. Sew together the two flap pieces, right sides together. But be sure to only sew three sides. The turn it right side out and press.

PetitePouch-Step3-ImFeelinCrafty

Step 3:  Start assembling the pouch. Take one pouch piece, fold it in half and iron a little spot at the center. This pressed piece is only for locating the flap! Open the pouch piece flat and center the flap on one side of the center. And pin.

PetitePouch-Step4-ImFeelinCrafty

Step 4: Sandwich the three pieces together. Pouch pieces right sides together with the flap in the middle. Sew along the top long length of the pouch pieces.

PetitePouch-Step5-ImFeelinCrafty

Step 5: Open the pouch pieces and fold over. Short sides of the pouch pieces to the short sides of the pouch pieces. And then sew along the two short sides.

PetitePouch-Step6-ImFeelinCrafty

Step 6: Sew the bottom of each pouch piece. And don’t forget to leave a hole on the lining side!

PetitePouch-Step7-ImFeelinCrafty

Step 7: Miter each corner. Align the side seam with the bottom seam so that it makes a triangle and then sew across. I made it so that the sewn line across was about an inch. Then clip the corners!

PetitePouch-Step8-ImFeelinCrafty

Step 8: Pull Through.

PetitePouch-Step9-ImFeelinCrafty

Step 9: Sew closed the hole in the lining.

PetitePouch-Step10-ImFeelinCrafty

Step 10: Topstitch.

PetitePouch-Step11-ImFeelinCrafty

Step 11: Add your closure. I used my favorite Babyville snap set. But you can use and kind of snaps, buttons, Velcro or any other closure you can think of!

PetitePouch-Last-ImFeelinCrafty

And Viola! You have a La Petite Pouch! Did you notice my switch-a-roo? I changed to orange snaps right at the last-minute!

So what would you use your La Petite Pouch for??

Fabric Bunting Tutorial

Today I am working hard on projects to get done before we head out on a spur of the moment vacation, so I thought I’d bring home another tutorial I did last year for Go To Sew! I know it’s a repeat, but I’ve got some other fun things in the works to share so just bear with me!  A fabric bunting! Quick and easy! A sweet thing to hang in the house or give as a baby gift (or any sort of gift for that matter)!

Bunting-Main-ImFeelinCrafty

I made a bunting a LONG time ago and I made it too big! But this version is a smaller one with a little something extra. Quilting! Recently a colleague asked me to make one, so I did! And I thought I’d tell ya how I made it so you can make your own!

Bunting-Materials-ImFeelinCrafty

The materials you need… You’ll need fabrics for the bunting pieces and fabric for the binding, a cutting tool, pinking shears, and batting. And if you’re wanting to add letters you’ll also need something like heat and bond (two sided fusible adhesive) and your letters. The pattern for the triangles is here.

Bunting-Step1-ImFeelinCrafty

step 1- Cut and cut and cut! Your fabric and your batting into triangles.

Bunting-Step2-ImFeelinCrafty

step 2- Stack your bunting pieces. Lay the back side right side down, then your batting and then your front side right side up.

Bunting-Step3-ImFeelinCrafty

step 3- Sew the three pieces together on the two long sides. You don’t need to sew the top side.

Bunting-Step4-ImFeelinCrafty

step 4- Trim the two sewn sides with pinking shears.

Bunting-Step5-ImFeelinCrafty

step 5- If you’d like to add letters you can here. Iron on the interfacing to the back of the fabric you want the letters cut out of. Then trim the fabric to the right size of the letter. remove the backing from the interfacing. Then iron on the letter. Depending on the interfacing you use, you can stop here if it’s a no sew interfacing.  If it’s a sew on interfacing, topstitch now.

Bunting-Step6-ImFeelinCrafty

step 6- Now for the binding. You could use premade binding if you’d like. Or you can make your own. I cut two inch strips, sew-ed them together at an angle and then folded it in half and ironed. Then folded the sides in again and iron again. And lastly, sew it to the flags.

Bunting--End-ImFeelinCrafty

And you’re done! See? Simple! What fabrics would you use? What occasion would you make one for? Enjoy!

Luggage Tag Tutorial

Well, I’m sewing up a storm before I head out on vacation and thought it’s perfect timing to bring home another one of my tutorials I did for Go To Sew. This is our last year before school starts to take our vacation without the crowds! Did you go somewhere fun for Spring Break?

TravelTag-Main-ImFeelinCrafty

And if you’re going, you probably need a bag. And if you have a bag, you might need a tag on your bag! So let’s make one!TravelTag-fabric-ImFeelinCrafty

There has been this fun fabric on sale at the fabric shop where I work and I’d been eye-balling it! Then someone bought some, so I just cut another piece for myself! That’s what inspired me to make this project! It’s by Moda and part of the Salt Air line. I’m feeling that it’s meant for making luggage tags, but I’m not 100% sure!

TravelTag-Materials-ImFeelinCrafty

You’ll need fabric, heavy fusible interfacing, clear plastic, snaps or buttons and a tag holder thingy. You can make it any size, but if you want it kinda big like mine, you can download the pattern template here.

TravelTag-Step1-Cut-ImFeelinCrafty

First off, cut all your fabric! You’ll need a back and a front (sized from the template), (6) 1.25 x 4.5 strips for the sides and bottom, (1) 3.25 x 4 top, (1) piece of fusible interfacing the size of the front and (1) 1.5 x 2.5 piece of fusible interfacing for the top and (1) 2.5 x 5 piece of clear plastic vinyl.

TravelTag-Step2-Sew-ImFeelinCrafty

Next, start sewing! Line up 2 of the strips with the edge of the vinyl and sew a 1/4″ seam, then fold over and topstitch. Do both sides and then the bottom. For mine I cut 2 pieces for the back, sew-ed them together and made the right size for the back piece!

TravelTag-Step3-Interfacing-ImFeelinCrafty

Add your fusible interfacing. Yep, I switched my front fabric piece from yellow to red mid project! For the two little pieces add the interfacing in the middle and iron over a 1/4 or so seam. And add the larger fusible interfacing to the back of the front piece of fabric. The interfacing is to give some stability, but also to help with the snaps!

TravelTag-Step5-Top-ImFeelinCrafty

Fold over the top piece and top stitch it to the vinyl. I inserted the vinyl into the top fold of the top fabric. You can see in the picture above how the sides go all the way to the top of the fold.

TravelTag-Step4-Trim-ImFeelinCrafty

Trim the front and back if you haven’t already!

TravelTag-Step7-Snaps-ImFeelinCrafty

Add your snaps!

TravelTag-Step8-AttachFront-ImFeelinCrafty

Topstitch your ‘Window’ onto the front. This keeps your card from sliding around. It was hard to see my stitching, so I drew it in for ya!

TravelTag-Step9-Sew-ImFeelinCrafty

TravelTag-Step9-Pull-ImFeelinCrafty

Stack the front and back pieces, right sides together, leaving a hole to pull it through. Then pull it through the hole! After you pull it through, you can iron it flat. BUT BE CAREFUL! You don’t want to melt your vinyl! I just gave it a little hit of the iron from the back side and along the edges.

TravelTag-Step10-Buttonhole-ImFeelinCrafty

Make a button hole and add your  tag holder thingy. I don’t know what they are really called! I just happened to have one!

TravelTag-Back-ImFeelinCrafty

Stitch the hole closed!

TravelTag-End-ImFeelinCrafty

Pack your bags (hopefully you have a larger bag than this one!), get your travel books, add your tag and get ready to hit the road!

The Eared Earflap Hat! a tutorial

Bringing another tutorial home today! Things are crazy here! I’ve missed sharing with you this week! I’ll be back to normal soon, I hope! But while I’m doing too much at once, why don’t you make a fun hat!!

EarFlapHat-Main-ImFeelinCraftyI was competing in Project Run and Play and got behind in other things. If you are following along this season of Project Run and Play, this hat might look familiar… It’s my ‘Eared’ Earflap hat for the kiddos!

EarFlapHat-Step1-ImFeelinCrafty

It’s a quick one that you can do with some larger fleece scraps you might have around the house! All you need is two pieces of fleece (or you could use just one color too) and cutting tools! And you can download the pattern here.

EarFlapHat-Step2a-ImFeelinCrafty

Step 2: Cut out the pieces. You’ll need 2 of each color/print for the main pieces and the little ears. And a 3 inch strip about 15″ long (you’ll trim this later, so it doesn’t need to be exact!)

EarFlapHat-Step2b-ImFeelinCrafty

Step 3: Cut the slit in the outside fabric. You can do it on the inside pieces, but I’ve found with fleece that it doesn’t really need the darts on the inside.

EarFlapHat-Step3-ImFeelinCrafty

Step 4: Make your ears. Sew the ears together and then turn right side out.

EarFlapHat-Step4-ImFeelinCrafty

Step 5: Place the ears in the hat.

EarFlapHat-Step5a-ImFeelinCrafty

Step 6: Sew it together! First sew the ear slit closed. Then sew the middle 3″ slit between the two side pieces. And sew the middle strip and side pieces of the inside pieces together too.

EarFlapHat-Step5b-ImFeelinCrafty

Step 7: Trim the excess of the middle piece off. I trim it in a slight curve between the two sides.

Step 8: Put the inside and outside together, one inside the other, with right sides facing.

EarFlapHat-Step7-ImFeelinCrafty

Step 9: Sew along the side edge. You do need to leave a hole, about 2 inches.

EarFlapHat-Step8-ImFeelinCrafty

Step 10: Optional, but you can trim the curved pieces. With fleece it’s not quite as critical, but if you were sewing it with a different fabric, this really helps to get the fabric to lay flat. Since the fleece kinda stretches around, it’s not as critical.

EarFlapHat-Step9-ImFeelinCrafty

Step 11: Pull through the hole.

EarFlapHat-Step10-ImFeelinCrafty

Step 12: Hand sew the hole.

EarFlapHat-FinishHat-ImFeelinCrafty

And you’ve got a hat! Pretty easy! It would also be fun to recycle a sweater for this project!

EarFlapHat-Side-ImFeelinCrafty

EarFlapHat-End-ImFeelinCrafty

And what about in green?? Do you see it? A frog hat? hehehe!

A Quilted Pouch Tutorial

I’m obsessively sewing on a quilt, so I’m using today to bring home another project I made for Go To Sew!

I recently made this pouch as a pouch for pinking shears. Then the other day I bought a pencil box for my son. As we were walking out of the store, I was struck by a moment of confusion…. Um, why did I just buy that when I could make one, super fast and for the same price (if not less, since this only uses scraps)???? No clue! I just kept on walking….

QuiltedPouch-main-I'mFeelin'Crafty

So not only can this be a pinking shears pouch, but it can be an eyeglass case, a marker pouch, a credit card holder, a cash holder…. Basically anything you want to hold…. Ok, maybe not ANYTHING, like it probably wouldn’t work for a puppy. You’d need something else for that. But small things, this will work!

QuiltedPouch-pouch2-I'mFeelin'Crafty

Ready? It’s simple!

QuiltedPouch-Materials-I'mFeelin'Crafty

Materials:

Scraps!

a small piece of batting

Cutting devices

Thread

Snap (or you could use buttons or magnets)

QuiltedPouch-Step1-I'mFeelin'Crafty

Step 1: Sew the scraps together. But, before you can start sewing you need to determine the size you need! For my pinking shears I decided that the pouch needed to by 11 inches wide. That’s about 5 ” for the front and back, plus your seam allowances. Then the shears are about 10 inches tall, so the pouch needed to be 20″ plus the flap, which I made 5″. So for this pouch I needed a pieced piece 11″ x 25″. Once you figure the size you need, just start sewing those scraps together!

QuiltedPouch-Step2-I'mFeelin'Crafty

Step 2: Trim your piece to the exactly dimensions that you need.

QuiltedPouch-Step3-I'mFeelin'Crafty

Step 3: Fold the piece in half.

QuiltedPouch-Step4-I'mFeelin'Crafty

Step 4: Sew together one end, right sides together. It’s hard to see in this picture, but I really did sew the end together there along the line I drew! Then turn it back, wrong sides together.

QuiltedPouch-Step5-I'mFeelin'Crafty

Step 5: Trim the batting to the same length and width of your folded piece.

QuiltedPouch-Step6-I'mFeelin'Crafty

Step 6: Insert the batting between the folded pieces.

QuiltedPouch-Step7-I'mFeelin'Crafty

Step 7: Quilt the pieces together!

QuiltedPouch-Step8-I'mFeelin'Crafty

Step 8: Cut the binding. 2.5 inches by the perimeter of your pouch. Mine was 5.5 + 10 + 5 + 5.5 + 10 + 5 = 41 inches, plus extra.

QuiltedPouch-Step9-I'mFeelin'Crafty

Step 9. Fold over the pouch so that the sewn end is the exposed end under the flap. Sew on the binding.

QuiltedPouch-Step10-I'mFeelin'Crafty

Step 10: Add the snap.

QuiltedPouch-pouch1-I'mFeelin'Crafty

Step 11: Add the pinking shears! You’re done!

QuiltedPouch-pouch2-I'mFeelin'Crafty

What would you use your for???

It’s a Kid! In a T-shirt! No! It’s a Super Hero! In a Cape!

Does this look familiar? This is a tutorial I did for Go To Sew and I’m bringing it home today!

Every time we go to the Gap outlet my son begs for one of those t-shirts with the capes Velcro-ed to the back. And it’s not just the Gap, they have them other places too. It doesn’t matter where he sees them, but he BEGS for one wherever we are. And I always same the same thing, ‘I can make that for a lot less than 30 bucks!’ We’re kinda like a broken record. Please, I can make that, Please, I can make that, Please… Get the idea?

Cape-Title-I'mFeelin'Crafty

So I finally sat down and made him one and he wore it all over town!

Cape-Jump-I'mFeelin'Crafty

OK, this is super simple and can be done with old t-shirts you have around the house! My son decided he wanted Bat Man with a black t-shirt and yellow symbol and blue cape. Honestly, I didn’t know Bat Man’s cape was actually blue. Yes, my then 4 four-year old son convinced me that he knew what he was talking about. I think he loved saying, ‘See, I told you so!’ when we googled images of Bat Man online!

This tutorial is a two part-er. First we did a freezer paper stencil and then we made the cape.

Materials:

Cape-Materials-I'mFeelin'Crafty

A blank t-shirt, color corresponding to your super hero of choice.

Fabric for the cape. About a 1/2 yard, or another adult t-shirt.

Freezer Paper

Your Super Hero Icon

Fabric Paint

Spongy Paint brush

Xacto Knife

Paper for making a pattern.

Velcro

Part 1: The Freezer Paper Stencil. I’m going to go over this quick, since it’s easy and I’ve already done a tutorials here

Step 1: Cut your image out of the freezer paper.

Cape-Stencil-1-I'mFeelin'Crafty

Step 2: Iron it on the shirt with the shiny side down (touching the t-shirt)

Cape-Stencil-2-I'mFeelin'Crafty

Step 3: Paint! Mine took a few (or more) coats of paint.

Cape-Stencil-3-I'mFeelin'Crafty

Step 4: Remove the freezer paper!

Cape-Stencil-4-I'mFeelin'Crafty
Part 2: Make the cape!

Step 1: Make the pattern. Trace the neck and shoulders. The cape will sit up along the neck of the shirt, so we want this shape along the top. Then you decide the length and width! The t-shirts I ‘knocked off’ keep the cape the same length as the t-shirt. We decided to make ours about 3 inches longer. And about 5 inches wider than the back of the shirt.  After a few patterns, I ended up going straight from the shoulder to the edge of the shirt. As in no curves!

Cape-Pattern-1-I'mFeelin'Crafty

Cape-Pattern-2-I'mFeelin'Crafty

Step 2: Cut the cape.

Step 3: Hem each side of the cape.

Cape-Hem-I'mFeelin'Crafty
Step 4: Cut your Velcro. I just happened to have color coordinated Velcro! How cool is that??? You don’t need it, but they do have all sorts of colored Velcro out there! Can you tell how excited I was when I found the blue? I already had the black. Ok, OK, OK! Back to the superheroes! Cut your Velcro in 1 1/2″ pieces. Position the Velcro and sew it on both the t-shirt and the cape.

Cape-Velcro-I'mFeelin'Crafty

Cape-Velcro-2-I'mFeelin'Crafty

Step 5: Turn your kid into a Super Hero! Or you, if it’s for you!

Cape-Photo-1-I'mFeelin'Crafty

So remember how I said I knew I could do it for less than 30 bucks? Well, the t-shirt was 4, the paint was 1 and the blue Velcro was 1 and I had everything else on hand. So it ended up being 6 bucks! Oh, yeah!

Cape-Photo-2-I'mFeelin'Crafty

Which Super Hero would you be??

Cape-Photo-3-I'mFeelin'Crafty


Shared with these Link Parties!

The ‘Eared’ Earflap Hat Tutorial at Go To Sew!

For the last year, typically every second Friday you can find me over at Go To Sew with a fun and typically pretty quick and easy tutorial! This month I was way behind with the whole holiday thing and Project Run and Play starting up! So here I am with my Go To Sew tutorial, just a tad bit late this month!

EarFlapHat-Main-ImFeelinCrafty

If you are following along this season of Project Run and Play, this hat might look familiar… It’s my ‘Eared’ Earflap hat for the kiddos! It made a more ‘fluffy’ apearance in my Project Run and Play Arctic Wolf Outfit!

It’s a quick one that you can do with some larger fleece scraps you might have around the house! Be sure to head over to Go To Sew for the tutorial!


Shared with these Link Parties!

Envelope Pillow Tutorial

Like I mentioned in my post last week for the Stay Put Scarf, I’m bring home some of my Go to Sew posts from the last year. And I’m starting with some that I think would make great last minutes gifts. So today, I’m sharing the envelope pillow tutorial!

EnvelopePIllowGift-Main-ImFeelinCrafty

I made quite a few of these in the last week for holiday gifts! (more will be coming on the random pot holder in the picture)

EnvelopePIllowGift-A-ImFeelinCrafty

The A is an antique mall find that I remade into a ‘Bama gift pillow! I made a grey and red striped background and then sew-ed the A on top!

EnvelopePIllowGift-CB-ImFeelinCrafty

I was doing a little shopping at CB2 and I saw these pillows with white and silver and red. I loved them! And I knew I just happened to have some fluffy white fleece and some silver vinyl. So I went to town making the pillows. I made three for myself and then I made four others for a handmade FB swap I said I would do in January! Their $30 ones look fabulous! But I am also pretty proud of how my ‘from my stash’ ones turned out as well!

So here’s the easy peasy tutorial!

EnvelopePillow-Main-ImFeelinCrafty

You can do anything with it! You can make your kid one out of one of their favorite shirts that they’ve outgrown… Or did you find some fancy fabric, but if was so fancy you really know you should only buy a half yard… Perfect for a pillow! Or you can do a quick little quilting job and have a baseball inspired pillow!

EnvelopePillow-Materials-ImFeelinCrafty

So what you’ll need is easy… A Pillow! Fabric, thread, cutting implements, and some batting if you want to do a little quilting.

EnvelopePillow-Step1-ImFeelinCrafty

First you cut! Cut out the front roughly a half inch larger than you pillow. For the back you’ll cut two pieces. I cut them to overlap by about three inches. For instance, if you pillow is 14 inches wide, I’ll cut two pieces 10 inches wide. If you’re going to be quilting, cut a piece of batting and a cover for the batting, both the same size as the front piece.

EnvelopePillow-Step2-ImFeelinCrafty

Hem the edges on the back two pieces.

EnvelopePillow-Step3-ImFeelinCrafty

If you’re going to do quilting on the front, go for it! Then cover the back of the quilting with you extra piece.

EnvelopePillow-Step4a-ImFeelinCrafty

EnvelopePillow-Step4b-ImFeelinCrafty

Stack them all together! Back of the quilted piece, right side down. Front of the pillow, right side up. Then stack the two back pieces, right sides down.

EnvelopePillow-Step5a-ImFeelinCrafty

EnvelopePillow-Step5b-ImFeelinCrafty

Hem the edges on all four sides. I like to back stitch over the overlapped back pieces. You’re going to be pulling at it here when you stuff the pillow in, so a little extra stitching helps!

EnvelopePillow-Step6-ImFeelinCrafty

Then trim the corners.

EnvelopePillow-Step7-ImFeelinCrafty

I like to trim the edges with a pinking shear. Or you could use a serger.

EnvelopePillow-Step8-ImFeelinCrafty

Turn it right side out. (yes, my back is not even, like I mentioned above, but it is overlapped like I mentioned.)

EnvelopePillow-1-ImFeelinCrafty

Then stuff that pillow in and enjoy!

See? Super simple! Quick and a sweet gift! I made mine for a friend that wanted a St Louis Cardinal pillow…

Capture

I’m not much for using fabrics with team logos and such, so I took their colors and logo and made mine.

EnvelopePillow-3-ImFeelinCrafty

EnvelopePillow-2-ImFeelinCrafty

What do you think? Does it say St Louis Cardinals without literally saying St Louis Cardinals? I hope so! I didn’t do a bird. But I did baseballs (don’t look at the basballs too closely, it’s my first time doing little bitty circles!), the yellow bat and the blue outline…. Crossing my fingers that she likes it!

The Stay Put Scarf Tutorial

I’m bringing some of my Go To Sew tutorials home this month! And I’m starting with this Stay Put Scarf Tutorial because it’s freezing here and I just stole this one from my son and I love it! (Yes, he has another one… Don’t loose any sleep fearing that he’s out in the freezing cold without the necessary warm things) Also, it’s a quick and easy holiday gift idea!

GoToSew-Scarf-title-I'mFeelin'Crafty

My son has been eyeballing scarves, but they are either too expensive, too long for a 4-year-old or something that I know that I can make. So I decided, I’ll just make one! And I’ll make it with a couple of easy enhancements. Every scarf needs a pocket to stash treasures that you find out and about. And a little strap so it stays in place… Hence, the Stay Put Scarf.

GoToSew-Scarf-pocket-I'mFeelin'Crafty

Materials: fabric, cutting materials and tread! I used fleece and minky fabric. That’s it!

GoToSew-Scarf-Materials-I'mFeelin'Crafty

Step 1: Cut the fabric.

GoToSew-Scarf-Step1-1-I'mFeelin'Crafty

You’ll need:

2 strips of 8×38 inch fabric for the front and back of the scarf.  I made mine for a small 4-year-old, you might want to make yours longer for a larger kid or an adult.

A 2.5×8 inch strip for the strap.

Two pieces of 7×6 inch fabric for the fringe.

And one piece of 7×8 inch fabric for the pocket.

GoToSew-Scarf-Step1-2-I'mFeelin'Crafty

Step 2: Make the Strap.

GoToSew-Scarf-Step2-I'mFeelin'Crafty

Sew the strap together, with right sides together and then pull it through itself.

Step 3: The pocket.

GoToSew-Scarf-Step3-I'mFeelin'Crafty

All you need to do here is hem one of the 8 inch long sides.

Step 4: Assemble.

GoToSew-Scarf-Step3-1-I'mFeelin'Crafty

Layout the front side of the scarf, right side up. Center the fringe piece right side down. Add the pocket, right side down. And lastly, add the back side of the scarf, right side down.

GoToSew-Scarf-Step4-2-I'mFeelin'Crafty

Pin in the strap. I pinned mine 6 inches toward the pocket from the center. Does that make sense? Find the center. Then measure  6 inches toward the pocket end. That’s where the strap goes. Again, like I said earlier, this one is for a small 4-year-old. The placement of the strap might change based on the size of the kiddo.

GoToSew-Scarf-Step4-3-I'mFeelin'Crafty

Next layer on the other end fringe. Again, right sides together.

GoToSew-Scarf-Step4-4-I'mFeelin'Crafty

Pin all the layers together for the whole scarf.

GoToSew-Scarf-Step4-5-I'mFeelin'Crafty
I have this little problem of forgetting to leave holes when I’m sewing things together, so I’ve started adding double pins where I want to leave a hole. Just a little reminder!

Step 5: Sew it all together. (Except between those double pins!)

GoToSew-Scarf-Step5-1-I'mFeelin'Crafty

Step 6: Trim the corners and pull it all out through the hole you left.

GoToSew-Scarf-Step5-2-I'mFeelin'CraftyGoToSew-Scarf-Step6-I'mFeelin'Crafty

Typically I’m a top-stitcher. I love to top stitch. EVERYTHING! But not this one. You can, but for some reason on this one, I didn’t feel like it needed it. But do sew the hole closed!

Step 7: Make the fringe.

GoToSew-Scarf-Step7-1-I'mFeelin'Crafty

I originally told you to make the fringe 6 inches. Now’s the time you decide how long the fringe is actually going to be. I made mine 2.5 inches!

GoToSew-Scarf-Step7-2-I'mFeelin'Crafty

Then trim the fringe, by cutting into 1/2 strips, but stop the cuts about 1/2 to 1 inch from the end of the scarf.

GoToSew-Scarf-StepDone-I'mFeelin'Crafty

And that’s about it! Nice and simple and completely your own!My son and I made this one together. He had his idea of all the colors he wanted in an outfit I was making for him, but we didn’t have orange, so we picked it up here in the scarf. And like I said, it’s all his (well, and mine too now!). His ideas, the colors he picked out and now it fits him perfectly! Much more fun than buying one already made. I hope you enjoy making one as much as we did!

Envelope Pillow Tutorial at Go To Sew

This month over at Go To Sew, I’m sharing a quick and easy envelope pillow tutorial! A great gift idea…

EnvelopePillow-Main-ImFeelinCrafty

I made mine for a friend that wanted a St Louis Cardinal pillow…

Capture

I’m not much for using fabrics with team logos and such, so I took their colors and logo and made mine.

EnvelopePillow-3-ImFeelinCrafty

EnvelopePillow-2-ImFeelinCrafty

What do you think? Does it say St Louis Cardinals without literally saying St Louis Cardinals? I hope so! I didn’t do a bird. But I did baseballs (don’t look at the basballs too closely, it’s my first time doing little bitty circles!), the yellow bat and the blue outline…. Crossing my fingers that she likes it!

Be sure to check out the tutorial over at Go To Sew!