A Little Little Mini Quilt

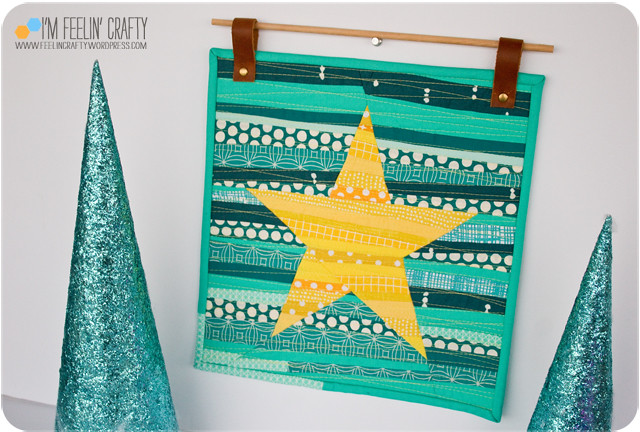
Another oldie that I never posted! This little little mini quilt was for a swap that the Seattle Modern Quilt Guild hosted way back in 2021! The swap was called the Friendship Mini Mini Quilt Swap. The guild paired up members that we might not know well to help the guild members reconnect after the pandemic.

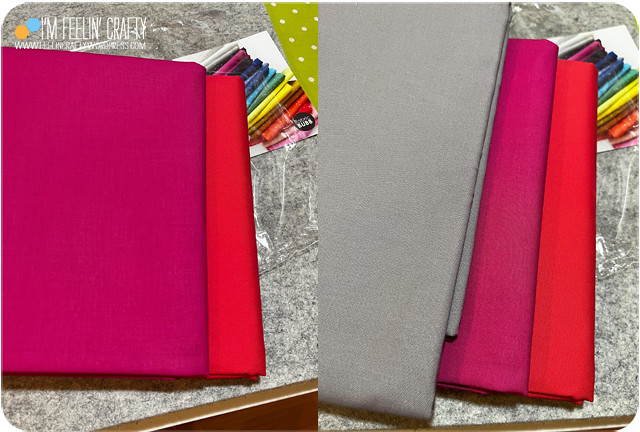
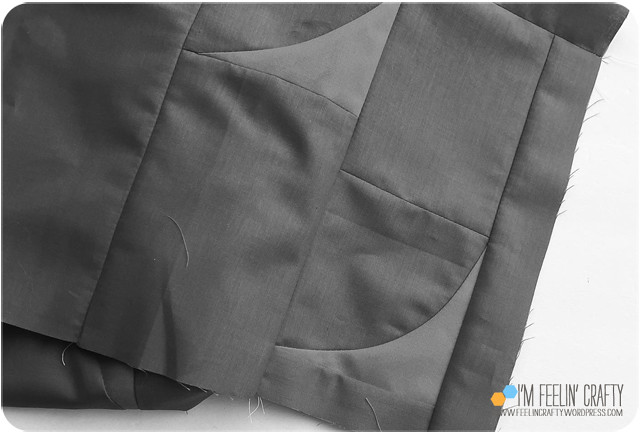
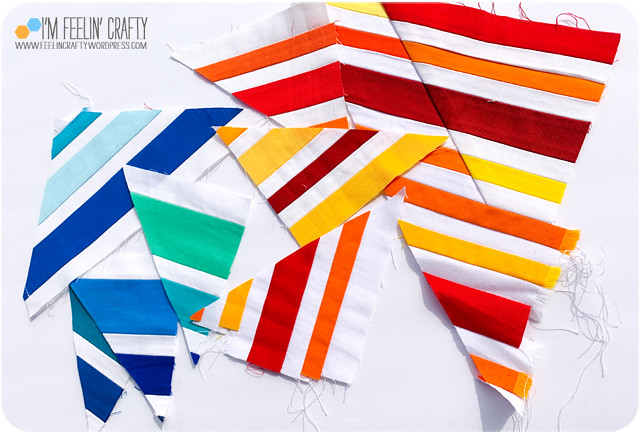
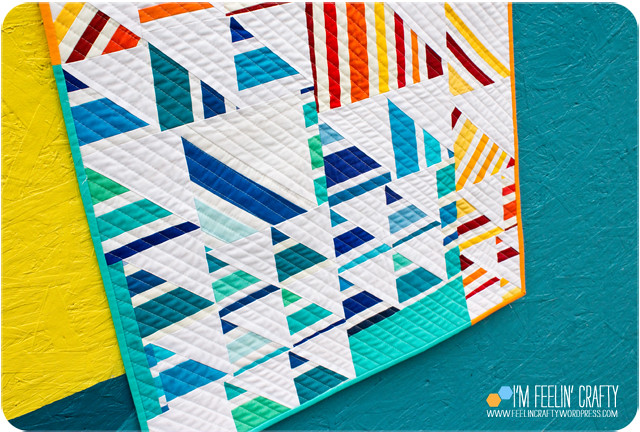
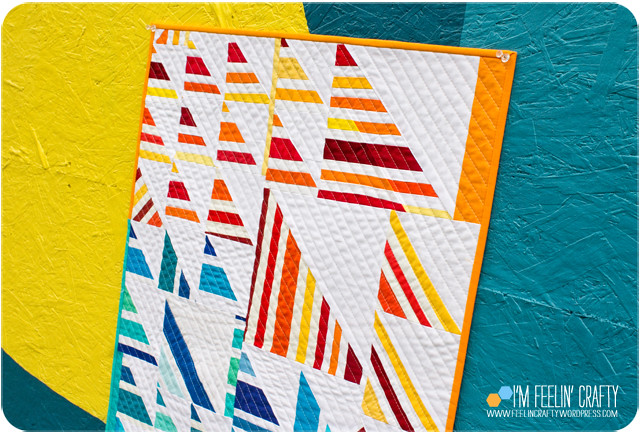
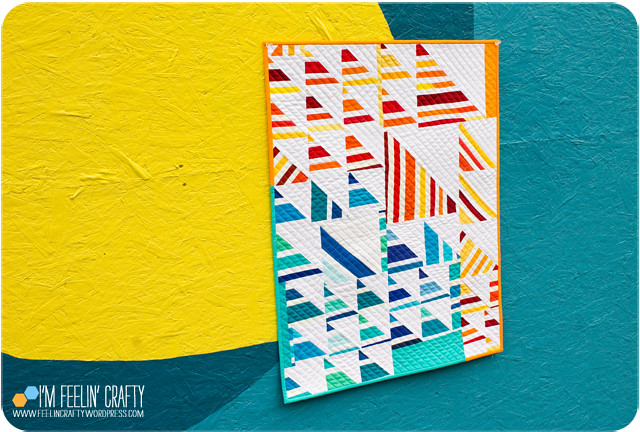
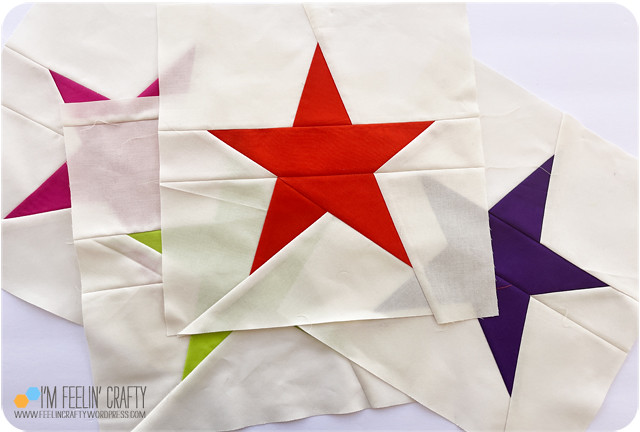
I had just recently finished my Rollin’ Rollin’ Rollin’ quilt, and decided to start with a left over block from that quilt. Then pulled some scraps and did a little arranging, a little different arranging and then piecing them together! I was pretty happy with how it turned out.

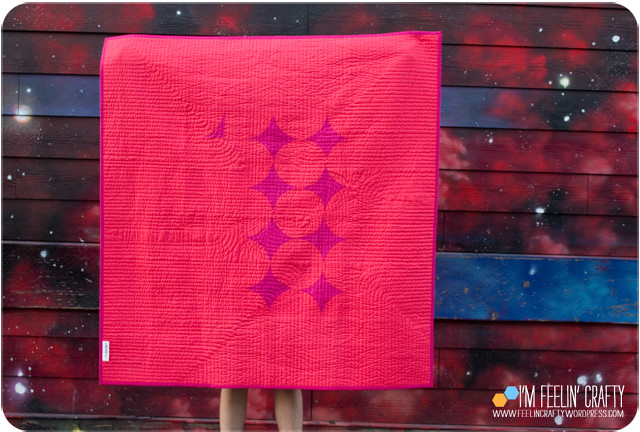
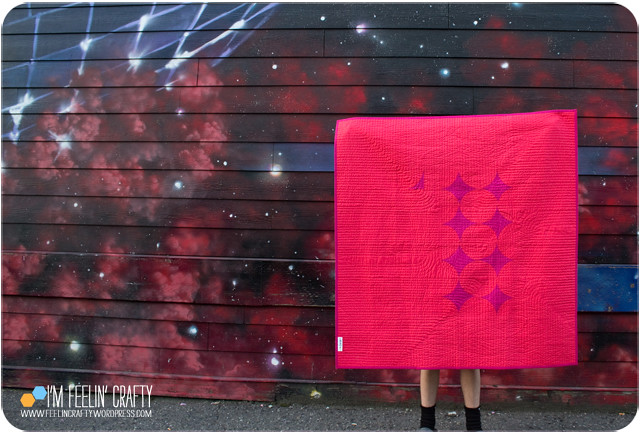
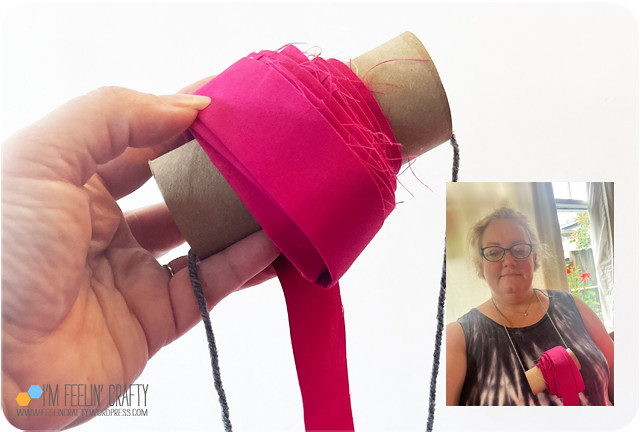
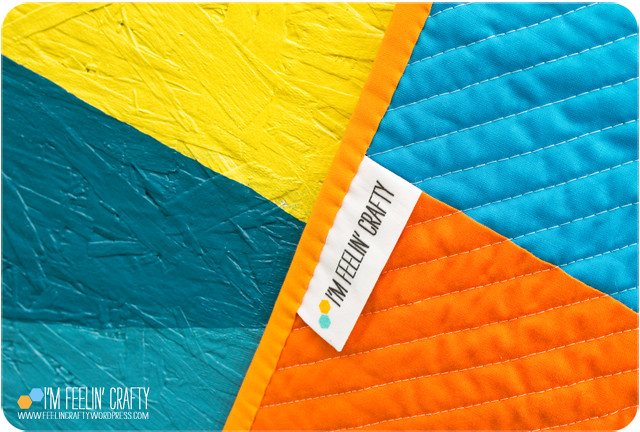
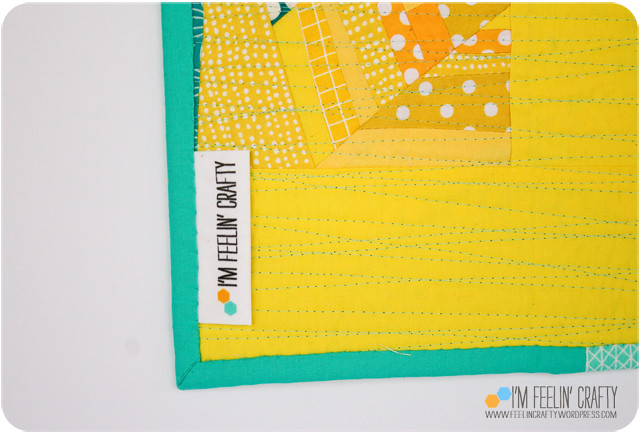
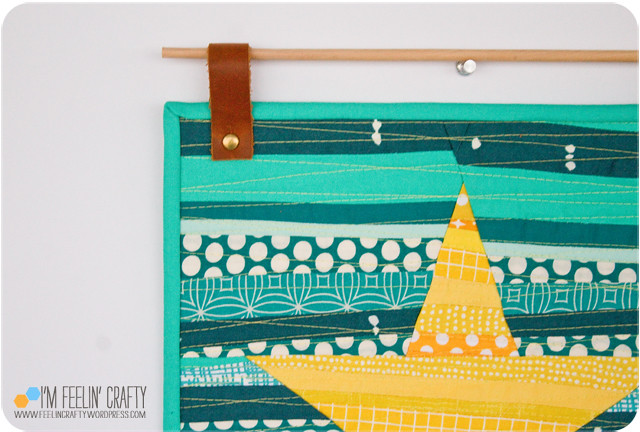
You can see by my fingers, it’s a little little mini quilt! It was about 6″ square.

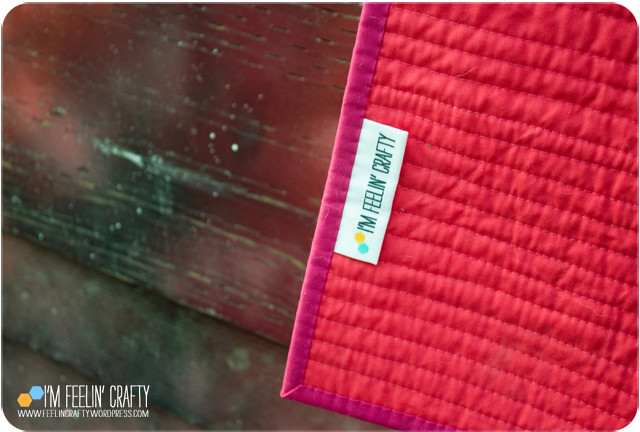
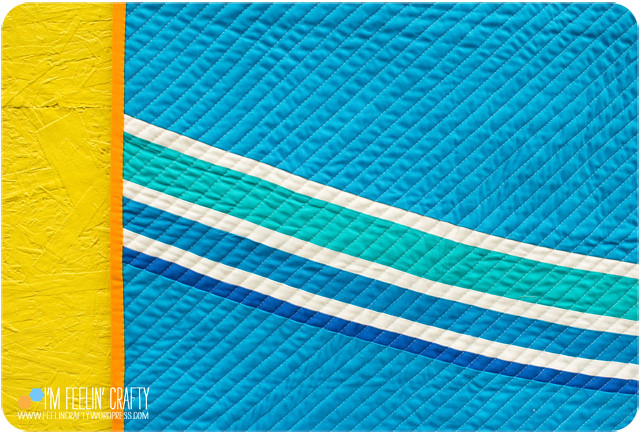
At this scale I did not piece the back too! ha! But I did add a label.

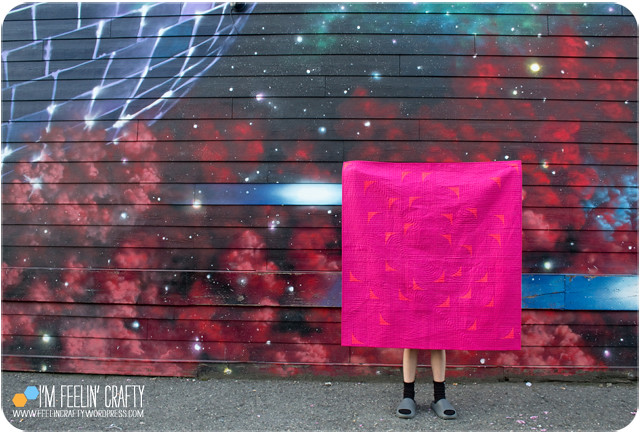
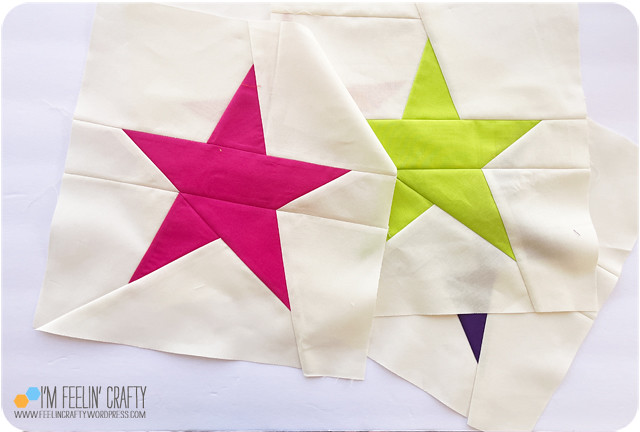
And this is the mini quilt I received from the swap from a member on the East Coast, Ruth. Needless to say, we didn’t get to exchange in person.

It was a fun little quilt to make! I don’t make little little quilts very often! Maybe I should make them more often. A series could be fun!

Lullaby- A Baby Quilt

I wanted to make a baby quilt for my co-worker, so I snooped around for her nursery style and colors. She showed me her picks that were mostly green and grey. I remembered I had a bag of left over scraps in this color scheme, so I pulled them out!

My ‘starter’ set, I’ll call it, didn’t have the darker green that she was using. I added in a dark green and it just fell a little flat for me. I took those out and added in a more greeny green and it worked.

You can see the process I took. I started with most of the original scrap bag, but to get to the baby quilt size I wanted, I had to keep adding to it. I kept with the same colors and shapes, mostly HST. Eventually, I got it where I needed it. When I do improv, often I have to figure out how to piece the different sized blocks. On my phone, I draw out how to group the blocks to piece them together.

I ended up at about 32×34 inches and I really enjoy the balance of the different blocks and colors!

Usually, I piece the back of my quilts. This time I was really excited about using the Charley Harper Bookends fabric, so I did a whole cloth back.

The cutest little baby was born in December, and I finished the quilt in January. A little late getting to her, but it was well received, and I love sharing my quilts with others!

X Marks the Creation- The Kiddo’s Quilt

This bog post is WAY late. Even though it took years to post it doesn’t mean I’m any less impressed with my kiddo! Way back in 2020 he designed and quilted this mini quilt and won 2nd Place in the Youth Category at Quiltcon!

Back in 2020, Curated Quilts hosted a youth mini challenge Youth Mini Quilt Challenge. The challenge was to have youth and another quilter collaborate on a 10×10″ to 16×16″ quilt that used navy blue, mulberry, spring green, aqua, evergreen, soft grey, and white.

I pulled out some scraps in the colors noted for the challenge and hung them on the design board.

The kiddo came in and arranged them in an X design with overlapping colors. Then I came in and pieced the scraps to match his design as close as possible to the original layout. You can see in the picture above, I would piece a mirror of what he designed for each arm of the quilt, before taking down his layout.

Then the kiddo came back and did all the quilting!

We ended up not meeting the timeline or the size requirements for the Curated Quilting challenge, but we pressed on and just went with it. And I’m glad we did. It just couldn’t be that small!

Once he had it on the design wall, it was too cool to try to downsize it to fit the challenge. Instead, we entered it in the Quiltcon show, it was accepted, and he won 2nd Place in his category!

The kiddo’s quilt description-

I started this quilt by making up ideas with my mom and this one just stuck. I came up with the design by thinking about geometric shapes. First off it was just a plain old X, but then I thought we needed to add more colors. So I got the idea of stacking the colors onto each other in different sized strips.  I included the white and grey as something to make the colors POP!  My mom pieced it because I’m not that advanced, but I came up with the colors and placement and everything. After that, I did all the quilting and binding.

I got the notice about him winning and had to keep it a secret until the Awards ceremony! He was having a sleepover at the time and I had to make them both watch. I think they were wondering why! Until the Youth announcement! Yea!

And here is now with the quilt. He’s grown a lot since then, but we still love the quilt!

The back we pieced we pieced with the scraps left over from the front.

I’ve been trying to get him to make another one. He started one, but never finished it… I’m still working on it!

Log Cabin Play

Log Cabin Play! One of my all time favorite quilts!

Back in 2021, I took a zoom class with Cheryl Arkison via our Seattle Modern Quilting Guild. The class was called Traditional Variations. The class was to take some familiar or traditional blocks to shake them up! We ‘played’ with improvisation, scale, and color to create fun and funky takes on the traditional block.

I obviously chose the log cabin block and pulled pink, yellow, red and orange scraps from my scrap bins and set to work! I tried to make each block different. Every one of them was a log cabin, but each one was slightly different. Each one did have white between the color pieces, that was my one real rule.

Once I had all the blocks I needed, I started piecing them together. The problem I had was that I had no idea how to quilt it! I knew I wanted to focus on the log cabin, but how??? I couldn’t quite figure it out, but I knew who could! I decided to send it to my friend, Dionne, to quilt it for me. This was my first quilt I ever sent out to someone else to quilt! I knew it was in good hands!

Together we decided to only quilt the white fabric. We agreed on three things, pop the log cabins, only quilt the white fabric and no feathers! Those were the only guidelines I left with Dionne!

And WOW! With Dionne’s help, this quilt turned out fantastic!

Look how cool the quilting is. Each area is quilted a little bit different, just like each log cabin is slightly different, too! My very favorite part of the quilt is this piece of the 4 quarter log cabins. When I pieced the quilt, I looked at pulling the quarter cabins apart, but I decided I really liked them left together!

Remember how I said the top was all from my scrap bags? Well, I then raided my stash for the back. I gathered up small pieces of yardage I had that fit the color scheme to make one really big log cabin!

I love how cheery the back is!

I started this before I knew that there would be a log cabin challenge at Quilt Con 2023. I was honored that this quilt was selected to show in that challenge exhibit!

And a shout out to the mural artist for the mural that served as a perfect backdrop for this quilt, Craig Cundiff.

The Hocus Pocus Quilt

I’ll say it right out. I’m apparently not the best photographer on crutches! Both of the these Halloween quilts have deserved better photos, but it is what it is!

Isn’t this a cute one! It is the Hocus Pocus Quilt by Corinne Sovey. I love the graphic nature of her patterns! I also made her Santa’s Helpers quilt.

One thing I really like about her patterns is that the blocks use different techniques. Most of the blocks are tradition HST and cut pieces of fabric sewn together. Others are paper pieced, like the broom and the witch’s boots. And the monster eyeball and cat had some hand applique.

I did do one little cheat… The pattern calls for piecing the striped blocks. I just happened to still have this striped fabric from way back when I made a quilt only out of the striped fabric, the Row by Row QAYG quilt in 2016.

On both of her quilts, there has been one block that I just decided to do my own way! On this one it was the Star block. The pattern has a english paper piecing method for the star, but I decided to make it a foundation paper pieced block. You can still download the block here.

ok… I love the back! I really love the back….

I had a bunch of triangular pieces and squares from the striped fabric on the front, so I started sewing those together with other solid scraps. Rather than squaring them off, I started sewing them together just how they turned out. I filled in the little angle pieces with green fabric and added a panel form one of my Halloween panels I have stashed not knowing what to do with! ha!
And if you hadn’t noticed yet, I had it quilted with bats! Can you see how cute they are??? I had Jana Royal quilt it and am super happy with how it turned out! I asked to just have straight lines, but then figured if I’m handing it over to someone, why don’t I get something fun that I could never do on my own???

This was a fun one and I’m really excited that I got it done in time to cuddle up watching silly Halloween movies! And maybe waiting for some trick or treaters! Happy Halloween!

Mini Series Mini Halloween Quilt

I made all these blocks last fall and was able to finish the quilt prior to Halloween this year! Giucy Guice and Alison Glass had a sew along to make their mini series paper piecing mini blocks and I decided to play along. I tried to play along on past sew alongs, but never succeeded in finishing all the blocks. This time I did and I even made some more than once!

I was inspired by a fabric pull I saw on Fabricbubb’s website. I love the fabric pull! A very bright Halloween pull to me.

The first two blocks we worked on were the Log Cabin Block and the Triangle Cabin block.

The Triangle Cabin block I didn’t use in the quilt, but in the Halloween Banner Garland I shared last week.

When I first started out, I knew I wanted the blocks to be Halloweeny, but I wasn’t sure what I was going to do with them. I knew pretty soon it was going to be a quilt! For the Log Cabin block, I decided to add in some other spooky elements! I started playing with the Spooky FPP Patterns by @spunstraw.

The next two blocks were the Courthouse Steps and Diamond Sidestep blocks.

I added the cat from the spooky FPP patterns to the Courthouse Steps block. I like showing the block itself with the candy for scale! These are tiny piecing patterns! Did I mention that?? Very tiny! But the blocks are made so that you can have tiny blocks or make them larger. I made this larger so I could add the cat in the middle!

Then I made the Diamond Sidestep block. When I made it all I could picture was an eye, in particular a cat eye! Warning, you may never see this block as not a cat eye again if you continue to read!

So I made two of these blocks!

Then sketched out the cat to go with these eyes!

The cat fits in the quilt just right if you ask me!

Next up were the Pineapple and Hexagon Steps blocks.

The Pineapple block plus the witches hat spooky block!

And the Hexagon Step block. This is one of only two blocks that I added in black into the halloween rainbow of fabric and I like it!

Next up Triangle Geese and Bloom blocks.

The Triangle Geese block also looked like an eye to me! So I made two to make another eyeball!

The Bloom block is probably one of my favorite of the series!

Next up was the Stretched Geese and Criss Cross blocks.

I added the ghost to the middle of the Criss Cross block!

And lastly, we made the Curved Cabin and Rainbow blocks.

I really did love the Curved Cabin block, but it got a little wonky when I quilted the quilt! I do love the little skulls in the corners. they fit perfectly!

At this point you can probably imagine what I thought about this Rainbow block! Yep, another eye ball! This one is a Cyclops Eye, though! But again, to get the eyeball, you need to make the block twice…. And there seemed to be an extra million pieces in this block!
Then came the paper removal… Luckily, it didn’t take as long as I had anticipated that it would.
For all the piecing on the front, a solid back seemed just fine for this mini quilt! I love this fabric and I’ve been holding on to it for some time. the colors were perfect and the piece I had left was almost just the right size! I think I’m down to scraps only left of this fabric.
The label picture! 🙂
I got a little over the top on this sew along. I made duplicates of 4 of the 12 blocks. I think if I do this sew along again, I’m sticking to one of each! 🙂

We’re enjoying having this one hanging in the dining room for the holiday!

Magenta Crush- COTY Quilt 2023

For the last three or so years, I have always had the intention of playing along and making quilts out of both the Kona Color of the Year and the Pantone Color of the year fabrics. I’m good at buying the fabric, but not so good at following through! I did use the Kona COTY 2019 in my Begonia Quilt. It seems like there were others, but… The good news is that I followed through this year!

MagentaCrush-FabricPull-ImFeelinCrafty

This year I ordered both the Kona COTY, Crush, and what I ventured was going to be a good match for the Magenta Pantone COTY, Cotton Couture Fuchsia. I ordered them both from one of my favorite shops, Fabric Bubb. I didn’t have any intention of using them in the same quilt, but when I opened the package, I fell in love with the colors together. I considered adding in a third color, but in the end decided not to!

MagentaCrush-Sketch-ImFeelinCrafty
I grabbed my pile of quilt sketches to find the right one! (you may even notice the sketch that led to the last quilt I posted, Subtraction!)
MagentaCrush-QuarterCircles-ImFeelinCrafty
Then set to piecing the Quarter circles for the front and made the opposite quarter circle blocks for the back.
MagentaCrush-ContrastColor-ImFeelinCrafty
MagentaCrush-Contrast-ImFeelinCrafty
In all the good quilting design classes, they always tell you make sure you have the right amount of contrast in your blocks, to move blocks around to get the right amount of contrast to keep the eye moving across the quilt. One way to check this is to take a black and white photo of your quilt. I have barely any contrast in this quilt and I love it. For fun, I did the black and white test. Not so much contrast here!
MagentaCrush-Front-ImFeelinCrafty
And this is what I ended up with. Low contrast and all! I’m still totally struck by how much I loke the colors together!
MagentaCrush-Corner-ImFeelinCrafty
MagentaCrush-TopHalf-ImFeelinCrafty
My quilting plan started with two bends, one starting at then curving with the quarter circle out the side. The second bend coming in from the other side and curving down to the bottom. Then the four corners and lastly the space left over!
MagentaCrush-QuiltingDet-ImFeelinCrafty
MagentaCrush-BackMain-ImFeelinCrafty
And the back is the opposite color scheme. Using the left-over quarter circle shapes from the front, but played with in a different way. And with the Kona Crush as the main color.
MagentaCrush-BackDetail-ImFeelinCrafty
MagentaCrush-BackLast-ImFeelinCrafty
MagentaCrush-Label-ImFeelinCrafty
MagentaCrush-ChallengeWin-ImFeelinCrafty
I tried to enter the quilt into the Pantone Quilt Challenge on IG hosted by @Saroy and @elizabethkray . I got the top and back done and basted, but wasn’t able to finish it in time. Luckily for me, they had a ‘Just the Top Category!’ And I won first place! I was a bit shocked!
MagentaCrush-BattingPrize-ImFeelinCrafty
And I won three packages of batting from Quilters Dream Batting! Yea! Again, so excited!
MagentaCrush-Binding-ImFeelinCrafty

For this one, I tried the binding necklace technique that I had seen on IG. It looks super silly, but it really does work!! And helps keep the binding from falling on the floor and twisted.

MagentaCrush-Last-ImFeelinCrafty
MagentaCrush-Last2-ImFeelinCrafty

I had a great time breaking the quilting ‘rules’ on contrast and winning the Pantone Quilt Challenge award with this quilt! Are there quilt rules you like to break??

Subtraction- A Mini Quilt turned Pillow

This is an oldie! Like I’ve said before, I sometimes forget to post quilts. Instead, I just move on the next ones!

HSTSubtractionMini-Main2-ImFeelinCrafty
This one was made for the Curated Quilts HST Mini Quilt Challenge back in 2020! The call for entries asked for ‘quilts that use subtraction as a design feature,’ with a color palette using soft pink, orange, golden yellow, and frosty blue, along with neutrals in the silver to graphite range.
HSTSubtractionMini-Piecing-ImFeelinCrafty
HSTSubtractionMini-Piecing2-ImFeelinCrafty

I had this design brewing about in my mind for a little while. I turned it into a paper piecing pattern and got to work! My original idea was just the rings with the HSTs.

HSTSubtractionMini-Subtraction-ImFeelinCrafty

Since the theme for this challenge was subtraction, I pulled a few of the HSTs out of the ring. As if they were being subtracted from the ring! I thought it was quite clever, but it did not get chosen for the magazine.

HSTSubtractionMini-HSTring-ImFeelinCrafty
Maybe it was because the HSTs weren’t actually squares? I doubt it, but… The distortion of the HSTs are actually my favorite part of this little design I came up with!
HSTSubtractionMini-Back-ImFeelinCrafty

Although it was a mini quilt, I made it into a pillow. I quilted the top, but before adding on the binding, I attached a zipper back to the mini quilt so it could be used as a pillow.

HSTSubtractionMini-PIllowLast-ImFeelinCrafty

I’ve made quite a few minis for the CQ’s mini challenges that have been selected for publication. I’ve made a few that haven’t been selected. Usually, the ones not selected I totally understand why and they aren’t favorites of mine, either. But this one was different. I really like this reject!

Hot or Cold Mini Quilt

Hot or Cold is a few things. It’s a scrap quilt, a stripe quilt and a quilt that plays with the traditional HST block.

Back in 2016, I made a bee quilt called Sunset Dreamin’. It’s one of my favorite quilts that I have designed. This quilt was one of my first quilts to hang at Quiltcon at Quiltcon 2017 and was also featured as a tutorial in Curated Quilts.

HotOrCold-Scraps-ImFeelinCrafty

For this quilt, I asked my bee mates to make long striped blocks. The striped blocks were cut at 45 degree angles to piece them all together. This left a bunch of different sized striped triangles scrap pieces. Scraps too good to toss.

HotOrCold-Main2-ImFeelinCrafty

Originally, I had planned to make these scraps into a pillow to go with the quilt. But then in 2021, a group of Finnish quilters (@nordiccrafter, @organisaattori, @tilkkunen and @tilkunviilaaja) hosted a quilting challenge, “Connected Stripes 2021” on Instagram. When I saw the challenge, I knew I had some striped blocks! So 5 years after making the original quilt, the inspiration came to leave them just as they were and turn them into a modern take on the traditional HST block, infilling as needed to make all the different sizes fit together. 

HotOrCold-Cools-ImFeelinCrafty
HotOrCold-Warms-ImFeelinCrafty

I looked at mixing up the warm and cool blocks, but in the end I liked it best as having the cool and warm blocks grouped together.

HotOrCold-Back-ImFeelinCrafty
HotOrCold-BackDetail-ImFeelinCrafty
The back! Back in the day of doing the bee quilts, I found that for each set of blocks I requested there was usually one that wasn’t just quite right. Usually, they fit in despite being slightly off. I needed the striped pieces on the front of the main quilt to be very straight. I had one block that was curved. It was curved too much to use in the original quilt. But for this one, it worked perfectly for the back of this one! I love the swoosh on the back!!
HotOrCold-Label-ImFeelinCrafty
The label really matched this back of this one!
HotOrCold-Last-ImFeelinCrafty
It took me a little while to get this on the blog, but in the meantime, it’s been being enjoyed on the dining room wall!

The STAR Block!

I had a fun response to my Star block that I posted on IG last week, so I decided that as a Christmas in July (last minutes of July) gift, I’d share it with you for free for the rest of the summer!

StarPattern-SolidsMain-ImFeelinCrafty

I’ve made the pattern quite a few times so far and it’s a quick and easy pattern for a foundation paper piecing pattern.

StarPattern-SolidsDetail-ImFeelinCrafty

You can see the sewing lines in the solid versions easier than in the improv pieced version! There are 3 main sections. The top and middle sections only have 3 pieces and the bottom section has 5 pieces.

StarQuilt-CloseUp-ImFeelinCrafty

Last winter I made this as a gift for a Holiday party. We play the White Elephant game and each year we have a theme. Last years theme was to look up. Stars were the first thing that came to mind, so I whipped this up! For this version, I improv pieced larger sections of stripes, then use those pieced sections as the background and star sections in the pattern. The pattern does not have the stripes included!

StarQuilt-back-ImFeelinCrafty
StarQuilt-Label-ImFeelinCrafty

For the back I mostly used left over scraps from the improv stripes on the front!

StarQuilt-Leather-ImFeelinCrafty
I finished this one off as a wall hanging, just like I did the heart Valentines I made last year! A little piece of leather, some metal cap rivets and a wooden dowel make for a fun wall hanging!

You can download the pattern here for free!

StarPattern-Solids2-ImFeelinCrafty
StarQuilt-CloseUp2-ImFeelinCrafty
There are so many options of how to make this block! And enjoy the Christmas in the last few minutes of July gift! And be sure to tag me if you make it and share on social media! Can’t wait to see what you create!