Mermaids!

I did it again…. I submitted a design to the Spoonflower Weekly contest again! It’s been a while since I’ve done it, but I did…

Mermaid-FatQuater=ImFeelinCrafty2

So be sure to vote (hopefully for me!)!

I know I talk a lot about the parties I design, and I don’t seem to show them very often. I’m getting them ready to show, I promise…. I have a huge backlog! BUT… In the meantime, I’m headed home to Bama to the beach next month, so I thought, maybe I’ll design a beachy party that I can photograph while I’m there. So of course the mermaid theme came to life. Then I saw the weekly contest posted! So it was great motivation to get some of the graphics done!

I’m not sure if it’s the final design or not. What do you think? What’s it missing? Would your little girl be interested in a mermaid party like this?

MermaidPanelsm

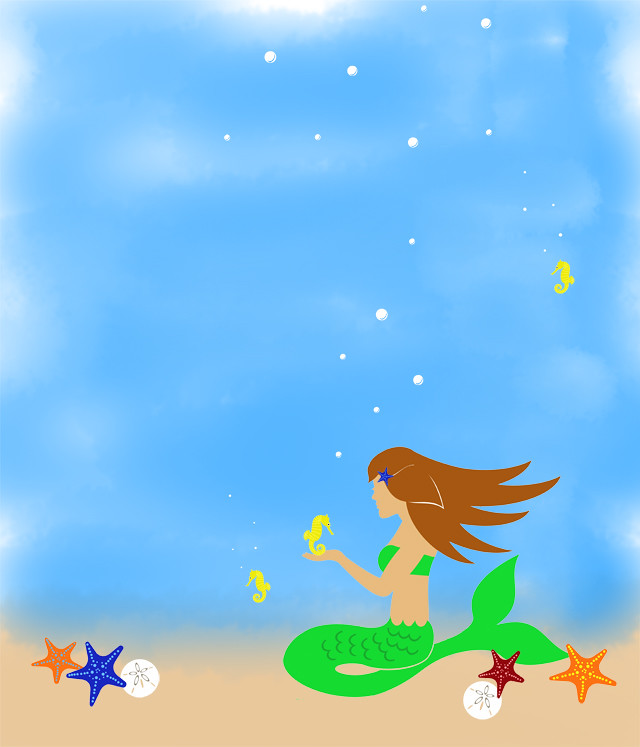
I’m thinking more of a watercolor look for the actual party graphics….

I can’t wait to get the party going!


I’m here…

But I don’t have anything to show you that you haven’t already seen. All year, I’ve had something… We took a little Spring Break trip, so I haven’t sewn in a almost a week! Kinda crazy! You saw all my WIPS on Monday….

monkey-ImFeelinCrafty

I haven’t been just hangin’ around doin’ nothin’ though! I’ve been working on a new party that should be a lot of fun! More soon!

Ice Castle Kit In a Bag!

Calling all Frozen fans!! Or should I say, calling everyone giving a Frozen fan a gift this year!!

IceCastleKit-Main-ImFeelinCrafty

My son was invited to a Frozen birthday party last week and I was debating what to give. I wanted it Frozen themed, but I didn’t want it to be too ‘Frozeny’…. If you know what I mean!

IceCastleKit-Label-ImFeelinCrafty

Then I figured it out! Years ago I saw the DIY Fort Kit by Saltwater Kids. For real. I’ve wanted to make a DIY Fort Kit for YEARS! But I changed it up a bit and made it Frozen themed….

IceCastleKit-Main2-ImFeelinCrafty

IceCastleKit-Contents-ImFeelinCrafty

IceCastleKit-Fabrics-ImFeelinCrafty

Most of the supplies came from the dollar store. We stocked it with clothespins, clips, suction cups, rope, double stick tape and fabric. And of course, you can’t have an ice castle without snowflakes! Now, here comes the expensive part… The fabric. The fort kit uses sheets. For this one, I wanted more of a see thru icy feel so I bought sheer fabrics. 7 yards of fabric that is! I used 4 yards of the iridescent fabric and 3 yards of the sheer. Then we did throw in a white sheet.

IceCastleKit-Hooks-ImFeelinCrafty

I also used ribbon for the ‘hooks’. I cut 6″ pieces of the ribbon, folded it over and sewed it on to the fabric pieces. I put a hook on each corner, one in the very center and one on each center of the long side… Does that make sense? But then on the white, I added a couple more hooks where I thought I’d need them. There’s no real rule here!

IceCastleKit-InTheBag-ImFeelinCrafty

And I made the bag too… I kept putting off the bag because I couldn’t find the right fabric for it. One night I was going to stop by the fabric store and my son didn’t want to. I wish I could remember what he said, but whatever it was, it totally inspired me to make my own!

IceCastleKit-StampSupplies-ImFeelinCrafty

IceCastleKit-Stamp-ImFeelinCrafty

I just happened to have bought these foam snowflakes about 3 years ago and never used them. Perfect! And then I just happened to have a block of wood the right size. I just used some double stick tape and stuck the foam flake on there, painted it and stamped it! Easy!

IceCastleKit-Castle-ImFeelinCrafty

Of course I had to try it out before I wrapped it! AWESOME! It made putting a fort together so simple. You have all your pieces right there. The hooks make it simple to rig it up to your furniture and doors and windows! My son really wants one, but he did request one, ‘that’s not a Frozen theme.’

IceCastleKit-Label2-ImFeelinCrafty

What do you think? Are you off to the dollar store for supplies right now!!?? You can print the label here!

Would you add anything else? Let me know!

Seattle Modern Quilt Guild Retreat!

I’m exhausted! In a very ‘I got so much done’ kinda way! Ok, and yes, the traditional lack of sleep is also contributing to it!

IMG_5887

This weekend our quilt guild had another retreat! It was so fun! And super productive! I roomed with my buddy Debbie, from A Quilter’s Table, and we were also table mates with 2 other fantastic women, Sue and Noelle! Such fun! Friday night we were the only full table still sewing at 1AM. Yes! That was us!

IMG_5882

I started by hemming my husband’s pants that have been sitting on my sewing table and ironing board for about a year. But I had to keep moving them when I’d work on projects, so as I was packing I through them in the bag to do. Then I added a little cover on a zipper (I’ll show you that soon!). Quick. easy. Moving right along! Until I got to my bee blocks! Those took longer than planned…

IMG_5883

But luckily one of the mistakes I made ended with this little one!

IMG_5898

I got the front and back of my do good stitches pieced. And basted onto the batting. Both sides are pretty much the same!

IMG_5899

Then I moved into a memory quilt that has been sitting for way to long! I got the quilt design laid out on the computer. And the top half of the front is done. And the back! Yea!

IMG_5908

We had fabric swaps and WIP swaps, which are fun. The WIP I got was the start of the Psychedelic Baby Quilt. Can’t wait to look more at this! But the swap I like the best is the handmade swap where we play the Dirty Santa kinda game/swap. I got this adorable little mug rug! It’s perfect for my sewing space!

IMG_5895


There was a beautiful sunset one night. I almost didn’t even go look at it! When I’m at a craft night or a quilt night, that’s what I do! Seriously! So I was like, I can see another sunset…. Boy am I glad I took a break!

Did you have a fun weekend? After some rest tonight, I might be up for getting back to sewing tomorrow!

Preschool Auction! I Love a Party!

Last year, I had a great time decorating our preschool’s auction! Don’t be too surprised, but they asked me to do it again this year!

Auction-1-ImFeelinCrafty

The tree and the green above is our school’s logo. That is without the heart. The heart was added for the auction. I didn’t come up with the color scheme or the theme, but I love it! Bright green, dark green, hot pink and brown. Love it!

Auction-FlowersDtl-ImFeelinCrafty

Auction-SIgn-ImFeelinCrafty

We decorated a little bit upstairs, around the stairs, in the silent auction room… But most of the decorating went into the live auction and dinner room!  We used a LOT of fans! Perfect! I love fans… We used them last year, too. I wonder if they will use them next year when we’re not around….

Auction-Before-ImFeelinCrafty

This is the room we started with….

Auction-After-ImFeelinCrafty

And this is the room we ended with… And notice, I keep saying we… This was not all me by any means. I was the head of the committee, but we had a great, creative team that helped with the design and implementing the designs!

Auction-Process-ImFeelinCrafty

I took some process shots to see it coming together!

I admit, I’m kinda a control freak when it comes to designing and throwing parties. So doing this type of party by committee is a real lesson in patience that I need! And going with the flow is fantastic! There were a few things that didn’t go as planned, but turned out beautifully!

Auction-VaseStart-ImFeelinCrafty

Like the enterpieces, for instance…. The original plan was to fill vases with limes. Great idea when limes aren’t at the highest prices EVER! Did you notice the prices of limes were insane this spring? Sooooo… What do you do? You take the tulle that was planned for the stairs, and fill the vases with limes and tulle!

Auction-Flowers-ImFeelinCrafty

And then I had cut all these strips of paper that were intended to stand up and add height to the centerpieces. Well that did’nt work… But curled, they worked perfectly as table scatter!

Auction-Hearts-ImFeelinCrafty

And if you’ve read about any of my parties, you know I love party favors! So I came up with this little felt flower that incorporates the heart of the auction and the tree leaves in the logo for a little table decoration and everyone’s party favor.

Auction-Favors-ImFeelinCrafty

We made a BUNCH!

Auction-Process6-ImFeelinCrafty


Auction-After-ImFeelinCrafty

I think we pulled it all together quite nicely! What do you think?


A SuperHero Cape Tutorial!

Are you tired of superheroes yet? Well, since we talk about them on a daily basis in our household, we’re not. So hopefully you aren’t either!

SuperHeroCape-Main1-ImFeelinCrafty

For the party favor at the kiddo’s party we gave capes and masks. The kids loved them. I mean Max has a few that I’ve made for him, and he’s still excited about this one. There was one kid that seemed to enjoy it, but then left it at the party ‘because Spiderman doesn’t have a cape.’ OK…

SuperHeroCape-Party2-ImFeelinCrafty

SuperHeroCape-Party1-ImFeelinCrafty

The rest of the kids loved them anyway!

Today I’ll share how simple the capes are to make! (and if you’d rather not make them, I have them on etsy!)

SuperHeroCape-Materials-ImFeelinCrafty

The materials are simple. Solid fabric (I stick with cotton, but you could use something shiny too!), felt, a tiny bit of Velcro, thread and scissors.

SuperHeroCape-CutCape1-ImFeelinCrafty

SuperHeroCape-Pattern-ImFeelinCrafty

To cut out the cape, you want to fold your fabric over the length of the cape and then fold that over the width of the cape. So you’ll end up with one piece, instead of two pieces. You can use the pattern here for the top of the cape. Then the dimensions above for the rest of the pattern.

SuperHeroCape-CutSymbol-ImFeelinCrafty

Then cut out your symbols.

SuperHeroCape-SewVelcro-ImFeelinCrafty

Sew on the Velcro and the superhero symbol of your choice. Be sure that one side of the Velcro is in the front and the other is on the back of the neck pieces.  (yep, I switched cape colors mid tutorial! I’m crazy like that!!)

SuperHeroCape-Turn-ImFeelinCrafty

Then fold over so the right sides are together and sew around the edge. Be sure to leave a hole near the bottom.

SuperHeroCape-Trim-ImFeelinCrafty

SuperHeroCape-Clip-ImFeelinCrafty

Trim the corners and cut slits around the neck to help it iron flat.

SuperHeroCape-Pull-ImFeelinCrafty

Pull the cape through the hole.

SuperHeroCape-Stitch-ImFeelinCrafty

Iron and top stitch you hole! Whoa! It’s red again!

SuperHeroCape-Cape2-ImFeelinCrafty

Hand over to your little superhero to save the day! I love (and so does he) how soft and flat it sits around his neck.

SuperHeroCape-Cape1-ImFeelinCrafty

What color would your cape be???

The Flash Pinata!

Like I mentioned the other day, I’m not a huge fan of piñatas. Kids bashing in things with baseball bats is kinda unnerving to me. But I guess it’s better that it’s a piñata than something else, huh? So when Max asked, or should I say announced, that we were having a piñata at his birthday party, I had to process the whole thing for a while.

SuperHeroPinata-Main-ImFeelinCrafty

But I came around and then had to decide which superhero was the piñata going ot be? I have to admit, the Flash symbol seemed to be the easiest to translate into a piñata and thank goodness he’s a big hit at our house!

SuperHeroPinata-Materials-ImFeelinCrafty

Now, I’m no pro at piñata building or anything, but I thought I’d share how I made ours! The materials I used were just a cardboard box, shipping tape, crepe paper, glue, an exacto knife and string. I’d recommend a thin cardboard than might bust easily when hit. (mine didn’t!) Like maybe an Ikea box…

SuperHeroPinata-Step1a-ImFeelinCrafty

SuperHeroPinata-Step1b-ImFeelinCrafty

First, I cut the tops and bottoms off the box and then taped them together.

SuperHeroPinata-Step2-ImFeelinCrafty

Secondly, I cut my circles. I don’t remember the dimensions, but basically as round as I could based on the size of the box. And then I cut a third little one for the middle circle.

SuperHeroPinata-Step3a-ImFeelinCrafty

SuperHeroPinata-Step3b-ImFeelinCrafty

Next, The sides. I cut a long narrow piece from the sides of the box, about 4 inches wide. Then I curled it by slightly bending it about every inch or so just a little bit. Also be sure to cut the side a bit longer than the circle sides to overlap at the end!

SuperHeroPinata-Step4a-ImFeelinCrafty

SuperHeroPinata-Step4b-ImFeelinCrafty

Next, I taped the side to the front and back circle, leaving a hole at the end. Don’t’ tape all the way around! You have to be able to add the candy!

SuperHeroPinata-Step5-ImFeelinCrafty

Then tape on some string. I taped it to the bottom and the sides.

SuperHeroPinata-Step6a-ImFeelinCrafty

SuperHeroPinata-Step6b-ImFeelinCrafty

SuperHeroPinata-Step6c-ImFeelinCrafty

And here comes the color! Glue on the crepe paper in rows at the top and the bottom. Then start gluing it on around all sides. This part will take a while because you kinda have to stop and let the glue dry and then come back to it! In the meantime, you can go ahead and glue on the yellow crepe paper to the smaller circle. Yes, I had the colors backwards a bit here. The Flash symbol has a white circle, but…. It worked!

SuperHeroPinata-Step7-ImFeelinCrafty

SuperHeroPinata-Step7b-ImFeelinCrafty

Turn the yellow piece over and tape the loose ends over, add glue and stick it on the main piñata. Stuff it with candy. Tape down the hole.

SuperHeroPinata-Hitting-ImFeelinCrafty

And get ready to party!

So here’s a few things I learned.  I thought the cardboard would bust, buuuuutttttt it didn’t! Hence the reason I’d recommend a thin cardboard. Mine was really sturdy. I wanted it to be sturdy enough so that everyone got a chance to hit it before the candy spill. Mine might have been just a little tooooo sturdy. Everyone got a couple of shots at it!

SuperHeroPinata-Candy-ImFeelinCrafty

But once a Dad stepped in had their turn, it almost came out… Then our Dad stepped in and did a quick switcher-upsideroo and the candy came out! No one seemed phased that the piñata didn’t’ actually BUST open!

SuperHeroPinata-End-ImFeelinCrafty

And the birthday boy was happy! He helped make it. It was his favorite super hero. He helped pick out all the stuffings. And he got a ton of candy. And to see that big smile on his face, Momma was happy too!

A Super Hero Party

I can’t believe another birthday has come and gone! It’s been 5 years since the little guy joined us! And this years theme… Superheroes! In case you haven’t noticed from all the costumes I’ve been making!

SuperHeroParty-Main-ImFeelinCrafty

About a week after his Pirate Party last year, pirates were kinda out (even though he swears they aren’t and he still plays them sometimes) and superheroes were in! SO we’ve been learning a lot about super heroes. It all started with Spiderman. Which he still loves ALOT! but now his favorite one is the Flash, since he says they have the same super power.

SuperHeroParty-Invite-ImFeelinCrafty

As usual, Momma made fun invitations and Dad made most of the decorations! The invites were based on old school BatMan comic books, were coloring book comics on the inside and mailed the clear plastic envelopes that you buy vintage comic books in. Not sure the kids really got the clear envelope thing, but I did and it made me happy! I do know that the kids like the invite, though! And as usual Dad made almost life size superheroes decorations and a bunch of little buildings! And of course, Max LOVED helping make everything and really being a part of all the planning!

SuperHeroParty-Envelope-ImFeelinCrafty

I asked the Post Office people if I could mail the invitations in the clear envelope and was told ‘No, plastic envelopes will melt in the machines we run them through.’ Well, that didn’t make any sense to me! So what did I do? I mailed them anyway. And of course I mailed one to myself just to make sure. And did it come back to me? Why yes it did! Did they make it to the other party kids? Why yes they did!

SuperHeroParty-Playing-ImFeelinCrafty

Since his birthday is the end of September, we never know about the weather. And this year we got rained out of the park. Luckily, we called Camp Long where Max had his Dragon Land Party, and there big room was still available 2 days before the party. And it was perfect! And it stormed all day! I can’t take as good of pictures inside, but the kids don’t care about that! The party favors were the capes and the masks and the kids loved running around with them, or laying on the floor pretending to be flying! They seemed to have just as much fun inside as they would have outside!

SuperHeroParty-PinTheHair-ImFeelinCrafty

It has become a little tradition at our parties to have some sort of pay on the Pin the Tail on the Donkey game, so of course we did it again. Momma came up with Pin the Cape on the Superhero. But as Dad and Max were designing the superhero decorations, Max came up with some other options. The first one was Pin the Shorts on the Hulk, which we didn’t pick (for kinda obviously weird reasons) or Pin the Hair on the Hulk. Pin the Hair on the Hulk it was!

SuperHeroParty-CuffCollage-ImFeelinCrafty

The other activity we have made a tradition is the art project! So to go with the masks and capes, we gave everyone wristbands to decorate! There was a lot of glue and glitter involved!

SuperHeroParty-Pinata-ImFeelinCrafty

I’m not a huge fan of piñatas, but around here all the kids seem to have them, so this year we added in the piñata! And of course, it needed to be a superhero themed piñata, so Max, Nannie and I made a Flash piñata! I wanted to make it strong enough so that all the kids got a turn at it, but I think I ended up making it a little too tough. Some of the dad’s had to help to get it to spill out! But that was ok for the kids, once the candy and toys were spilling across the floor! Luckily, the place we had let us use one of the shelters for the piñata!

SuperHeroParty-Cake-ImFeelinCrafty

And then it was time for the Spider Man cake! And presents! I love how the characters Dad made look like they are hanging out with the kids opening presents!

Flash-Last-ImFeelinCrafty

I had promised Max a Flash costume. We had gotten the fabric and everything we needed for it, but it kept getting pushed to the bottom of the pile. Then came party decorating and party supplies came in. Then the day before the party, Max reminded me… I HAVE to have my Flash costume for my party! And that he did!

SuperHeroParty-5-ImFeelinCrafty

Max turned 5 in his Flash costume!

Stay tuned for more party fun this week! As I mentioned above, my pictures of the ‘pieces’ didn’t’ all come together during the party, but we had a lot of fun pieces and more to come that were planned, but not finished in time. I don’t know why, I knew it was a super hero party plenty of time ahead, but for some reason I didn’t get all the pieces of plan pulled together in time. At the last minute it came down to me having my ‘pieces’ or the kiddo having his costume. The costume won!

Monster Cake from Sowdering About in Seattle!

I’m in a FB group for Seattle blogger’s and have met (online anyway) some very talented people, including Randi from Sowdering About in Seattle. When I sew her monster party, I knew it would be a perfect fit for her to join us! I couldn’t decide if I wanted her to share how to she made the cake or the headbands… We decided on the cake! It looks so delicious and I wish I had some now!!!! Be sure to check out her blog and all her fun food ideas and crafts!

Welcome Randi!

My son turned one in January and in celebration, we threw him a “monster” themed birthday party. It was very fitting for him since he is, well,  a monster. 

We had various decor, that was mostly homemade, including but not limited to a pretty awesome cake. I really loved how it came out, it probably was my most favorite thing we had at his party. I thought it would make a great tutorial, so here I am.

Because I baked this cake while we were on vacation in Las Vegas, I didn’t actually take pictures while I made it, so instead, I did what any normal person would do. I made another one. I mean, there is never BAD time for cake right? Lucy decided that she wanted our new monster cake to be a purple cake with red frosting.  I used a basic white cake mix from the store and just added some Wilton’s frosting dye to it.

icing copy

Once it was all mixed, I cooked the cake according to the directions on the box and when it was done, I froze it.   Freezing the cake turned out to be the best for me because where I had planned to have this cake done in just a couple of days, life got in the way, kids got sick, we got super busy.  Anyway, the cake was frozen so it lasted longer.   When I was ready, I brought the cake out and started frosting it before it was defrosted.  Also, this is where you would normally put on the “crumb layer” of frosting.  This is basically a thin layer of frosting all over the cake which “captures” all the crumbs so that they don’t get tangled up into your top layer of frosting.  I normally do this.  I did not do the crumb layer on this cake.  Not for any particular reason except that I just plain forgot. I mixed the frosting together with Wilton’s frosting dye like I did with the batter.

IMG_4769 copy

The recipe I used for the frosting was super easy:
  • 1 cup butter (salted)
  • 4 cups powdered sugar
  • 2-3 tsps vanilla extract (I didn’t measure, just put some in)
  • a splash of whipping cream
Cream the butter and sugar together on low.  Slowly add vanilla and your splash of cream (I left mine a little thicker so I didn’t add a lot of cream).  Mix on med-low until it’s fluffy.  At the end, I added the color and mixed until it was the color I wanted, which ended up being pink, not red.
I noticed with the Wilton’s dye, that if you let it sit a little, it will darken.  So that’s what I did.  After it was all mixed, I let it sit for about 15 minutes.  When I was ready, I pulled out my frosting bag and I used the grass frosting tip that you can get from any craft store.
I always make a HUGE mess when I am frosting.  I will save you from those pictures.  Once my bag was full of pink frosting, I just started piping.  I made small downward strokes to get the “hair” look I was going for.
The best part about this particular style of cake, is that it doesn’t need to be perfect.  It’s actually the imperfections that make it the best.  I mean, what monster have you ever seen with perfectly combed hair?  None.
On Dexter’s cake, I just used large marshmallows on a skewer for the eyes and I used a food marker for the eyes balls.  However, Matt said that we should do something different with this one, so he grabbed some Fruit Loops and we shoved small marshmallows into the holes and then stuck a toothpick in them.  I like how it came out, a little more colorful and fun if you ask me!!
I struggled trying to figure out the best way to cut into this cake to show you the middle.  I didn’t want to just cut into it without a special reason, even though really, Tuesday is a good enough reason to cut into a cake.  But, as it turns out, we were having some friends over for a space craft to celebrate National Space day.  What’s better than a monster cake that you call an alien cake on Space Day right?

Dexter was totally impressed with his cake.  He said it even tasted good with the dirt he had just eaten too.

I thought it turned out pretty amazing.  The colors were great and all the kids loved it.  But what kid doesn’t love a purple cake right?
I hope you all enjoyed this and have fun making your own monster cakes!!!
Randi blogs from a blue recliner in the wet city of Seattle where she lives with her husband and two kids.  To read more about their shenanigans and crafts, please visit her blog Sowdering About in Seattle.  Also, be sure to like her facebook page!

KCW Day 6- Monster Tee

I was crossing my fingers the whole time I was sewing this shirt, hoping and hoping that it would fit over the noggin’!

KWC-6-MonsterTee-Main-ImFeelinCrafty

And it did! Not even a struggle! Woo Hoo!

KWC-6-MonsterTee-Hanger-ImFeelinCrafty

I also have a huge problem finding cool knit fabric for the boy. So I finally resorted to online. I found a few great ones at Banberry Place. Including this monster fabric by Lillestoff, a European import. Please explain to me why cool knits are so hard to find in this country??? I love Lillestoff! Love! It’s so nice and soft and the design is COOL!

KWC-6-MonsterTee-Shoulder-ImFeelinCrafty

My original plan was to use the Flashback Tee again. I used it once before and it was a bit tight, so I wanted to try it again the next size up. But then I was like… Well, maybe I reuse the Winter PJ top cause it fits so well. But the head thing… The winter PJ’s top goes on easy, but it’s kinda hard to get off.

KWC-6-MonsterTee-Shirt-ImFeelinCrafty

So I went with the original plan to use the 4T Flashback tee pattern. And it’s perfect. Easy on. Easy off. Cute. Fast. Not too tight. Love.

KWC-6-MonsterTee-Tag-ImFeelinCrafty

I even remembered the tag! The kiddo was pretty excited about that!

KWC-6-MonsterTee-Back-ImFeelinCrafty

And he wanted to be sure we showed the back of the t-shirt. Since it’s so different from the front….

Shared with these Link Parties!