Log Cabin Play

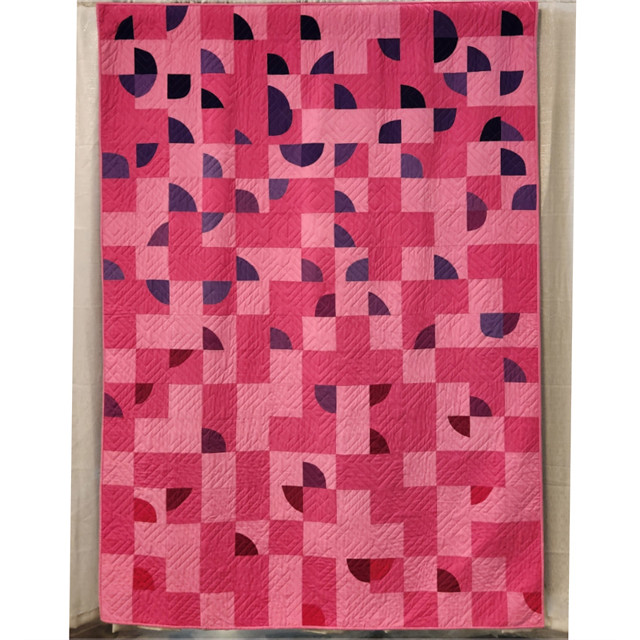
Log Cabin Play! One of my all time favorite quilts!

Back in 2021, I took a zoom class with Cheryl Arkison via our Seattle Modern Quilting Guild. The class was called Traditional Variations. The class was to take some familiar or traditional blocks to shake them up! We ‘played’ with improvisation, scale, and color to create fun and funky takes on the traditional block.

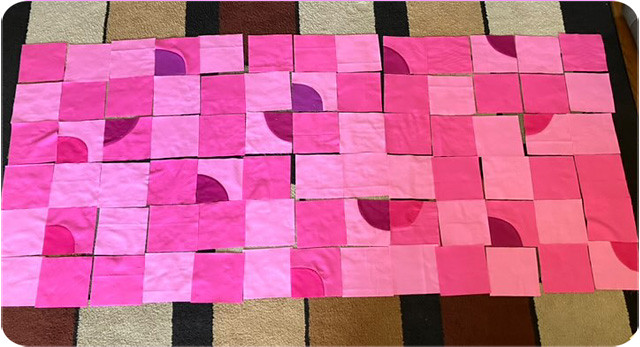
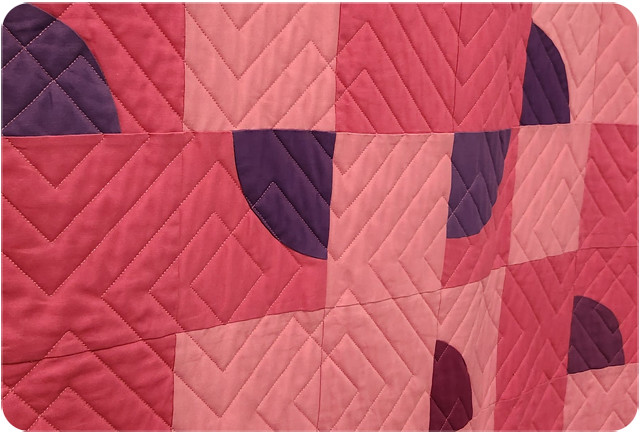
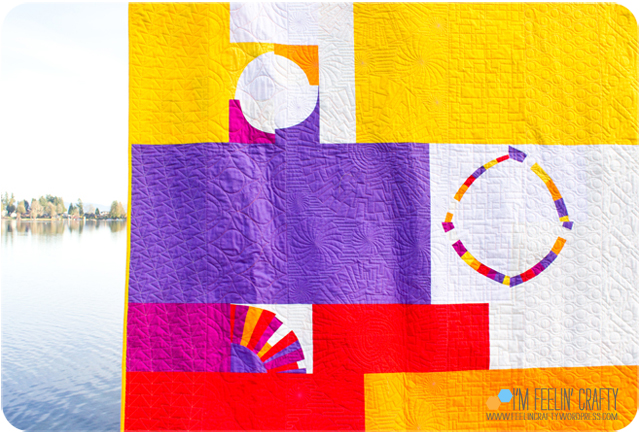
I obviously chose the log cabin block and pulled pink, yellow, red and orange scraps from my scrap bins and set to work! I tried to make each block different. Every one of them was a log cabin, but each one was slightly different. Each one did have white between the color pieces, that was my one real rule.

Once I had all the blocks I needed, I started piecing them together. The problem I had was that I had no idea how to quilt it! I knew I wanted to focus on the log cabin, but how??? I couldn’t quite figure it out, but I knew who could! I decided to send it to my friend, Dionne, to quilt it for me. This was my first quilt I ever sent out to someone else to quilt! I knew it was in good hands!

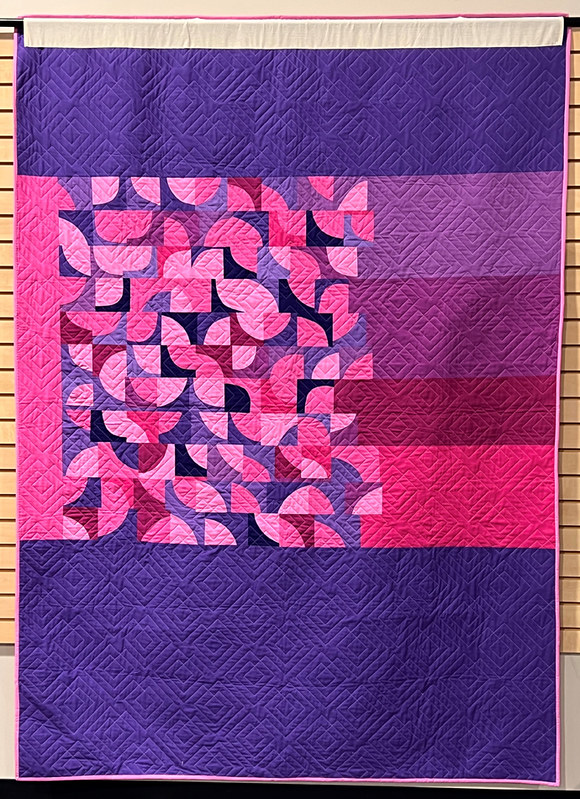
Together we decided to only quilt the white fabric. We agreed on three things, pop the log cabins, only quilt the white fabric and no feathers! Those were the only guidelines I left with Dionne!

And WOW! With Dionne’s help, this quilt turned out fantastic!

Look how cool the quilting is. Each area is quilted a little bit different, just like each log cabin is slightly different, too! My very favorite part of the quilt is this piece of the 4 quarter log cabins. When I pieced the quilt, I looked at pulling the quarter cabins apart, but I decided I really liked them left together!

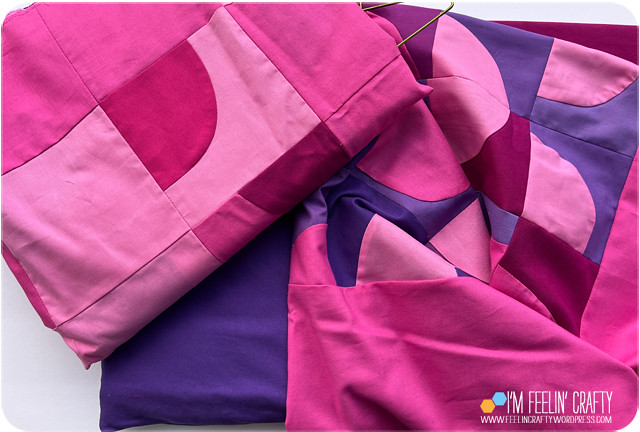
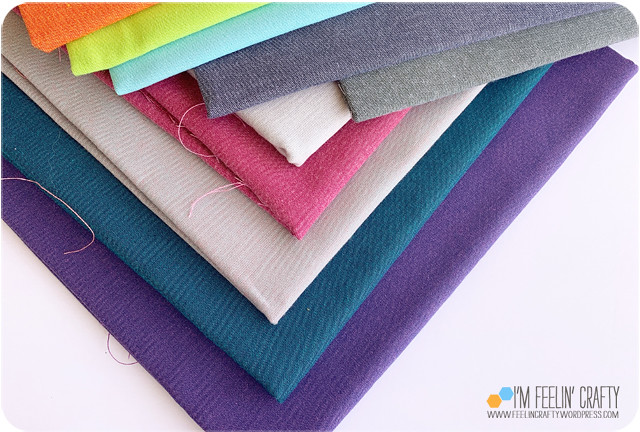
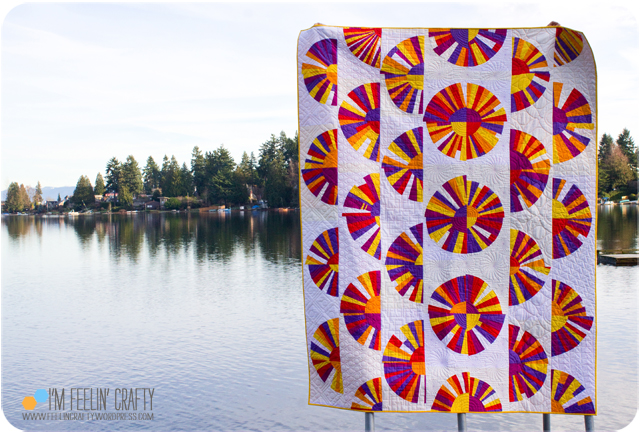
Remember how I said the top was all from my scrap bags? Well, I then raided my stash for the back. I gathered up small pieces of yardage I had that fit the color scheme to make one really big log cabin!

I love how cheery the back is!

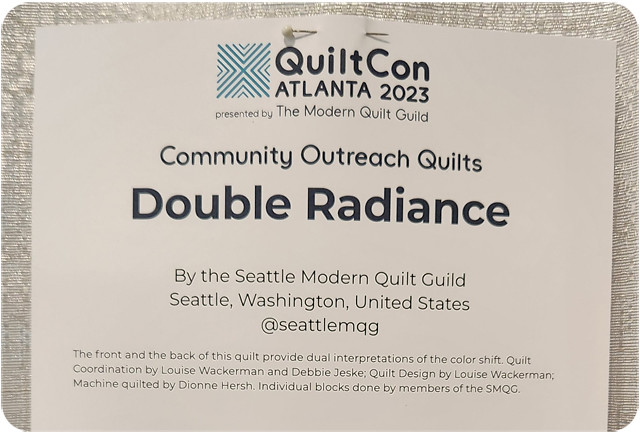
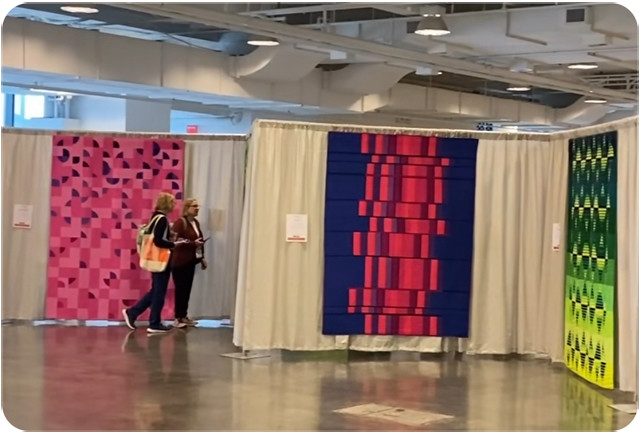
I started this before I knew that there would be a log cabin challenge at Quilt Con 2023. I was honored that this quilt was selected to show in that challenge exhibit!

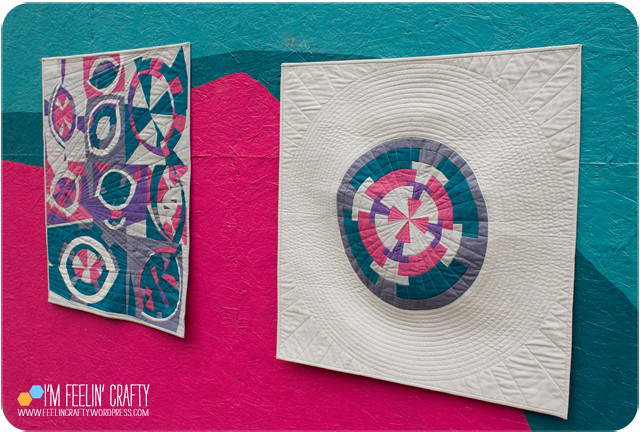
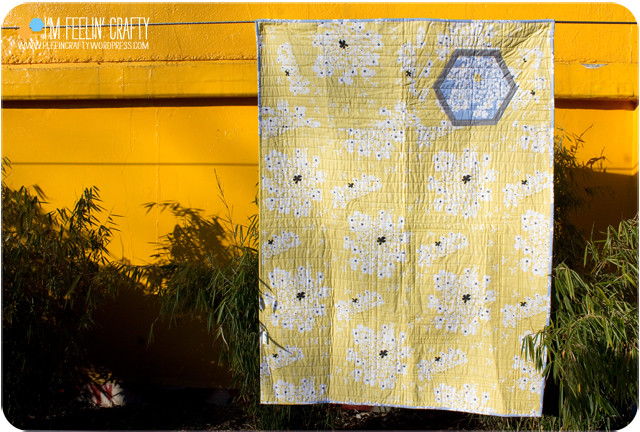
And a shout out to the mural artist for the mural that served as a perfect backdrop for this quilt, Craig Cundiff.

SMQG QuiltCon Community Quilt

There were two quilts hanging at Quiltcon this year that I had a part of! This one is not my quilt, but a quilt that I was honored to participate in along with a BUNCH of Seattle Modern Quilt Guild members!

A while back my friend Debbie and I were the co-chairs of the SMQG Charity Quilt Commitee. It’s been a while since we did it and it’s passed through a few hands since we led the charge. I have been known to be a on the opinionated side every now and then… So, when our new co-chairs, Ann and Marion, mentioned they were thinking about this Quiltcon quilt challenge, I shared some opinions.. I’m not sure if they wanted my opinion or not, but I am hoping that they appreciated it!

Then they put out a call for help. Debbie and I said sure, let’s do it again!

SMQGQCCommunityQuilt-MQGOptions-ImFeelinCrafty

This year’s theme was Color Shift (from the MQG QC website):

For this year’s Community Outreach Challenge, we are asking MQG members to make quilts that show a color shift, or gradient, in the piecing. We have selected two colorways for you to choose from, and hope you are as excited about them as we are!

What is a color shift or gradient?
A gradient or shift in color is a gradual blending from one color to another. This can be accomplished by using intensity, lightness/darkness, and color. The blending can occur in many ways, including within the same color (like baby blue to navy blue), between two unique colors (such as from purple to orange), or even between more than just two colors.

A color shift or gradient is an interesting way to create movement across a quilt, drawing your eye to different portions of the quilt in a dynamic fashion. The use of a gradient or color shift across a quilt also adds depth and texture to a quilt, before you add a single stitch of quilting.

Top Tips for a Smooth & Successful Color Shift:

  • Use at least two or three color stops along the way between colors.
  • It’s important to make your steps gradual. It can be hard to get from navy to baby blue if the only other color you chose is a darker slate blue.
  • Play around with how you want to move the colors across your quilt – do you like vertical or horizontal linear movement? Or perhaps something a little more playful, like diagonal movement across your quilt?

I came up with a few options for the quilt design. Ann and Marion chose my quarter circle (yes, again) design option and they chose the Warm Color palette.

SMQGQCCommunityQuilt-Sketches-ImFeelinCrafty
SMQGQCCommunityQuilt-FabricBubb-ImFeelinCrafty

I started the design with a sketch from my phone app, Assembly App, then took it into CAD to figure out exactly what we needed.

Then Debbie and I worked with Kristina at one of our most favorite fabric shops, Fabric Bubb, to match the QC palette. Kristina was so awesome in putting this together for us! Then Debbie and I split the orders, waited about a day for the fabric to show up and then got cutting!

The colors we used were Kona Solids Regal, Velvet, Heliotrope, Morning Glory, Magenta, Geranium, Cerise, and Valentine for the blocks; Dragon Fruit and Candy Pink for background; Velvet for the backing; and Candy Pink for binding.

SMQGQCCommunityQuilt-Fabric-ImFeelinCrafty
SMQGQCCommunityQuilt-FabricRolls-ImFeelinCrafty
We cut yards and yards of fabric and then paired an accent color with one of the background colors. We had an in person SMQG meeting and were able to give them all away. each person made two blocks. One for the front and one for the back of the quilt.
SMQGQCCommunityQuilt-Tutorial-ImFeelinCrafty
I have a reel on my IG account with a quick tutorial of how we made the blocks!
SMQGQCCommunityQuilt-Blocks-ImFeelinCrafty
SMQGQCCommunityQuilt-Sections-ImFeelinCrafty
SMQGQCCommunityQuilt-Sections2-ImFeelinCrafty
SMQGQCCommunityQuilt-FrontBack-ImFeelinCrafty

I got all the quilt blocks back from dozens of quilt guild members. I then sorted the blocks into the Top, Middle and Bottom pieces of the quilt top. Then sent them to three members that volunteered to piece these three sections together. Kami, Jackie and Terry. These three knocked this piecing exercise out in record time!!!

I got them back and pieced them together. In the meantime I had a great time piecing the back, because I love a pieced back! Then the back and top went to Dionne for her amazing quilting! And to finish it off, Ann added the binding. Ann and Marion took the last step to get it registered with QC and shipped to hang in the show!

SMQGQCCommunityQuilt-Main-ImFeelinCrafty
SMQGQCCommunityQuilt-Back-ImFeelinCrafty

I didn’t get to go to QC this, but I loved seeing pictures and being emailed pictures! Such fun!

SMQGQCCommunityQuilt-FrontQC-ImFeelinCrafty
SMQGQCCommunityQuilt-QCSign-ImFeelinCrafty
SMQGQCCommunityQuilt-Quilting-ImFeelinCrafty
SMQGQCCommunityQuilt-QCShow-ImFeelinCrafty
SMQGQCCommunityQuilt-QCShow2-ImFeelinCrafty

Thank you to Ann and Marion for organizing every step of the way and letting Debbie and myself jump in the game a little bit this year!

Testing- A MQG Fabric Challenge Quilt Part 1

Every year the Modern Quilt Guild hosts a fabric challenge for Quiltcon. This year the fabric challenge was hosted by Windham Fabrics using their Artisan Cotton fabric line. If you sign up fast enough, they send you free fabric. I didn’t sign up fast enough, so I actually ordered my own fabric to play along!

MQG-Fabric-ImFeelinCrafty

There were 4 main fabrics you could choose from. You had to use three of the four. Then there was a list of other fabrics that you could incorporate. I ended up ordering some that had nothing to do with the challenge and I’m really excited about the colors! For ‘Testing’ I used the four challenge fabrics, Wine/Pink, Coral/Aqua, Aqua/Blue and Blue/Orchid plus neutrals Stone/Lavender and Navy/White.

MQG-Main2-ImFeelinCrafty

I actually ended up making two quilts. ‘Testing’ was my submission to Quiltcon because I finished it in time. The second quilt, ‘Eyes on You’, I’ll tell you more about later. It wasn’t completed in time, so it didn’t even get submitted. But today, I’m just telling you about ‘Testing’.

MQG-Testing-QDADInspiration-ImFeelinCrafty
image via https://www.design-seeds.com/
MQG-Testing-QDADDesign-ImFeelinCrafty
MQG-Testing-Detail2-ImFeelinCrafty

Do you remember way back when I used to design quilt patterns with the Quilt Design a Day FB group? I’ve made 6 quilts from those designs: Running Away, Rabbit Hole quilts, Raindrops of Wildflowers, Left and Right, Triangle Mountain, and Bright Tide Pools! And now we have number 7, ‘Testing’!

MQG-Testing-Detail3-ImFeelinCrafty

It started as succulents. Once the design was translated in fabric, the quilt took on a different persona. Gone was the nod to the succulents. The quilt now takes it’s que from the ‘off the air’ TV graphics of a bygone era when screen time wasn’t available all day and actually ended at a certain time each day. 

MQG-Testing-Detail1-ImFeelinCrafty
MQG-Eyes-Scraps-ImFeelinCrafty

I started in the center and with each layer, I created a piece made of different colored wedges. Then I used my inset circles technique to layer and layer one on top of the other. The picture above is actually the scraps from each layer, but you can see what they started as.

MQG-Testing-Back-ImFeelinCrafty
MQG-Testing-Label-ImFeelinCrafty

When I quilted the circles, the mini quilt became a little wobbly and doesn’t like to hang flat. You can really see it in the picture of the back. So maybe it’s a good thing it didn’t get picked for the Quiltcon show! For the back I used stash fabric that I happened to have. I love that it picked up not only the grey from the front, but also the circles!

MQG-Testing-Last-ImFeelinCrafty

And that’s my ‘Testing’ Mini Quilt! Did you submit a fabric challenge quilt to Quiltcon?? I can’t wait to show to you my next one! Stayed tuned for Part 2!

ABC- O and Q Quilt Blocks


This years Modern Quilt Guild Quiltcon Charity Quilt Challenge is all about Text.

‘Quilts incorporating text have been popular in the modern quilt movement right from the start,” says the MQG. And this year all the participating guilds get to interpret that challenge in a black, white and grey pallette. The SMQG giving committee had a call for design ideas and they landed on one that includes a bunch of letters. You can see more about that here.

Letters-Main-ImFeelinCrafty

I came home and knew I wanted to make a Q. Instead of using a circle, I had the bright idea of using a hexagon. But then I wasn’t sure how to make the little line for the Q. As I’m thinking this out in my head, it started to look familiar… Like maybe someone else had already done this… Like maybe Jaybird Quilts in her alphabet block book, Alphabet Soup… Yep. That’s where I had seen this! I’ve been wanting to buy this book, but haven’t had a need for quilted letters. Mine are a bit different from hers, but totally inspired by hers!

Letters-O-ImFeelinCrafty

And the hexagon used as an O! No patterns were used. I just started with a hexagon. and went from there! 

I really do like these blocks and can’t wait to see what the giving committee comes up with!

Another 1 Hour Basket

I’m going through all the pictures I have of unshared projects and here’s another one!

Even though this one is old, I love it! This is a 1 hour basket that I made for a SMQG swap ages ago! This wasn’t my first rodeo, as they say, with the one hour basket. Which technically isn’t one hour if you are piecing and quilting it. Well, at least not for me! I made another one back in 2015. Both times I used the tutorial from Kelby Sews.

1HrBasket-Front-ImFeelinCrafty

1HrBasket-Detail-ImFeelinCrafty

For this one I used the techniques from Sew Katie Did’s Psychedelic Baby Quilt Class. I made a bunch of triangles, sewed them together and then added a top and bottom border.

1HrBasket-detail2-ImFeelinCrafty

For this one, I used ribbon for the handles, rather than making actual handles. And I used some of my favorite fabric, the sprinkles from Cotton and Steel!

1HrBasket-Exchange-ImFeelinCrafty

I mentioned this was for a swap. And in the swap, I got this awesome Sew Together bag made by Kristy. I LOVE this bag! I use it all the time! But I’ve always been scared to make my own, so I was so excited to get it in the swap!

1HrBasket-last-ImFeelinCrafty

OK, here’s where I need your help! Every year, I make the kiddo’s teacher a tote bag. This year his teacher is a Mr. Do I make a Mr. a totebag? Or do I make a Mr. a 1 hour basket for his desk? Or do you have an even better idea for a Mr. teacher? I was kinda thinking a 1 hour basket might be a nice idea…. Hmmm! Love to hear your thoughts!

Madrona Road Challenge- An OLD WIP, finally finished!


If you are a member of the Modern Quilt Guild, you are probably familiar with the fabric challenges they do. I used to love them! I would get so excited and sign up right away for my free fabric. The problem is there are deadlines. You are supposedly to make a quilt using their fabrics within a certain time frame… I had a problem with staying within that timeline… A bad problem..  Does anyone remember the Madrona Road Fabric Challenge???

MadronaRoadHexi-Main-ImFeelinCrafty

In 2012 (yes, 7 years ago now, see what I mean??) The Modern Quilt Guild announced their Winter Fabric Challenge. You signed up and then got the fabric around the first of Decemeber that year and were supposed to finish the quilt by January 31st. This fabric bundle was the Madrona Road line from Violet Craft for Michael Miller.

MadronaRoadHexi-ImFeelinCrafty

I had originally design this quilt to be a rainbow of hexi’s, but when I got this fabric, I decided to go with this designing using the Madrona Road to make the hexi’s. I started these hexi’s the summer of 2013. See, I was already behind. Way behind! Violet Craft had already selected her favorites!

WIP-MadronaRdFront-ImFeelinCrafty

WIP-MadronaRdBk-ImFeelinCrafty

I finished the top and back in January of 2014! And that’s when this quilt went into the pile of WIP’s. Wishing to be quilted… Yelling at me from the shelf… See, these pictures even have my old ‘logo.’

GreyQuilt

Then in 2017, this photo made it’s first appearance in the Finish A Long posts that I was participating in. (still am, though missed the last one!) And it’s been showing up every couple of months since then. Sitting basted, waiting to be quilted….

MadronaRoadHexi-Quilting-ImFeelinCrafty

And then last year it finally got quilted! What a long story for this little quilt!

MadronaRoadHexi-Corner-ImFeelinCrafty

MadronaRoadHexi-HexieDetail-ImFeelinCrafty

I just quilted it in straight line quilting with accent quilting around the box.

WIP-MadronaRd-Back-ImFeelinCrafty

Of course, the other thing with the challenges is they don’t give you much of the fabric, so you pretty much have to buy more if you want to make more than a mini. and I did. I used the yellow flower fabric on the back.

MadronaRoadHexi-Label-ImFeelinCrafty

And you know I love a label shot!

MadronaRoadHexi-Last-ImFeelinCrafty

So this quilt started back in 2013 and had a long journey of 5 years before I finally finished it last year about this is same time. And I guess you could call it 6 years, if you count the year it took to actually blog about it! I finished it and put it in my son’s school auction. His best friend’s family purchased it and it lives on their couch just a block away! We went over to take care of their cat and I saw it sitting out. I was like, that looks familiar! Ha!

And needless to say, since I can’t keep up with the deadlines of the fabric challenges, I no longer participate in them.

It does feel nice getting a WIP finished and then to know it’s being loved by someone.


Seattle Modern Quilt Giving Quiltcon Quilt for 2019

With three years of giving quilts under my belt as one of the Seattle Modern Quilt Guild Giving Committee co-chairs, I think this is my favorite giving quilt! OK, I love it! Really love it! Like want to steal it kinda love it….


Introducing our quilt for the Modern Quilt Guild QuiltCon Charity Quilt Challenge, The Last Hurrah! If you’re at QuiltCon right now, be sure to take an up close look at our quilt!

SMQG-QuiltConQuilt-closeup-ImFeelinCrafty


The basic layout of our QuiltCon Charity quilt was inspired by an antique quilt made of hand pieces diamonds from our guild President, Matt Macomber’s, antique quilt collection. From this quilt layout, I designed the layout colored diamonds, white on white diamonds and the solid diamonds.

SMQG-QuiltConQuilt-Pattern-ImFeelinCrafty


For our quilt we jumped right in and embraced the Modern Quilt Guild small piecing challenge. Between the two of us Seattle MQG Giving Committee Chairs, Debbie Jeske and myself, 18 yards of fabric was cut into 1 inch by 6 inch strips! We shared those strips with the guild in little baggies of 18 pieces each. Guild members sewed them back together into 185 rectangles. Then the Giving Committee Chairs cut the rectangles into diamonds and pieced them into hexagons! I love explaining this process to non quilters and watching their blank expressions as I tell them, ‘We cut up the fabric, then sewed it back together and then we cut it again and then sewed it back together again…. ‘

SMQG-QuiltConQuilt-blocks-ImFeelinCrafty

SMQG-QuiltConQuilt-CuttingDiamonds-ImFeelinCrafty

SMQG-QuiltConQuilt-Diamonds-ImFeelinCrafty


There are a lot of great things about QuiltCon, but one of best things is meeting new people and online friends. We designed the quilt based on a particular size diamond. Instead of using paper as a template to cut 309 diamonds, we wanted a plastic template and we remembered taking a class at last year’s QuiltCon with a woman who owns a company that makes acrylic templates! So we still had her card and looked her up online and ordered our 5″x8″ custom templates ordered from MakeATX!

SMQG-QuiltConQuilt-Piecing-ImFeelinCrafty

My co-chair Debbie pieced half of the hexagons and I did the other half. The quilt plays on a very traditional quilt design, but makes it modern. The diamonds are pieced into a group of 12 to make an 18″ hexagon. The placement of each of the striped pieces and solid pieces are laid out to break out of the hexagon to blur the lines between hexagons and stars and where one hexagon starts and stops. I love how it looks in the end, but I did confuse myself once or twice when piecing the top together!

SMQG-QuiltConQuilt-Quilting-ImFeelinCrafty


SMQG-QuiltConQuilt-QuiltingBack-ImFeelinCrafty


The amazing quilting was also done by Matt with a mix of machine and hand quilting. Again, he drew from his antique quilt for the quilting inspiration. And a special thanks to Kathleen for putting the finishing touches by binding the quilt!

SMQG-QuiltConQuilt-Detail2-ImFeelinCrafty

SMQG-QuiltConQuilt-Detail1-ImFeelinCrafty


With the design taking inspiration from the antique quilt, the color inspiration from the MQG, and the design goal of small piecing, we created a truly modern quilt.

SMQG-QuiltConQuilt-Vertical-ImFeelinCrafty

SMQG-QuiltConQuilt-closeupbottom-ImFeelinCrafty

SMQG-QuiltConQuilt-Last-ImFeelinCrafty


You may have noticed the name of this one…. The Last Hurrah! This one really is our last hurrah being the Guild’s Giving Committee Chairs! We think it’s a great one to go out on. Debbie and I would like to thank every single person that took the time to make even a single block for any of our Giving Committee Quilts for the last three years! To everyone who made a block, quilted a quilt or added binding, we appreciate it! We think all the quilts turned out fantastic! I had my doubts about some of them, but when it all came together, I loved them all!

SMQG-QuiltConQuilt-Me-ImFeelinCrafty

Seriously, do you really think anyone would notice is this quilt ended up at my house????


*******************

Quilt Name: The Last Hurrah

Design by: Louise Wackerman, @imfeelincrafty

Quilt Size: 70″ x 90″

Blocks by: Seattle Modern Quilt Guild Members

Top Pieced by: Debbie Jeske @aquilterstable and Louise Wackerman, @imfeelincrafty

Quilted by: Matt Macomber @odditease

Bound by: Kathleen Munns @quiltmunnster

Seattle Modern Quilt Giving Quiltcon Quilt for 2018

Here’s another flashback post for projects unblogged about… It’s just been patiently waiting in a folder on my computer to be shared on the blog!

For the Seattle MQG Quiltcon Charity quilt, the Giving Committee decided to do a little something different this year.


Instead of just one guild member designing the entire quilt, we decided to have a design challenge for the guild’s 2018 QuiltCon Charity Quilt. We put it out to the guild that we were taking submissions and received about 10 fantastic designs. Our main goal was to pick a design that would be the most feasible to create and one that we could involve as many members as were interested in participating. Deciding on just one was tough. We ultimately chose a design submitted by Cecelia Lehmann‘s and then we put a bit of an improvisational spin on it.

We used the color palette chosen by the Modern Quilt Guild, with fabric generously donated by Paintbrush Studio – beautiful Painter’s Palette Solids in (from bottom, below) White, Rice Paper, Purple, Tangerine, Tomato, Daisy, and Fuschia.

And then we mixed the colors and handed out 56 adorable little bundles to all the members that wanted to participate. Debbie wrote an easy to follow tutorial and we were off!

The timing was great because we got to work on it at our annual fall retreat. All the bundles that had not been claimed were found and transformed into blocks.

SMQG QuiltCon Quilt Front Detail Side 2-ImFeelinCrafty

I took the blocks home and played with the layout. Over and over. Until, with Debbie’s help, we agreed on a layout.

SMQG QuiltCon Quilt Options-ImFeelinCrafty

Excuse the horrible pictures. I couldn’t turn the light on or risk waking up my husband in the middle of the night, so I didn’t turn on the light! But I came up with quite a few ideas.

SMQG QuiltCon Quilt Front Detail-ImFeelinCrafty

The layout that we ultimately went with, really shows off the fan blocks and they really pop! Its’ almost a little art deco to me.

SMQG QuiltCon Quilt Front Detail Side-ImFeelinCrafty

Once again the quilt was handed off to another guild member for quilting, Dionne. And WOW! What an amazing job she did. I thought the blocks popped before she got it…. Now, it’s even more fantastic! Each row has a different pattern and each row is quilted in a different color thread to match the challenge fabric colors!

SMQG QuiltCon Quilt Back-ImFeelinCrafty

And I love a fun back. While piecing the back, I also had all the scraps from everyone’s blocks, so I pieced them together into blocks and added them in. The colors are so fun!

SMQG QuiltCon Quilt Back Detail-ImFeelinCrafty

I love the ring block the most. I almost snuck it into the front when no one was looking! But I figured everyone might notice soon enough, so I left it on the back. And I think it’s right at home there after all!

SMQG QuiltCon Quilt Back Label-ImFeelinCrafty

We’re also very lucky to have Dionne make our Giving Committee labels. It was truly a collaborative, group effort for our Seattle MQG contribution to the Quiltcon Charity Quilt Show.

SMQG QuiltCon Quilt Front 2-ImFeelinCrafty

Quilt Name: Frannie’s Flashy Fans

Quilt Size: 68” x 87”

Block Design by: Ceclia Lehman

Blocks by: Seattle Modern Quilt Guild Members

Block layout by: Louise Wackerman and Debbie Jeske

Pieced by: Louise Wackerman

Quilted by: Dionne Matthies-Buban

Binding by: Louise Wackerman

Recipient: Northwest Breast Center

Me+You Fabric Challenge with Seattle Modern Quilt Guild

We just recently had a guild challenge using fabrics from Hoffman Fabrics line, Me+You.

MeYouChallenge-Main-ImFeelinCrafty

It’s a line of bright saturated batiks. When I first head batik, I opted out. Then I saw them and opted back in! Be sure to check out the hashtag #meandyouandseamqg and you’ll understand why I opted back in! The line is a great line of fabrics, with prints and solids.

MeYouChallenge-Fabric-ImFeelinCrafty

I had grand plans for this project…. But they didn’t pan out as planned…

MeYouChallenge-Design-ImFeelinCrafty

As you probably know if you follow me on IG, I’m loving the Quilt Design A Day FB group. So for this project, I had planned on making one of my QDAD designs into a mini quilt/pillow.

MeYouChallenge-Circle-ImFeelinCrafty

I started with the circle using the reverse applique process that I used here. Looking pretty good, I thought. Feelin’ good about it!

MeYouChallenge-Applique-ImFeelinCrafty

Then I added little squares using the needle turn applique process. I looked at a few tutorials…. I was originally inspired by Carolyn Friedlander‘s book Savor Each Stitch. But I hated how it looked. I need more practice….

MeYouChallenge-RevApplique-ImFeelinCrafty

Then I tried teeny tiny reverse applique. Didn’t like that either… So I cut up the circle! And made some improv quarter circles….

MeYouChallenge-Front2-ImFeelinCrafty

Added some circular quilting….

MeYouChallenge-Last-ImFeelinCrafty

And it ended up looking absolutely NOTHING like the original design! Nothing! But I like it!

I wasn’t able to make it to the show we had at Pacific Fabrics in Northgate, but we ended up with quite an impressive group of designs!

MeYouChallenge-Show1

MeYouChallenge-Show2

MeYouChallenge-Show3

All show photos via AllisonSews and SMQG


Happy New Year with my Glitz Quilt

I thought it might be fitting to ‘ring’ in the new year with a glitzy quilt!

MMGlitzChallenge-Front-ImFeelin'Crafty

Ha! Get it? ‘Ring’ In the New Year with a quilt of rings? I crack myself up sometimes! This is the quilt I made for the Michael Miller Glitz challenge. It was not a winner. It didn’t make it into QuiltCon… And while everyone is showing thier favorite posts of 2015, this might be my least favorite quilt of the year…  It’s actually growing on me though….

MMGlitzChallenge-Bundle-ImFeelin'Crafty

For the challenge we got this little teeny tiny bundle of fat eighths of the Michael Miller Glitz line of fabric. I’m not a fan of mini quilts. I think I mentioned that before. I just don’t know what to do with them! So I don’t make them hardly ever. But when I get a mini bundle like this, I should probably think a little smaller…. But instead I ended up with this nice big throw quilt!

MMGlitzChallenge-CircularQuilting-ImFeelin'Crafty

Even though this quilt isn’t a favorite, I learned a lot making it! I got so excited with the new circle technique I learned for my sports quilt that I decided to try it here but not using a true circle. It worked, but it got really hard for the larger rings. Once I got to the larger rings, I had to start patching together the freezer paper and it just got pretty awkward to move around and get into place. But it worked! Just more ‘challenging’ than I had planned on!

MMGlitzChallenge-MatchedBinding1-ImFeelin'Crafty

I’ve been wanting to use Debbie’s matched binding technique many times, but have kept finding excuses not to. But this time, I knew it had to be done! And it’s awesome!

MMGlitzChallenge-MatchedBinding2-ImFeelin'Crafty

It really adds to this quilt!

MMGlitzChallenge-MatchedBinding3-ImFeelin'Crafty

I decided to quilt it using a circular pattern that had to get wider and closer depending on the rings. I like it, but keep seeing areas that I could have spaced a bit differently. But overall, I totally think it works!

MMGlitzChallenge-Back-ImFeelin'Crafty

MMGlitzChallenge-BackDtl-ImFeelin'Crafty

And the back. As you know, I don’t do a lot of quilting with black…. Maybe that’s why I’m not as drawn to this one… It seems to attract fuzz like crazy! I used every little bit of my fat eighth bundle! What I didn’t use on the front, I added into the back.

MMGlitzChallenge-Last-ImFeelin'Crafty

All in all, It was a fun one to make and really challenged my process. Did anyone else participate in this challenge? And the other plus about this one… I actually finished BEFORE the challenge deadline! Might be a first!

And I can finally cross this off my Finish A Long list!