Rice Crispy Turkeys

We like to make turkeys out of food around here! First (and my favorite) we made the Salad Spinner Turkeys….

RiceCrispyTurleys-Main-ImFeelinCrafty

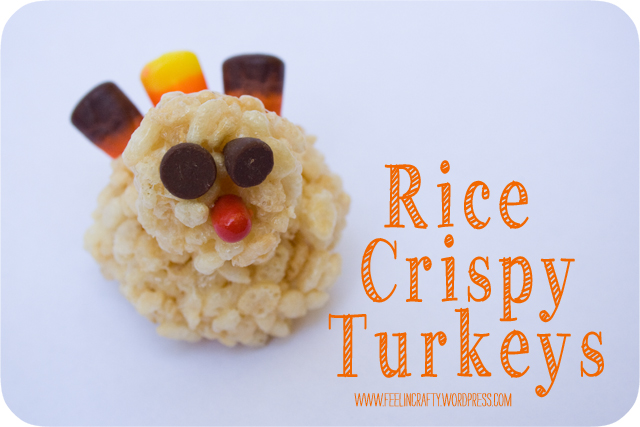
And now we made them out of Rice Crispy Treats!

RiceCrispyTurleys-Bunch-ImFeelinCrafty

These are a silly little project we did! I kinda laugh every time I look at them, actually! I had the idea, but in my head they weren’t quite so silly looking! But I think the silly works for a rice crispy turkey, huh?

RiceCrispyTurleys-Materials-ImFeelinCrafty

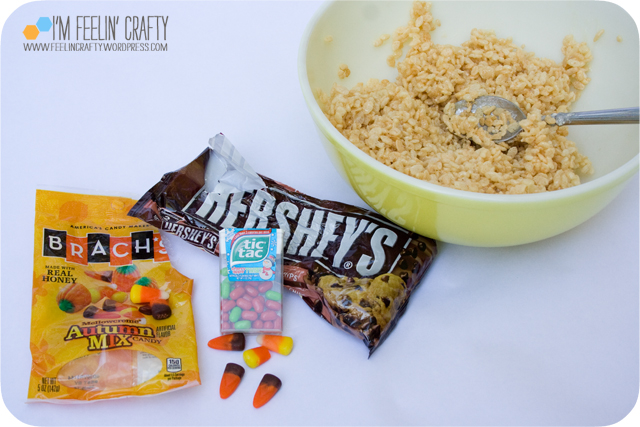
You need rice crispy treats, red tic tacs, chocolate chips and candy corn!

RiceCrispyTurleys-Body-ImFeelinCrafty

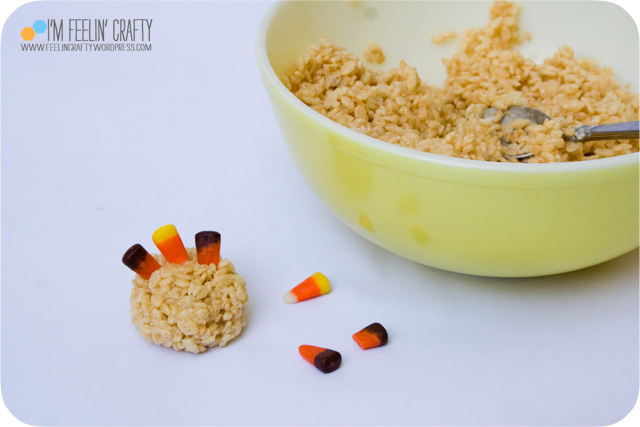
They are super simple to make! A bit sticky, but easy. Make a rice crispy ball and then stick the candy corn tail feathers in. I had to keep squeezing the ball while I inserted the candy corn, just to help keep the tail feathers in tight.

RiceCrispyTurleys-Head-ImFeelinCrafty

Now make a smaller ball and add the chocolate chips and the red tic tac beak.

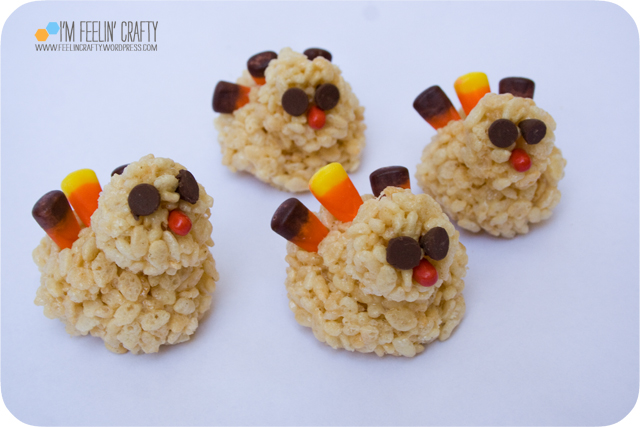
Then put them together! You do have to kinda squeeze and squish the two together keeping the round shape. Or, in hindsight, I would probably add a toothpick to hold the head on the body. It works without, too!

RiceCrispyTurleys-Last-ImFeelinCrafty

And I hate to say it, but… These silly little guys taste good too! Do you have a favorite Thanksgiving craft?


Paint Chip Challenge

We seem to like challenges in our Modern Quilt Guild! This time we decided to tackle a paint ship challenge. You are given a paint chip and all your fabric has to match the colors on the paint chip.

PaintChip-Main-ImFeelinCrafty

The ones in charge of the challenge picked grey, teal, light blue and dark blue. Some lucky ducks got a yellow chip too, which meant they got to add in accent pieces of yellow. I stood in line for my envelope hoping ‘not grey, not grey, not grey…’

PaintChip-Fabrics1-ImFeelinCrafty

I got grey….

PaintChip-Fabrics2-ImFeelinCrafty

And it wasn’t easy to find the grey’s either. Everytime I’d go to a fabric store I’d pull out my chip and nope… Or I’d buy grey thinking it had to be right and I’d get home and it wasn’t. Then I finally raided my stash and found just the right pieces!

PaintChip-WIthSketch-ImFeelinCrafty

I’ve been really wanting to do one of these triangulated pieces. First I used a triangulation app on my phone. Then I just assumed I’d make it into a paper piecing pattern. But, um, no. My assumption was wrong! Paper piecing a triangulated piece, didn’t work so well for me! I ended up just piecing as I went.

PaintChip-Main2-ImFeelinCrafty

I just couldn’t get snow out of my head when it came to this paint chip. So a snowy mountain top it is. I considered a white bunny in a snowstorm, but…..

PaintChip-Back-ImFeelinCrafty

I did get some yellow in the back! I’m loving that almost all of this was actually from my stash in the end.

PaintChip-Tag-ImFeelinCrafty

How do you do labels? I just use a sharpie and make a had written label. Maybe I should a more professional looking label…

PaintChip-Last-ImFeelinCrafty

So, I am totally over my wanting to quilt a triangulated anything! It was a good exercise in inside corners… Not a big fan, I learned! But I’m happy with it. Glad it’s done.

If you want to see them all, check back in the first part of June. Or come out to the show at Drygoods Design on June 4th! That’s opening night, but the show will be up for a month. And they are for sale!! Yea! We’ve never done a for sale show before!

And I can mark this off as 1 of my Q2 Finish Along finishes!
2015 FAL at On the Windy Side


‘Gator Quilt Blog Hop- Tester Pics!

I am just loving seeing all the creativity in the ‘Gator Quilt! It’s remarkable to me how you can give someone the pattern and then from one pattern, such different pieces are created! I love it!

I had a wonderful bunch of testers. Some of which finished projects, others who just finished a block or two and then there are the ones who made a finished project but don’t have a blog to share it on. Today I’m sharing the work of some of these testers!

etsytester-1

etsytester-2

The first one is my ‘etsy tester’ as I call her! Sharon contacted me on etsy when I first posted a picture of the quilt and asked if it was ready to be purchased. This was a while back, so I had to say no. But then I thought, I do need testers (see this was before testers even!). So she took it on, twice! I love her two quilts! Especially the clock in the belly from Peter Pan!!! I also love what she did with the ‘Gator’s eyes! The roses are from a pattern created by Beth at Piece By Number and the alphabet is from Linda at Paper Panache.

KarenBolan-IMG_2

Next up is Karen is new to the quilting world. This is her second paper piecing project. Her goal right now is to gain proficiency with as many quilting skills as possible. In “real life” she is an engineer living in Northern California. I love that it’s pink! It’s the first pink ‘gator I’ve seen!!

MarjorieNath-Aligator test

Next is Marjorie in Mexico! Now this one is cool too by using the different colors! I love how the blue and green pop! Marjorie is making this one into a wall hanging for a friend who’s nick name is ‘Gator! How fun!

KerrieErb-gator4

And Kerrie is the last one to share today! Kerrie is an avid sewer who just started paper piecing around October of last year and was super excited to try this one! She was able to test the small and medium ‘gator for me. I love the texture in the patterns that she used. They just look great!

The quilt pattern is color coded. But only with codes like background color, body color, etc… So this way, you can come up with your very own personalized ‘Gator! And by the looks of the tester projects, everyone was able to do just that!

Keep checking in for more ‘Gator fun!

AlligatorQuilt Cover-sm

BlogHopButton

June 10th- I’m Feelin’ Crafty

June 11th- A Quilter’s Table

June 13th- Marci Girl Designs

June 14th- I’m Feelin’ Crafty– showing off other Testers work!

June 15th- Made By Amanda Rose

June 16th- Wombat Quilts

June 17th- Wips and Tuts

June 18th- Shaffer Sisters

June 19th- Crafty Shenanigans

June 20th- I’m Feelin’ Crafty

Pinwheels for PreSchool- Another Quilt

Man, I seem to be posting a lot lately about quilts! I seem to have been doing a lot of them lately!

PreSchoolQuilt-Main-ImFeelinCrafty

And this is one that I love! I wish I could have kept it, but it went for a nice chunk of money that I couldn’t spend on it!

PreSchoolQuilt-Front-ImFeelinCrafty

Our pre-school has an auction every year, like most pre-schools in Seattle. Do the ones near you?? Anyway, our school has two classes and each year each class does a project to be auctioned. This year my son’s class decided to do a quilt. And no, I didn’t have anything to do with the idea! But… They did ask if I’d put it all together! And what could I say?

Of course I did it! Of course I said yes!

PreSchoolQuilt-Process-ImFeelinCrafty

We cut all the shapes, each one in different colors. Then I made all the pinwheel blocks while I was waiting on the pieces from the school kiddos. And then they all went together quite nicely.

PreSchoolQuilt-Stories-ImFeelinCrafty

As each one was drawing their blocks they told a little story. You have to hear some of my favorites!

Daniela said ‘It is a house. It has people inside. The people want to go for a walk, but they can’t because it’s very rainy.’

Ardin, Max’s best school friend, drew one of my favorite pictures and said, ‘It’s a monster. It has two claws on it’s feet.’

Max’s picture, ‘Is a wolf kingdom. I forgot to draw the wolf.’

Nevia doesn’t have a story, but I loved her very orderly picture!

And Max’s other ‘bestie’, Ali, says, ‘It’s called a red rocket. It has rockets. It doesn’t go into space, only clouds.’

PreSchoolQuilt-Back-ImFeelinCrafty

And then on the back we had the teachers draw their own blocks.

PreSchoolQuilt-FrontDtl-ImFeelinCrafty

And I made my own block. You can get the pattern pieces here. The pieces include a quarter inch seam allowance. Sew together pieces 1, 2 and 3. Then sew together pieces 4, 5, and 6. Then sew the two halves together. And lastly, I trimmed them down to 6 1/2″ blocks. Changed the colors around in each block and randomly rotated them in the quilt. I love the overall effect!

PreSchoolQuilt-FrontMax-ImFeelinCrafty

I wonder what next year’s project will be!


Shared with these Link Parties!

Spring Thyme- a Book Review with a Free Printable!

Recently I was contacted by the lovely and sweet ladies at Bittersweet Walnut Grove! They have been awesome putting up with my scatter brained ways these last couple of months! See? I started to tell you why they contacted me and I have already gotten sidetracked….

IntroTheir wonderful e-book! That’s why they contacted me! I’m so lucky to get to review their wonderful e-book, Spring Thyme! It’s full of spring time recipes, craft projects and family memories!

Authors

The book is a family project between Mother and Daughters! It’s the family memories and  anecdotes from these beautiful ladies that make their series of books stand out from the rest of the craft books I’ve seen lately. The ladies intersperse tid-bits about growing up on the farm and I just wanted to run around with them in the fields and look out the window of the farmhouse next to them. They do a great job making you feel like you are a part of this creative and nurturing lifestyle that they are writing about!

The series of e-books that have written correspond with the changing seasons and are meant to connect you and the season thru the recipes and projects! A lot of the recipes are focused around strawberries and that’s perfect for this family who can go through a carton of strawberries like none other! All the recipes have gluten free options, as well.

StrawberryLemonade-I'mFeelinCrafty

I picked two recipes to try. Yes, both involve strawberries! With the first being the Strawberry Lemonade! Delicious! I don’t think I’ve ever made lemonade from scratch before! Not only is it really pretty, but it’s tasty too! And even better the day after you make it.

StrawberryDip-Bowl-I'mFeelinCrafty

And then we made the DELICIOUS Strawberry Fruit Dip! You could dip anything in this and it would be delicious! It’s super simple and the whole family LOVED it! I’m so glad to have this one. I wonderful new recipe to take to spring and summer potlucks!

StrawberryDip-kiddo-I'mFeelinCrafty

I just happened to try a couple of recipes, but the book is full of fun craft projects, like the Strawberry (yes, more strawberries) Sugar Scrub and the Garden Pots, printables, including the adorable pie boxes,  and sewing projects as well, like a really precious bunny doll and little baby chick applique pattern. Fun projects to keep or share! And they are all really easy and quick!

I really want to share all the projects with you, but I don’t want to give it all away either!

PrintableGift

And for you…. A lovely printable for bag toppers! The mini bag toppers coordinate with the Gratitude Gift Project series in the book! Click here for your free printable!

You can get your copy, either the kindle edition or paperback, at Amazon, or a paperback version at Barnes and Noble. It’s great! I’m tellin’ ya! Get you own today to see all the other projects I don’t have time to write about!

And be sure to follow the ladies on Facebook!


I have been compensated with either payment or product for this post. All opinions are my own, honest opinions!


Dr Seuss Party Series- The Food and a Recipe!

Mmmmmm…. mmmmmm…. The party food!

When it came to planning the food, I let Dr Seuss be my guide! Pretty much everything was inspired by the stories. I made sign labels for most of the food!

I have been LOVING the striped straws, so I just had to include these in the party! You might be seeing them again, because I have about a zillion of them. I also made the stickers for the swirl pops. The swirl pops were given out after Pin the Hat on the Cat and after cake and I think it kinda sent a few of the kids into a sugar coma… But they bounced right back!

All the paper products and plastic ware were purchase at a local Dollar store. The perfect colors! I made the mini pops using this tutorial via The Baker’s Twine. I used my fingers instead of a fork. Super easy! And then they came in handy for our Halloween Costume!

You might be wondering about the cake…. wellllll…. Everyone has these amazing cake pictures of their Children’s birthday cakes. Mine didn’t turn out well at all. I had such HIGH hopes for the cake. I knew exactly how I was going to make my Dr Seuss topsy turvy cake… The problem was I waited until the last minute. I mean last minute. Kids were already starting to get here! So my husband took over the mess that I had started. Did I say mess? I meant cake… Well, he took over and I gave up my control issues (barely) and the cake tasted fantastic… But….. It didn’t look sooo good! (And I’m not saying that was my husband’s fault! He did great with what he was given to work with!) Hence the reason the picture of the cake is a very small one!

And Horton’s specks? They were only the hit of the day! These cookies are called Forgotten Cookies. They didn’t get quite as round as I was envisioning, but I forgot that with these cookies, you don’t really get perfectly round cookies.  I know one friend went home with a copy of the recipe and others were asking for it to be emailed.

I have to give a shout out to my mother who helped with soooo much of the food! And these cookies were all her. I’ve tried a couple of times to make them, but have not had much success…. But when she makes them…. They get gobbled up by everyone SUPER FAST! Including the birthday boy. My mom agreed to share the recipe she uses and I hope you have better success than I do. (I think at Christmas I might just have to have her give me a lesson on these!)

Forgotten Cookies:

from my Mother, via MARY KAY (yes, of Mary Kay Cosmetics)

2 egg whites

3/4 cup sugar

1/2 t. vanilla

1 small (6 oz) semisweet chocolate chips, optional

1/2 to 1 cup pecans, chopped, optional

dash of salt

pre heat oven to 350

beat egg whites ’til stiff.  I like to use a bowl with a narrow base===copper is great.

Add sugar gradually

Beat a high speed for about 5 minutes, til peaks form

Add food color, if desired.

Fold in vanilla, chocolate chips and pecans.

Line a cookie sheet or 2 with foil or parchment paper

Drop from teaspoon onto cookie sheets.

Put in oven and TURN OVEN OFF!

Leave overnight (at least 8 hours)  (do not peek!)

Makes about 3 dozen meringue-like cookies.

and party credits:

All fabric came from JoAnn’s

Striped Straws via Modern Lola

Swirl Pops via Oriental Trading Company

Red and White Boxes via Oriental Trading Company

Birthday Cake Candle via Modern Lola

Update…. Unfortunately, the food labels and invites are no longer available for sell or sharing.

Shared with these link parties!