Happy Thanksgiving!

Happy Thanksgiving! 

Thanksgiving-LinkLove-ImFeelinCrafty

I’m hoping everyone (even you non-Americans who might not be celebrating Thanksgiving) has a wonderful day tomorrow! It’s a wonderful day for everyone to take a break and remember what we are thankful for!

There aren’t a lot of Thanksgiving activities on the blog, but I thought I’d remind of ones you might have missed!

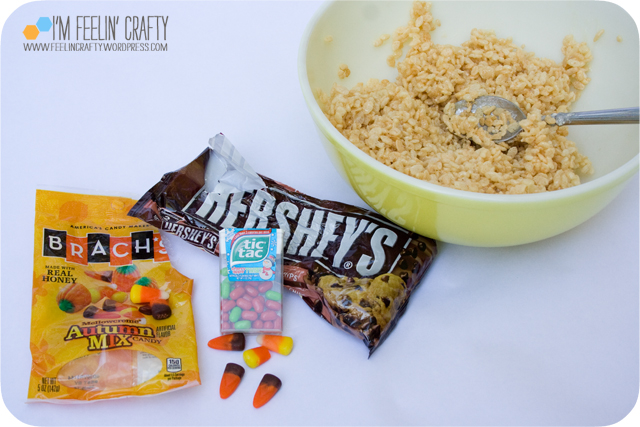
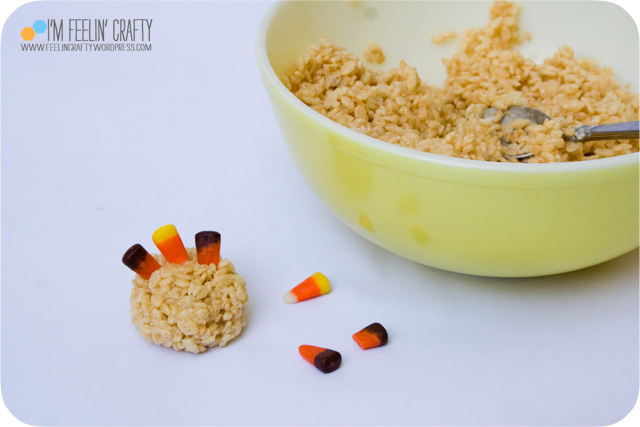
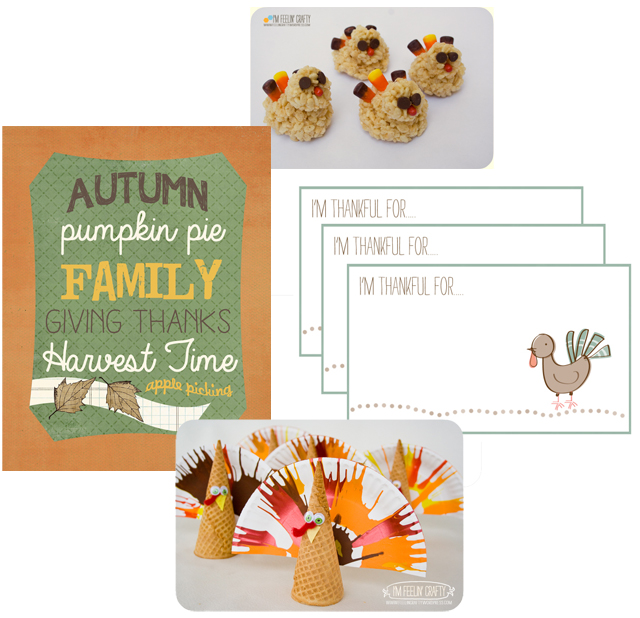
Just recently I posted about how to make the silliest Rice Crispy Treat Turkeys!

In need of a last minute printable for your Thanksgiving decorations? Be sure to print out the subway art-like printable courtesy of the ladies at Bittersweet Walnut Grove.

I’ve always loved the Thankful cards that I shared designed by the lovely My Little Buffalo!

What about a fun activity for the kid’s table? We had fun making the Cone Salad Spinner Art Turkeys!


Have a wonderful day!

Visiting with Santa at Southcenter Mall

I am a strong believer of not celebrating Christmas before Thanksgiving…. BUT… The only exception I make is seeing Santa!

Santa-Main-ImFeelinCrafty

Last year we went to see Santa before Thanksgiving and it’s so much easier! And I think Santa is probably less stressed. I mean, I think I have a long To Do list before Christmas…. This guy has an even longer one…. Plus there’s shorter lines (if any) and you can get $5 off if you use the coupon below!

Santa-Waiting-ImFeelinCrafty

LetterToSanta-Title-I'mFeelin'Crafty

We printed our letter that we use every year. Yes, it’s on the blog and has been updated for 2015! The kiddo did a little proof reading while we waited in line!

Santa-Talking02-ImFeelinCrafty

Santa-Talking03-ImFeelinCrafty

Santa-Talking01-ImFeelinCrafty

I’m savoring this sweetness! He loves going to see Santa and take his letter!

Santa-Santa-ImFeelinCrafty

This guy is the coolest! The other thing about seeing Santa before Thanksgiving is that the lines aren’t long and you get more chatting time. I even got to chat with him a bit!

1219_MyImage-small

We got a super sweet picture this year!

Santa-Coin01-ImFeelinCrafty

Santa-Coin02-ImFeelinCrafty

Santa-Coin03-ImFeelinCrafty

This year Santa pulled out a special treat for the kiddo! He gave him a naughty or nice coin. ANd luckily with the heads and tails, the coin landed on Nice for the kiddo. Santa told him to keep it in his pocket to always remind himself to be nice! So special!

Santa-Gift-ImFeelinCrafty

Now, I don’t think every kid gets a coin, but every kid does get a little crayola gift! And don’t forget the candy canes!

Santa-FastPass-ImFeelinCrafty

At Southcenter Mall, you can register ahead and get in the Fast Pass line!

Coupon1_Internal-Campaign_FB-2-No-FASTPASS

And don’t forget to print your coupon and take it with you! Go early! Do it!

Santa’s schedule is:

November 6 – December 6

10 a.m. to 9 p.m.

Sunday: 11 a.m. to 7 p.m.

and

December 12 – 23

9 a.m. to 10 p.m.

Open 9 a.m. to 6 p.m. on Christmas

Santa-Tree-ImFeelinCrafty

Santa-Love-ImFeelinCrafty

I was also very impressed with the decor this year. There are so many photo spots! You could even put off that professional photography and take all your holiday pictures right there around Santa! I love the big letters for Santa and Love. The trees were pretty cool too and make great backdrops! I took so many pictures!

Santa-WithSanta-ImFeelinCrafty

Aren’t they cute???

I have been compensated with either payment or product for this post. All opinions are my own, honest opinions!


Rice Crispy Turkeys

We like to make turkeys out of food around here! First (and my favorite) we made the Salad Spinner Turkeys….

RiceCrispyTurleys-Main-ImFeelinCrafty

And now we made them out of Rice Crispy Treats!

RiceCrispyTurleys-Bunch-ImFeelinCrafty

These are a silly little project we did! I kinda laugh every time I look at them, actually! I had the idea, but in my head they weren’t quite so silly looking! But I think the silly works for a rice crispy turkey, huh?

RiceCrispyTurleys-Materials-ImFeelinCrafty

You need rice crispy treats, red tic tacs, chocolate chips and candy corn!

RiceCrispyTurleys-Body-ImFeelinCrafty

They are super simple to make! A bit sticky, but easy. Make a rice crispy ball and then stick the candy corn tail feathers in. I had to keep squeezing the ball while I inserted the candy corn, just to help keep the tail feathers in tight.

RiceCrispyTurleys-Head-ImFeelinCrafty

Now make a smaller ball and add the chocolate chips and the red tic tac beak.

Then put them together! You do have to kinda squeeze and squish the two together keeping the round shape. Or, in hindsight, I would probably add a toothpick to hold the head on the body. It works without, too!

RiceCrispyTurleys-Last-ImFeelinCrafty

And I hate to say it, but… These silly little guys taste good too! Do you have a favorite Thanksgiving craft?


Technicolor Galaxy- Update!

It’s been a little while since I updated on this project! I got close to up to date, but now I’m really behind again….

TechnicolorBlocks-Main-ImFeelinCrafty

I got up to date with blocks 3, 4 and 5. I’m still in love with the project, I just need to get back on it!

TechnicolorBlocks-Blocks-ImFeelinCrafty

TechnicolorBlocks-Blocks2-ImFeelinCrafty

Each of the three blocks was really 4 blocks, so the 3 blocks is really 12 blocks in total! Block three was the Piano Keys. Super easy paper piecing. I made one extra block of this one. You can see in my planning for this block I didn’t use a solid. Once I had the two prints together, I knew it was a big fat NO!

Block 4 was the scattered geese. Another paper piecing, just a little more in depth. And I made these with a solid first, then decided I didn’t like it that way. So technically the 12 blocks were actually 16 since I made a few extras….

And lastly, Block 5 was the Arrowheads. This block incorporated the applique. I’m not a big fan of applique because I’m worried about the fabric fraying after washing. But I did it anyway! And I love how they turned out!

TechnicolorBlocks-Whole-ImFeelinCrafty

Here it is all together! You can read more about the earlier steps here and here.

TechnicolorBlocks-Last-ImFeelinCrafty

The next ring is waiting patiently for me in it’s box…. I’ve got one of the 3 sets done… I need to finish the rest of the ring to show! What am I talking about? I want to finish the whole thing before the end of the year…. We’ll see!

Wallet Tutorial

I’ve been away from the blog because…. I’ve been sewing! Love it! Today I’m bringing home a post I did this summer for Busy Being Jennifer blog and going back to the sewing machine!!

Years ago, I found this little vinyl pouch wallet in a shop for almost 30 bucks! As I was talking to the store clerk, I was turning it over, unzipping it, looking inside…. Basically just figuring out how it was made while at the same time chatting away! I paid for what I did buy and I ran home. Ok, I was pretty pregnant at the time, so it’s more like I waddled home than really ran….

WalletTutorial-Main-ImFeelinCrafty

That night I told my husband I was going to sew. About 30 minutes later I came up and told him I had just saved almost 30 bucks! Yep, I had made my own wallet!

WalletTutorial-Old-ImFeelinCrafty

That was about 6 years ago…. I used it everyday for about 6 years…. Then it started to look like this. Sad, very sad. I kept meaning to make another one and when Jennifer asked me to be a part of her series, it was the perfect excuse to finally make myself a new one! And I thought I’d show you how to make yours!

WalletTutorial-Materials-ImFeelinCrafty

First you need a vinyl, a zipper, thread, scissors and a cutting device. And you can also add a clip. For the zipper, it doesn’t actually matter what the length is because you will trim the end. I think I used a 7″ zipper. For the vinyl, you’ll need four pieces:

(1) 5×7 inch piece for the back

(1) 3.5×7 inch piece for the front bottom

(1) 1.5×7 inch piece for the front top

(1) .75×4 inch piece for the clip holder

and any additional small pieces to use for embellishing the front or back

WalletTutorial-Step1-ImFeelinCrafty

First cut out all your pieces.

WalletTutorial-Step2-ImFeelinCrafty

Secondly, prepare the front. First embelish if you’d like. Originally I had made circle flowers. This time I did little hexagons! And then sew in the zipper. Locate the start of the zipper about half an inch from the side of the wallet. Then sew in the zipper!

WalletTutorial-Step3-ImFeelinCrafty

Assemble the pieces. Front with the zipper open a bit right side up. Then lay the clip piece over the zipper. And lastly, cover with the back piece, right side down.

WalletTutorial-Step4a-ImFeelinCrafty

WalletTutorial-Step4b-ImFeelinCrafty

WalletTutorial-Step4c-ImFeelinCrafty

Sew all the pieces together using a 1/2 inch seam. And sew over the zipper. When you get to the zipper, move your needle by hand, nice and slow. I go back over my zipper stitches a few times! And then clip the corners!

WalletTutorial-New-ImFeelinCrafty

Turn it right side out and you have a perfect little for all those crazy cards you carry around!

WalletTutorial-OldNew-ImFeelinCrafty

What do you think? Throw away the old one? Oh, yes!

WalletTutorial-Last-ImFeelinCrafty

I think the old one held up pretty well for the amount of time I used it! But I’m also pretty happy, more then happy, to have a new one!


Handmade Halloween

Yes, Halloween has come and gone, but I wanted to share the costumes we had this year!

Halloween-Ash-Main-ImFeelinCrafty

The ‘real’ costume was Ash, the Pokemon trainer, and his Pokemon, Pikachu! We went back and forth and back and forth between costumes. FIrst it was Ash, then Shaggy from Scooby Doo, then another Pokemon character, and back around to Ash!

Ash_Ketchum

Do you know Ash? Well, this is what he looks like as a cartoon….

Halloween-Ash-Whole-ImFeelinCrafty

And this is my real life version! As we were trick or treating, kids kept saying Hello to Ash! Then Dad and I were waiting on the kiddo to trick or treat and these older kids came by talking about the kiddos costume. One kid was telling the other kid about how he’d seen the kid in the Ash costume and,

‘It’s so LEGIT, man’

Talk about making a Momma proud! Oh, yeah! The kiddo came back and I told him about the huge compliment he got and he said, ‘What’s that mean?’ Ha! It means you have a really cool Momma that makes you really cool costumes! hehehe!!!

Halloween-Ash-Pieces-ImFeelinCrafty

This costume was a mish mash of handmade and not. The coat, totally all handmade. I used the Kitschy Coo Reversible Zippy Hoodie Pattern for the jacket. I got the hat online and painted on the symbol with fabric paint. I was planning on making the pants, but when I found then for ten bucks at Target, I just bought them…. The gloves are half and half! I tried to make my own, but then found some just the right color. I cut them down and added on the red cuffs.

Halloween-Ash-Last-ImFeelinCrafty

And Pikachu! I made Pikachu! I made a neighbor one a while back using the Ikat Bag’s Menagerie Pattern with a few alternations. And now the kiddo gets his own!

Halloween-Shaggy01

And remember I mentioned Shaggy? Well, the Friday before Halloween school had a Dress Like Your Favorite Book Character Day. Max choose Shaggy from Scooby Doo! Yes, they are books now. He’s become obsessed with those meddling kids in both book and video form!  And yes, that’s Scooby dressed as a wolf for Halloween! hehehe!

Halloween-Shaggy03-ImFeelinCrafty

Originally, I was just going to whip up a tshirt for him. Then I headed into Old Navy I just happened to find one last green short sleeved shirt with a V-neck, in his size, for $1.50! Um, can’t pass that up! I very liberally used See Kate Sew’s Surfer Slacks for the bell bottoms. I started at one size of the pattern at hte waist, then just drew the pants out at the knee for the bell bottoms. I should have exaggerated even more….

Halloween-Shaggy02-ImFeelinCrafty

You aren’t Shaggy without the silly whiskers! And I found the Scooby Snacks at Target!

Halloween-Ash-Pokemon-ImFeelinCrafty

We had a fun Halloween! The kiddo said it was his best one yet! Awesome! I told him that I hope that when he grows up that he has fond memories of Halloween and being involved with all his custom made Halloween costumes. And I told him, if he has a wife that doesn’t sew, that means he has to make his kids costumes! I hope so!


And the PillowCube Winner is…..

Thanks to everyone for your interest in the Pillowcube giveaway! The pillows are fantastic! You can totally tell the difference between the pillows on my couch. The difference between the cheap big box stores and the Pillowcube!

PillowCube-HandChop-ImFeelinCrafty

Now to what you’re waiting for… The Winner is….

drumrollplease1 copy

And here’s my traditional drum rolllllllll……

Comment #11!

Capture

via Random.org

Yea! Erin! You’re the Winner!

Capture2

And thanks again to Pillowcubes for the awesome giveaway! Thank you! And if you didn’t win, don’t forget to you can order your own pillows right now with the coupon code FeelinCrafty10 to receive 10% off your purchase!