A Backsplash How To Idea!

Today I’m welcoming Merri Cvetan from the blog Design Coach and she’s going to show us a fun take on a DIY Backsplash! Welcome!

Image 9

The two most expensive aspects to kitchen remodeling are the cabinets and countertop. First, you choose your cabinet style, color and design. Next, you pick out the countertop. There are many countertop options to choose from. Before making a decision, check out the pros and cons of each. The most popular countertop materials are:

 Granite continues to be a popular choice. It’s a natural stone that comes in a variety of colors, veining and patterns. No two pieces are ever the same. It’s resistant to heat, scratches and stains.

 Quartz counters are man made from ground quartz and resin and are extremely durable. It’s available in many colors and textures.

 Solid Surface countertops are also man made and completely non-porous. Since the finish goes all the way through, scratches can be sanded out.

 Laminate countertops are the most affordable option. It comes in a multitude of colors and patterns and faux finishes.

There’s also stainless steel, concrete, wood, copper, marble, soap stone, recycled material, glass, travertine and tile.

Image 2 copy

Depending on the countertop you choose, you may decide to install a coordinating or matching backsplash. There are no hard press rules; it’s a matter of taste, style and budget. The previous owners of this house decided against a matching granite backsplash. They probably planned to install tile backsplash at some point, but never got around to it. Now, it’s in the hands of new homeowners. Although they would love to add color and pattern to their kitchen, a tile backsplash isn’t in their budget at this time.

Image 3

I decided to offer them an alternate solution. I framed vintage recipes passed down from the couple’s grandmothers!

Image 4

Image 5

To do this project yourself, gather a variety of 5 in. x 7 in. picture frames with glass (glass will protect the recipes). I prefer the original recipes, but you can make photocopies and choose a scrapbook paper that coordinates with your kitchen décor.

Image 6

Image 7

Cut the scrapbook paper to fit the inside of the frame and attach recipe cards with adhesive squares.

Image 8

Layout the frames on the counter and rearrange until you get an arrangement you like. Make as many as you need to fill in the space between the countertop and bottom of the upper cabinets.

Image 9

As an interior designer, I always recommend you choose the best countertop you can afford. But you should also consider your personal style and lifestyle: do you cook and entertain? Are durability and maintenance a concern? Do you want a countertop to look like new ten years from now, or do you prefer the patina you get from use? There are hundreds of finishes and colors: Polished or honed? Natural stone or man-made? Bold color or neutral? Countertops cover a large surface in any kitchen, so choose wisely and think about how it will mesh with your backsplash. And if you inherit—or simply choose—bare walls as their backsplash, consider how you can get creative with family heirlooms like old recipes to fill the space. Have fun with the process!

Merri Cvetan in an interior designer that likes to incorporate cool crafty DIYs into her designs. She also gives great kitchen design advice that includes how to match your countertop with your cabinets and backsplash.  To see more info on countertop options, visit homedept.com.

The Last 2015 do Good Stitches Quilts

This is my last throw back post to 2015!

25044633016_ef65474fd3_k copy

There are 3 Nurture Group do.Good Stitches quilts that I haven’t shown from 2015!

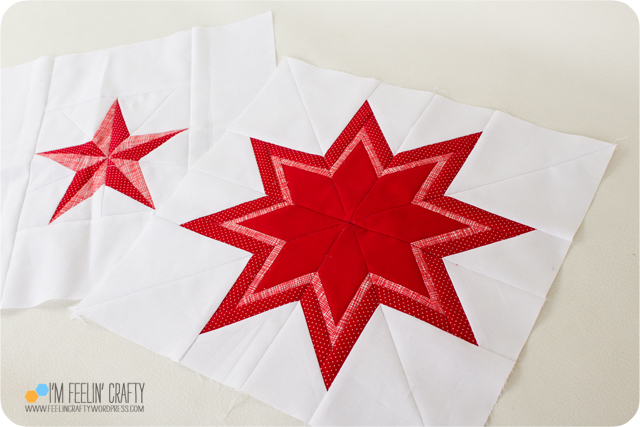
First up is the lovely red and white quilt from August! This was designed and quilted by Briawna, of Purple Poppy Quilts. I love the red and white. For this one we had two rules. You had to make a star and it had to be red and white. That was it. We all picked our favorite stars! Or, in my case, two stars I had not made before.

AugDoGood-LoneStarburst-ImFeelinCrafty

I love paper piecing, so I chose two paper pieced stars. The first one I made was the Lone Starburst. This one is a free pattern by Six White Horses on Craftsy. I love how it turned out in the different reds!

AugDoGood-TwoTone2-ImFeelinCrafty

This is another one I have been wanting to make for a while! This little guy is a small block. It’s a 6″ finished block and I needed a 12″ block, so I decided to go ahead with it and just make more white space. Glad I did. This is the Two-Tone Star by Sewhooked on Craftsy.

25006842696_46765e699b_k copy

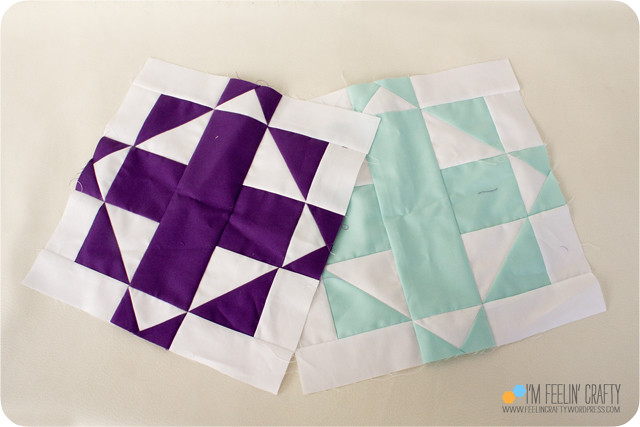
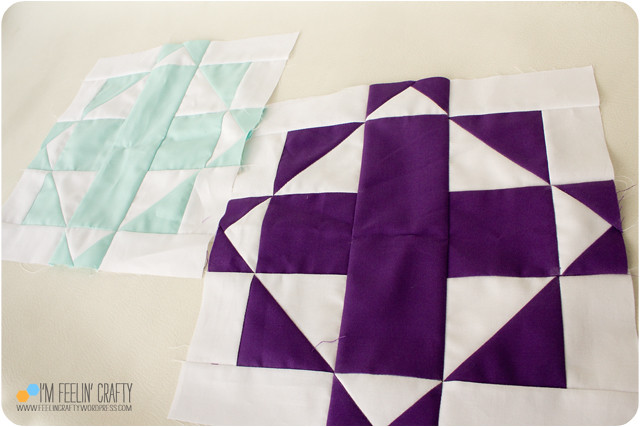
Next up is our September Quilt by Carla of Modern Bias. This one had a few more ‘rules’ than the last one!

image via this website

This one was inspired by a photo for the color scheme. As I’m writing this, it’s the first time I’ve looked at the inspiration photo next to the finished quilt and I love it! I think the group stuck to the color scheme beautifully!

SeptDoGood-Both-ImFeelinCrafty

SeptDoGood-PurpleMain-ImFeelinCrafty

For the pattern, we used a tutorial from Canoe Ridge Creations.  The pattern is called Granny’s Front Porch. Pretty nice and easy. Easy tutorial to follow.

23985246534_17450235f9_k copy

23985249284_007f382c6b_k copy

And the last quilt we made was an arrow quilt! This one is also by Briawna, of Purple Poppy Quilts. There have been a lot of arrow quilts around online lately. I love them, but have never attempted one. This was nice to be able to contribute to one!  I had a fun time making arrows!

OctDoGood-Arrows-ImFeelinCrafty

For this one we used the arrow tutorial by Grace and Favour. And then we sent in the leftover pieces and Briawna used them on the back!

Quilts of 2015

Another flashback to 2015…

2015Quilts-ImFeelinCrafty

This time the quilts I finished in 2015!

I got nine done last year, with three of them being mini’s. All the designs are my original designs. The only exception is the Charley Harper mini quilt. I didn’t design the bird, but I did design the quilt on my own….

I feel like I’m in a bit of a design slump. I don’t know why, but I feel like I am not coming up with anything creative lately. Then I look at the quilts I made last year and am pretty happy with the originality in my quilts. Maybe I’m not in the slump I thought I was in after all!

I’ve also finally added a Quilts Tab to the top of my blog! It has a drop down menu with additional tabs for all the years I’ve been quilting. All 5 years! And you can see things have changed a bit since the first couple of years! It seems like I’ve been quilting for so much longer! I love seeing all my quilts in one spot. Check it out!

Everything I Made in 2015

I know I should have posted this coming series of posts back in January….

Everything2015-ImFeelinCrafty

But I didn’t. I didn’t get around to getting everything together! Until now! So technically, it’s actually everything I blogged about in 2015. But some thing were made in 2014 and not blogged about until 2015. And there are some things I made in 2015 that I still haven’t blogged about it. SO I feel like it all evens out in the end!

I do love putting a little snippet of everything I made in a years time in one place. I was pretty busy!

I did a lot of sewing. A bit of quilting! Loved crafting with the kiddo, trying out Pinterest ideas! (I need to resurrect that crafting time!) And a few printables to round everything out!

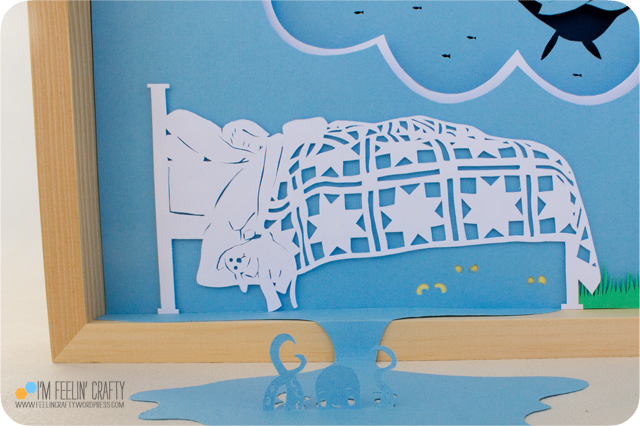
Sweet Dreams, a Paper Cut Art Piece

I haven’t done a paper cut in a long time…

Papercut-Main-ImFeelinCrafty

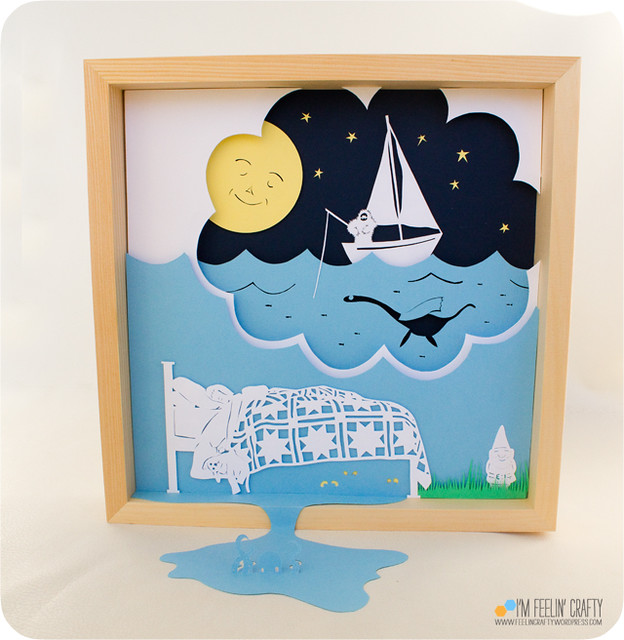
Then a friend of mine has a gallery with a little mini gallery and she asked me to do another piece! And when I say mini, I’m not kidding! The mini gallery is about 14 inches by 14 inches by 9 inches. I thought about doing a mini quilt, but she loves the paper cuts I do and convinced me it was time for another one! I’ve done a Halloween one and a Christmas one….

Papercut-Main2-ImFeelinCrafty

LIke I said, I really thought about doing a mini quilt. Then I thought about a papercut quilt pattern with a quilt behind… Then it turned it to a quilt on a bed. A quilt on a bed covering a kiddo. A quilt on a bed covering a sleeping, dreaming kiddo!

Papercut-Dreamer-ImFeelinCrafty

The bed on the quilt was for sure the inspiration for the whole piece! I had the kiddo pretend to be asleep under a quilt and took pictures. Then I cut from the picture. And from there came the dreams….

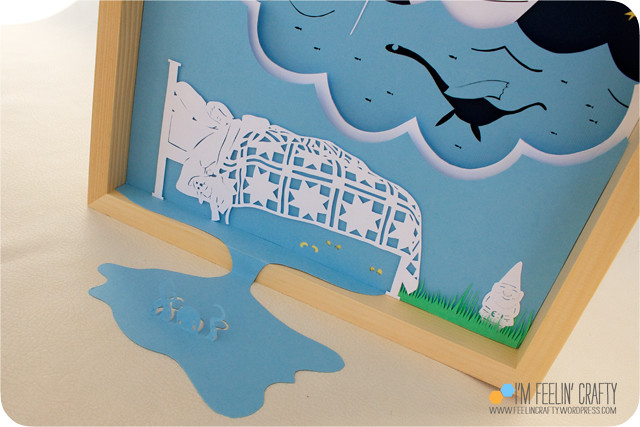
Papercut-Bottom-ImFeelinCrafty

The bottom half has the monsters under the bed, the kraken and the gnome!

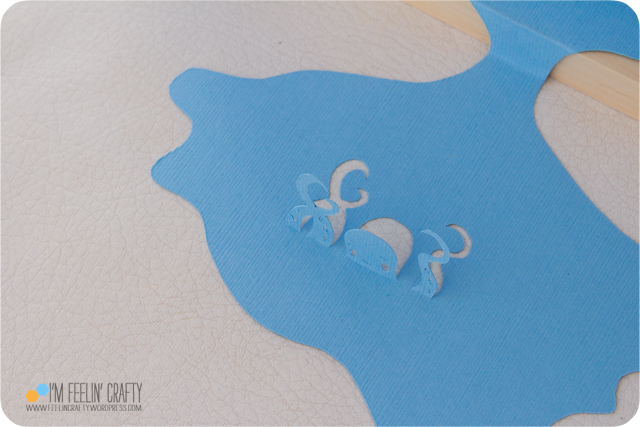
Papercut-Kraken-ImFeelinCrafty

The kraken is a mythological sea creature that looks somewhat like an octopus! Sometimes the drawing are a bit scarier than others. This is a sweet one!

Papercut-Gnome-ImFeelinCrafty

I love the monsters under the bed! The piece is called sweet dreams, so these guys must be sweet! As is the kinda creepy gnome, keeping watch.

Papercut-SeaHero-ImFeelinCrafty

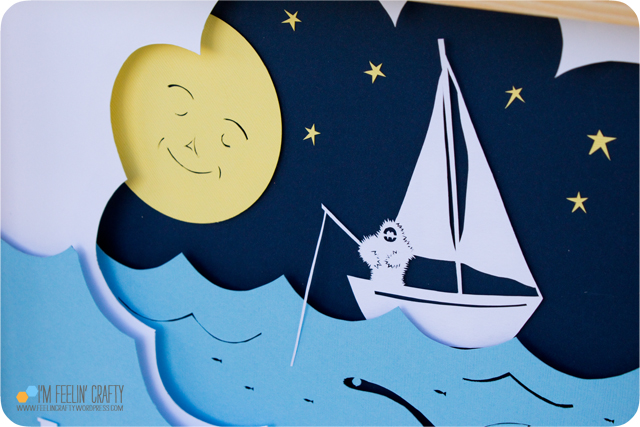
The upper half is full of other fun creatures too! Including the Man in the Moon, a Yeti (I love Yeti’s) and a Loch Ness SuperHero!

Papercut-ManMoon-ImFeelinCrafty

I love yetis! With the help of my husband I love how the water from the background spills out under the bed. I love the detail in the quilt. But I really think my favorite piece, is the simple round Man in the Moon!

I do love all the little fish too! But I think the fishing Yeti, might be going home hungry!

Papercut-Last-ImFeelinCrafty

The piece was for sale, but didn’t sell. And as much art as we have at our house, the last thing I need is another piece. But I have to say, I was very excited to go pick it up and bring it home from the show!!!!

I’d love to hear what your favorite piece is!!! Hope you like it!

SMQG BOM- Almost Done

Another installment of the SMQG BOM!

SMQGBOM-Aug-Main-ImFeelinCrafty

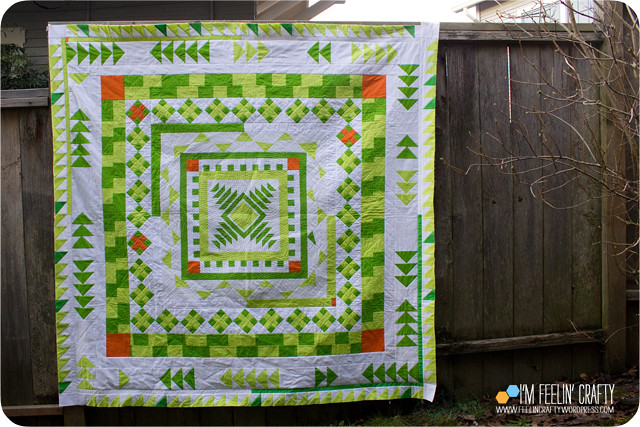
I had grand intentions of finishing this last year… I’m almost done, just need to the add the back, but until then, I thought I’d give you an update of the second to last border. It barely fits on my fence anymore!

SMQGBOM-Aug-HST-ImFeelinCrafty

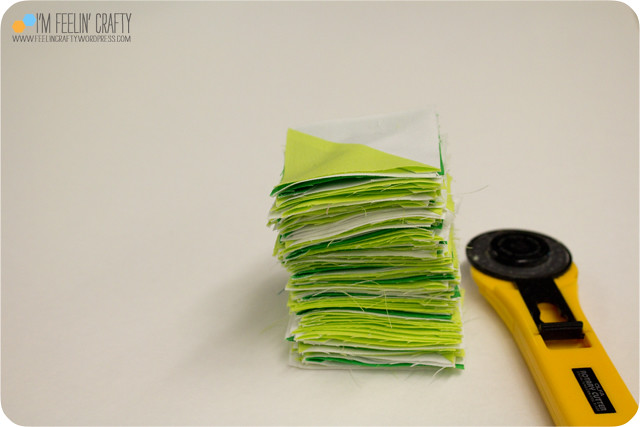
So this last border was a million little half square triangles and it totally knocked me off my rythm…

SMQGBOM-Aug-HSTpile-ImFeelinCrafty

Making the HST’s wasn’t the problem! I made them at a retreat and they went super fast…. I used Debbie’s tutorial on making multiples and it worked great! But then sewing them together and onto the quilt just turned me off for some reason. No idea why. I made the HST’s and shelved the project.

SMQGBOM-Aug-Close-ImFeelinCrafty

All in all, once I finally sat down to do it, it didn’t take long at all. of course… My family is very excited to see this one getting some action again!

SMQGBOM-Aug-Last-ImFeelinCrafty

Hopefully the final installment of this quilt will be coming soon!