SMQG Needle Case Holiday Exchange

A needle case project! This is the perfect storm of a project! Every year at our SMQG Holiday party there is a gift exchange. It’s always different. Sometimes everyone makes the same thing using whatever pattern they want, others we all make the same thing using the same pattern (like our 1 hour basket exchange) and then sometimes we make totally random things. This time the only rule was to make a needle case and to wrap it. Sometimes we play the white elephant game, sometimes we are given a specific member to sew for, but this time we played Left Right Center. I had never played it before, but it was hilarious! The game went along with a story about Santa and his elves losing the list. Every time the story says left, you pass to the left, etc.

I had been eyeing Stitchy Pie pattern from Charm About You. I have this problem of saying to myself, I can make that… But then I feel guilty knowing the right thing to do is to support the maker and buy their pattern and make the thing rather than just stealing the idea. Right? I’ve been needing a needle case, so I finally bought the pattern to make myself a needle case so I could stop leaving needles in the sides of every project bag have!

Right about the same time I purchased the pattern, Fabricworm posted that they had my favorite Charley Harper fabric (I had previously only seen it in vinyl) and I had to buy it!!! This would be perfect for my needlecase!

Then the guild announced the swap. I knew I was in!

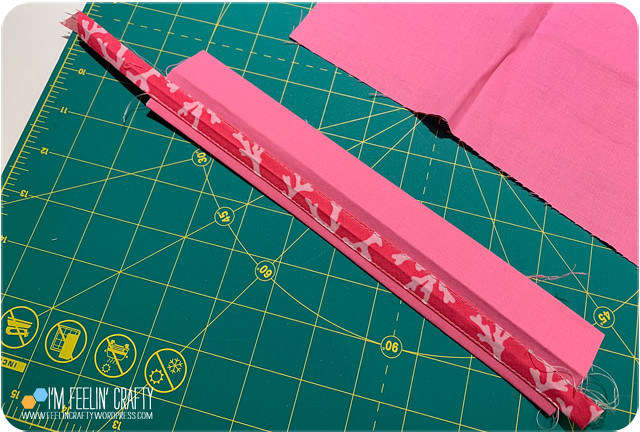
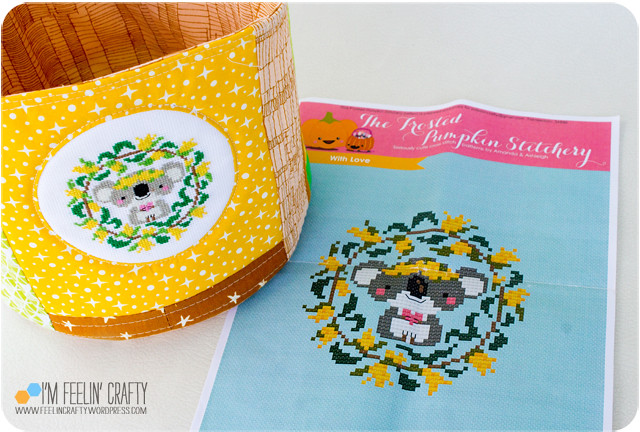
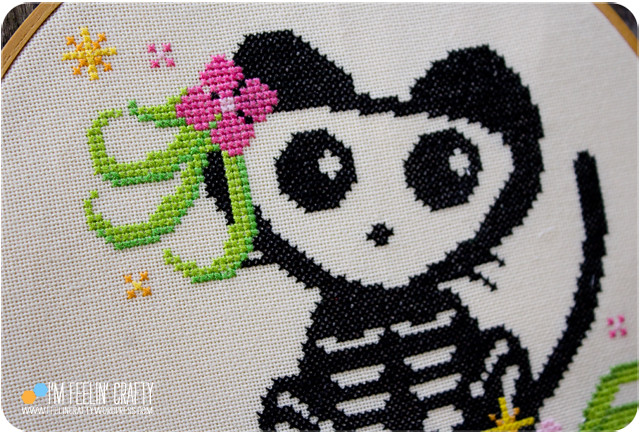
I started by embroidering the Cardinal. It was the only animal I embroidered. When I got the fabric, I knew I wanted to embellish the fabric with embroidery. I didn’t use an interfacing, but I did need end up adding a fusible interfacing per the pattern.

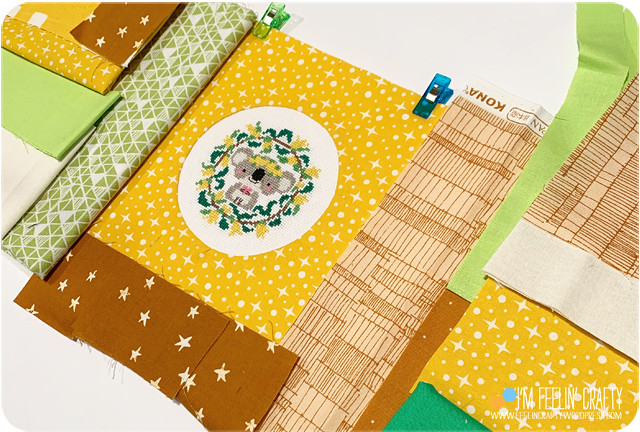
Before cutting the pattern, I made sure the cardinal fit just right in one of the folds of the needle case.

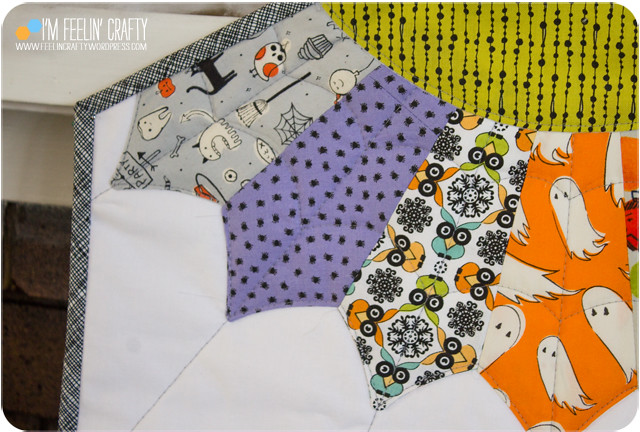
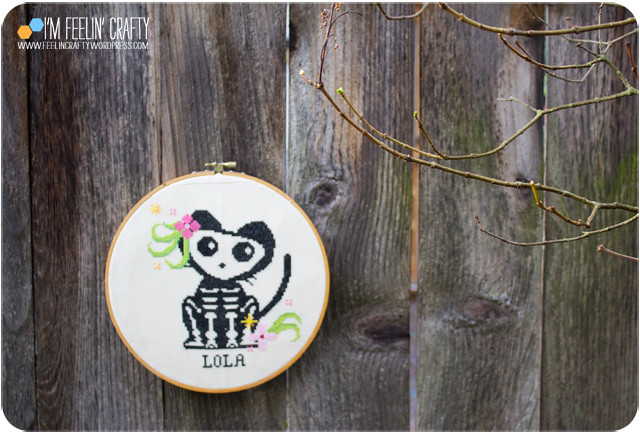
And the inside. This pattern does call for Fusible Fleece, so it makes the needle case a little bit thicker than I anticipated. but I like it!

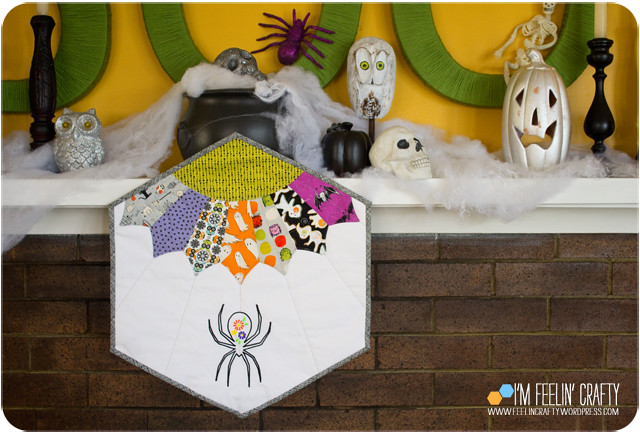
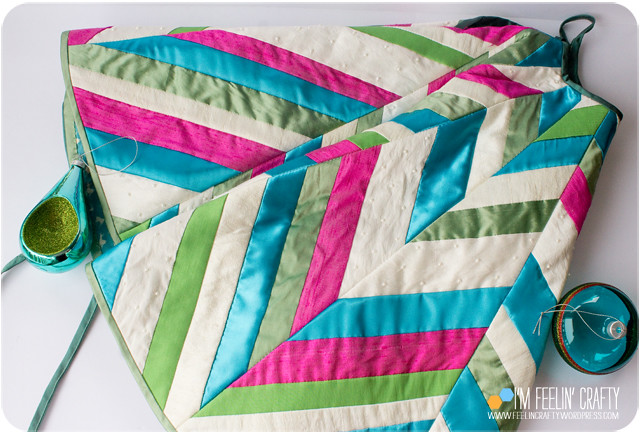
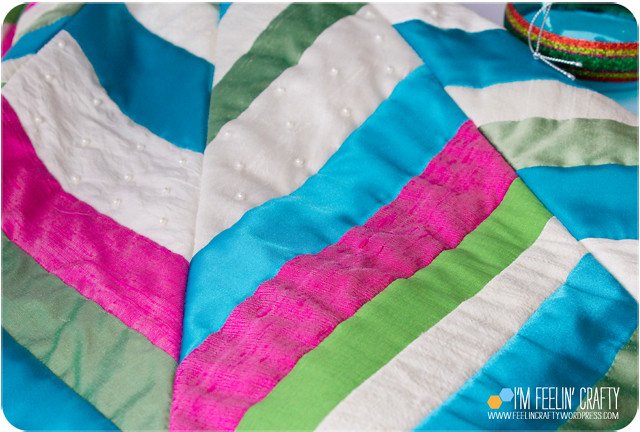
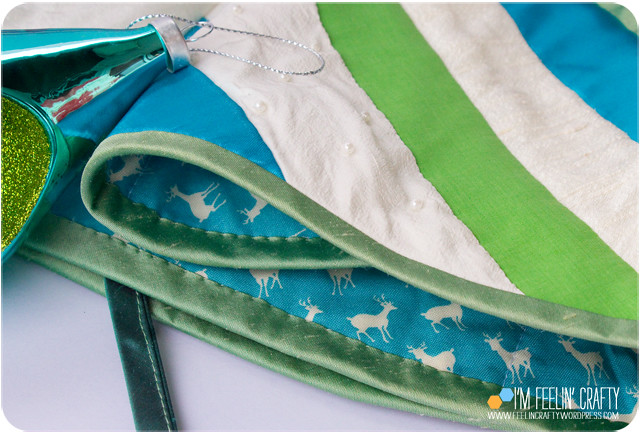
And this is the needle case that I received. OK, there were probably 30 or so people participating in the swap. Of all those gifts, I get a needle case with the same design idea. They both fold over into kind of a triangle shape and then open flat into a circle shape. I was so excited, obviously! I loved the stitchy pie pattern that open and folds flat just like this one!

I’d say this exchange was a success! I hope the person who got mine, enjoys it! I know I will enjoy the one I received! And I really love the one I made and will have to make one for myself to keep in another on the go project bag!

A Baby Quilt

Here’s an oldie but a sweetie!

This one was finished in 2019 (that’s the oldie part) for a friend in the Seattle Modern Quilt Guild. A group of folks made blocks from a color scheme and block, sent them to me and I put it together.

ABabyQuilt-Front-ImFeelinCrafty
ABabyQuilt-Fabric-ImFeelinCrafty

I just happen to be buddies with the Momma’s Mom who gave me the inside scoop on some colors going on in the new baby’s world that was being created!

ABabyQuilt-FlyingGeese-ImFeelinCrafty
ABabyQuilt-FlyingGeesePlus-ImFeelinCrafty

I asked guild members to make flying geese blocks with a little added piece on the side. Pretty simple. A 2.5×4.5 inch flying geese block and the added piece was 2.5×3.5 inches. Then I put them together!

This is the same way I put together my Left and Right quilt, which was done with an online quilting bee group that I was a part of.

ABabyQuilt-Front2-ImFeelinCrafty

The best part of making these blocks with a group of people is the different shades of fabric and how they play together. When I do my own, I usually end up using the same fabric, but the blends that come from a group of people makes it so much more interesting, IMO.

ABabyQuilt-Binding-ImFeelinCrafty

And I through in a little matched binding….

ABabyQuilt-Back-ImFeelinCrafty
ABabyQuilt-BackDetail-ImFeelinCrafty

I used a few extras flying geese for the back and pieced some larger pieces of the pink, blue and purple fabric.

It looks like I glued the binding before hand stitching it…. I think I was working under a deadline and needed to photograph it between the rain so I must have done the glue thing to get the pictures in!

ABabyQuilt-Last-ImFeelinCrafty

I think it turned out super sweet! I do love a good flying geese quilt!

I’ve Got My Eyes on You – A MQG Fabric Challenge Quilt Part 2

I’ve Got My Eyes on You… The second quilt made from the fabric for the fabric challenge for Quiltcon, hosted by Windham Fabrics using their Artisan Cotton fabric line. I didn’t finish this one in time to submit, but I really like it! I like to think it may have had a better chance at making it into the show, but who knows!

MQG-Main-ImFeelinCrafty

In case you missed the first quilt, you can read all about it here.

MQG-Eyes-Main2-ImFeelinCrafty
MQG-Eyes-Scraps-ImFeelinCrafty

Testing, the quilt I shared the other day, had A LOT of scraps. So much so that the front of this quilt is made out of about 98% scraps from the other quilt! I didn’t mind having so many scraps, because I loved the shapes that were being left over and I knew a second quilt was in the works from the beginning!

MQG-Eyes-Process-ImFeelinCrafty

The blocks coming together.

MQG-Eyes-FrontDtl3-ImFeelinCrafty
MQG-Eyes-FrontDtl-ImFeelinCrafty
MQG-Eyes-FrontDtl4-ImFeelinCrafty
MQG-Eyes-FrontDtl2-ImFeelinCrafty

Details! I just started sewing the circles on top of each other. All improv, no inset circles, no pins, no real planning. I just had fun. I made the basic oval shapes, then puzzled them together. After working on the previous quilt, tying to make something a little more precise, this was a fun exercise in just making for the pure joy of sewing things together to happy shapes!

MQG-Back-Last-ImFeelinCrafty

The back is pile of scraps as well! The scraps from the front scraps became the back scraps! But I did eventually run out of scraps and I had to fill in with larger pieces of my fabric pile.

MQG-Eyes-BackScraps-ImFeelinCrafty

This is how the back started… Literally the last of the last scraps!

MQG-Eyes-BackDtl-ImFeelinCrafty
MQG-Eyes-Label-ImFeelinCrafty
MQG-Back2-Last-ImFeelinCrafty

And this is how the back finished!

MQG-Last-ImFeelinCrafty

To me, I love the juxtaposition of these two quilts. I love how different they are. And I love that they are so different, yet both started from the exact same quilt block! Do you find that fascinating? Or is it just me?

MQG-Eyes-Last-ImFeelinCrafty

I’m pretty excited about this one!

Quick Key Chain Tutorial

I recently made a group of projects for a Graduation Gift. I had used almost all of the fabric I was using for this group of gifts, but I had just a little bit left. Thinking about what else I could make, I thought… a Keychain! That would be easy enough right? So I ordered the hardware…

Keychains-FirstOne-ImFeelinCrafty

After I got the hardware, I went to work and within about a half hour, I had this! And that half hour included taking all the pictures and figuring it out. Since you won’t be doing any of that, hopefully it will be even faster!

Keychains-Step01-ImFeelinCrafty

The dimensions are a little loose here. This is the scrap I had, so I was a bit limited on the length! For most of the ones I did, I tried to hit about 10″ in length.

Keychains-Step02-ImFeelinCrafty
Keychains-Step03-ImFeelinCrafty

For this one, I used cork for the wider, background piece and just the regular quilting fabric for the thinner accent piece. For the background piece, I cut this barely shy of 2″ wide. And the accent piece, I cut 1.5″ wide.

Keychains-Step04-ImFeelinCrafty

Fold over the accent piece, wrong sides together. Sew the length with a scant 1/4″ seam allowance.

Keychains-Step05-ImFeelinCrafty

Iron the seam allowance open. While you are ironing it open, keep the seam centered so that seam allowance stays centered down the middle of the accent piece.

Keychains-Step06-ImFeelinCrafty

Now you are going to sew the accent onto the opened background fabric. Fold the background fabric in half (but don’t sew it together yet) and center your accent fabric. I did not pin anything. I just eyeballed it and aligned it with the outside edge. Sew one side down and then the other.

Keychains-Step07-ImFeelinCrafty

Then fold the background piece in half and stitch as close to the edges as you feel comfortable.

Keychains-Step08-ImFeelinCrafty

The next step is the last one! Adding the hardware. I ordered the hardware from Amazon. Mine came with the wide nose pliers, but I’m assuming you can use any pliers.

Keychains-Step09-ImFeelinCrafty

You just fold your keychain in half, set it inside the key fob and use the pliers to close it on the fabric keychain. And you’re done!

Keychains-Step10-ImFeelinCrafty

I’m super excited how it turned out! So excited that I made more!

Keychains-Step15-ImFeelinCrafty

I made a couple with a cotton background and one with just vinyl.

Keychains-Step11-ImFeelinCrafty

For the fabric background, I used cotton with interfacing. I cut a piece of fabric 3 1/2″ wide by 10″ long. I also cut a piece of fusible interfacing, Pellon 809 Decor Bond, 2″ wide by 10″ long.

Keychains-Step12-ImFeelinCrafty

Fold the fabric in half, center the interfacing in the middle and iron on. Then fold the sides in toward the center along the edge of the fusible interfacing. You should then have a 2″ wide background piece.

Keychains-Step13-ImFeelinCrafty

Then continue on with the accent fabric as noted above.

Keychains-Step14-ImFeelinCrafty

I also had these awesome printed vinyl samples that I thought would be fun to make into a keychain as well! I just cut the length in the sample in a 2″ width. Then folded it in half, sewed the edges and added the key fob bit!

Keychains-Last-ImFeelinCrafty

So many options! You could end use a piece of ribbon over a background fabric. Super easy stocking stuffer for the upcoming holidays! What fabric would you use????

Happy Halloween!

After my last quilt, I was so excited to sew a little mini together for one of my favorite holidays, Halloween!

HalloweenMini-Spider-ImFeelinCrafty

When I first saw the pattern from Flamingo Toes, I was super excited about it and really wanted to make one. I don’t have an embroidery machine, but I do have an awesomely talented family member who does! She graciously agreed to do the spider for me on her machine.

HalloweenMini-Main2-ImFeelinCrafty

I’ve never made anything with embroidery before. I’ve also never made a Dresden before. It’s my first attempt at a Dresden design.

HalloweenMini-Dresden1-ImFeelinCrafty
HalloweenMini-Dresden2-ImFeelinCrafty

I had a different fabric selection at first, but switched gears to this more colorful palette. And I did have to make a little Halloween fabric purchase to round out the colors!

HalloweenMini-Mantel-ImFeelinCrafty

With the whole mantel. Although I forgot to hang my bats… Oops! (That’s what 2020 has done to my brain!)

HalloweenMini-Last-ImFeelinCrafty

I’m so glad I was able to sneak in even a little Halloween sewing!

Halloween is going to be a little different this year for most of us, but I’m still excited about the day and evening and hope you are too! Hope you can find a little bit of normal today out of the crazy that seems to be going on all around us!

Upcycled Sailboat Pillows

I first want to send love and thoughts to all those left in the wake of Hurricane Laura. The Gulf Coast is where I’m from and all my family and childhood friends are still there so I watch the storms with a heavy heart wherever they go once they hit the Gulf. I’m always leery about donating to national organizations, because I’m not sure where the money is really going. I found this article with some local organizations that are already working to clean up the aftermath and help those in the path.  Hopefully, there will be a group that stands out for you if you are looking for a way to help from a distance.

With all that said, my happy place is an old beach cabin on the Gulf Coast of Alabama. I love sewing on the porch when I go to visit. And sometimes I sew things for the house before I get there. Like these sailboat pillows.

BoatPillows-Curtains-ImFeelinCrafty

A few years ago, I found these sheets at Goodwill and I couldn’t walk away from them! They were sailboat sheets from Pottery Barn Kids and I just knew they would be a perfect fit for something at the beach house. We’re always doing little upgrades here and there and the ‘middle’ room as it’s called had just received a new grey paint job and needed fresh curtains. (There’s the end room, the middle room and the blue room, even when it hasn’t been painted blue, it’s still the blue room!) I backed the curtains with yellow lining and extended that just about a half inch for a little yellow accent.

BoatPillows-PillowsCurtains-ImFeelinCrafty

And of course, the fabric hoarder that I am, I just couldn’t through away the scraps from the curtains. But what to do with those scraps???

BoatPillows-2-ImFeelinCrafty

Make pillows of course!

BoatPillows-Little-ImFeelinCrafty

The yellow is one of my staples, so I still had some of that and ‘outlined’ each boat with it.

BoatPillows-Room-ImFeelinCrafty

BoatPillows-Back-ImFeelinCrafty

Like the seahorse pillow, these were made before my invisible zipper phase started! I didn’t even have enough scraps left to make the back sailboat fabric. I used almost every inch of that upcycled sheet set!

BoatPillows-3-ImFeelinCrafty

BoatPillows-4-ImFeelinCrafty

BoatPillows-Last-ImFeelinCrafty

I didn’t get to visit the beach house this year due to COVID and my son asked me this weekend if there had ever been a year that we hadn’t been. And no, I don’t think in all my 20 years (ha! it’s been a few more than that) on this planet, I have never spent a whole year away from the beach house. Definitely not a year missed since the kiddo’s been around and I can’t remember another year that I’ve missed it. Let’s keep wearing our masks so we can get back to our well loved traditions whatever they may be!

Koala Cross Stitch Storage Bin

I actually made a cross stitch project and turned it into something all in less than a year! Maybe even less than a month start to finish!

Remember back when we were worried about the fires in Australia? It seems like a lifetime ago with everything going on in the world these days. Way back then in January, I think, I bought a bunch of koala patterns. And I’ve made a couple of them!

KoalaCrossStitchBasket-Pattern-ImFeelinCrafty

Including this sweet one by The Frosted Pumpkin Stitchery, With Love!

It went faster than cross stitch usually does! I wanted to do something with it besides hang it on a wall and decided to make a storage bin.

KoalaCrossStitchBasket-Detail-ImFeelinCrafty

First I sewed the cross stitch to the fabric with the circle cutout, like usually do, using this tutorial.

KoalaCrossStitchBasket-Piecing-ImFeelinCrafty

For the storage bin I decided to use the Faithwell Storage Bin pattern by Sew Sweetness. It’s a free pattern with a video tutorial. Super simple. And I made it more simple by eliminating the open hole handles. I picked my fabric and laid it out on the foam interfacing and did a quilt as you go before turning it into the storage bin.

KoalaCrossStitchBasket-Back-ImFeelinCrafty

With the quilting I did, it doesn’t stand up in a perfect circle, but I’ve learned that the more stuff you put into, the circular shape starts to show better!

I was going to take it to work for a pencil holder. I obviously didn’t pay much attention to the directions and the finished size, because it’s a bit big for a pencil jar! So now it sits on my sewing table holding the pieces to my temperature quilt that I’m working on.

What’s your favorite thing to do with cross-stitch projects?

An Angel Pillow

I have a whole stack of handmade Christmas presents piled up to share! I had a nice long list of handmade Christmas presents I wanted to make for family this year. It was a bit too long and I didn’t get it all done. But I did get a good bit done. At least one thing for each person on my list. And now I want to share them with you.

First up is this angel pillow! I actually pieced the angel in 2018, but didn’t make it for Christmas. It sat around for more months than I can to share until I got it quilted and made into a pillow in time to gift in 2019!

AngelPillow-Front-ImFeelinCrafty

The pattern is by Quilt Art Designs. Have you seen her patterns? She has some of the most elaborate paper pieced patterns I’ve ever seen. They are so good! And she must have hundreds of patterns. I bet if you want a paper pieced pattern of something, she has it! You can find this one here.

AngelPillow-Detail-ImFeelinCrafty

For the dress I used an ombre pink fabric that I had in my stash. I believe it was by Cotton and Steel a few years back. I also debated on how to quilt it. I thought about starting with the halo and quilting a circular pattern radiating out from the halo. Now that I type this, I like that idea even more! But I went straight line quilting and I’m very happy with how it turned out.

AngelPillow-Back-ImFeelinCrafty

I used all solids on the front, so I threw in some pattern on the back!

AngelPillow-Zipper-ImFeelinCrafty

I know I’ve said it before, but I’m loving invisible zippers! This one is a little more invisible on one side than it is on the other! but it still works!

AngelPillow-Last-ImFeelinCrafty

I’m pretty sure this one was well received by it’s new owner! I think it’s quite beautiful!


A New Christmas Tree Skirt

I finished with a day to spare!

I started this project in January. I started it but then put it away to work on other things. The thought was to start back up after the early in the year so that it would be ready in plenty of time for Christmas. Well, that didn’t happen! so of course, I was cramming to get it done for this Christmas. And I did!

TreeSkirt-Skirt03-ImFeelinCrafty

It is so beautiful (if I do say so myself)! It would make a beautiful real skirt! My Christmas colors are white, bright pink, bright green and teal. And I’m excited to say, it’s all made from my stash! I saw the project in Issue 66 of Love Patchwork and Quilting and knew I wanted to make it. The pattern is by Evie of EVQuilts and is the Starburst Tree Skirt.

TreeSkirt-Skirt02-ImFeelinCrafty

Then when I realized I had all the fabric I needed, I was even more excited! The pink raw silk was a scrap I had been given ages ago. I don’t know where the teal satin and bright green came from. I did use the bright green for our handmade Elf on the Shelf.

TreeSkirt-Wedding03-ImFeelinCrafty

TreeSkirt-Wedding02-ImFeelinCrafty

TreeSkirt-Wedding01-ImFeelinCrafty

All the other fabrics were from my wedding! The white raw silk look alike (it’s not actually raw silk, but looks like it) was from my wedding. The beaded white raw silk was from the cake table at my wedding. And the green, but not bright green, was from extra fabric I bought to match the bridesmaids dresses. I ran out of that fabric and had some of the darker fabric from their dresses that I used to finish off the binding in the back. I didn’t make thier dresses, but we used a company that I picked the fabric, the bridesmaids picked the dress style. You can buy extra fabric to use on other projects for your wedding. Perfect use of stash, IMO! I also used the beaded white fabric from our Chirstmas stockings I made ages ago! Nine years ago, actually! (excuse the horrible pictures if you click back…) 

TreeSkirt-Before-ImFeelinCrafty

For years, we’ve been using these fleece tree skirt. It went better with the tree when we used to get a live, green tree. It’s literally a piece of fleece cut into a circle with a split in the back. Since we got the white tree I have not liked it anymore!

TreeSkirt-After-ImFeelinCrafty

But man! Check out how much better the new skirt looks!! I’m actually gleeful with how this turned out!

TreeSkirt-Skirt01-ImFeelinCrafty

The tree skirt is quilt as you go. You start with a really long piece of batting, like 60″ long, and sew the strips on at angle. Over and over and over! Then you do it again with the strips going in the opposite direction! So, needless to say it took me longer that I had anticpiated. I was planning on quilting just the white. But then decided, nope.

TreeSkirt-Binding-ImFeelinCrafty

I did hand sew on the binding. You can see the two fabrics from the bridesmaids dresses here.

TreeSkirt-NewClose-ImFeelinCrafty

I’m just so excited about it! I almost hated to cover it in presents! But we did, of course! And now it’s empty again and I can enjoy the tree skirt again before it has to go away until next year.


Happy Halloween` with a little Cross Stitch

I hope everyone is having a Happy Halloween!

Or Happy Day of the Dead if you prefer! Today I wanted ot share a cross stitch project I made for a friend after her kitty cat died. And what better day to show this project then today!

RIP Lola Crossstitch-Whole-ImFeelinCrafty

As soon as I saw this pattern I was excited to make it. And it opened up my world to the Daily Cross Stitch website. I love this website! The designs are very simple for the most part, but not always. There is a pattern for everything and you can get every pattern on the website for only $10! You should check it out!

And did you notice that I started too close to the edge of the aida fabric? that bummed me out, but I sewed two piece together and made it work!

RIP Lola Crossstitch-Detail-ImFeelinCrafty

I love the flowers and the eyes on this one!

RIP Lola Crossstitch-Last-ImFeelinCrafty

Are you doing any Halloween cross stitch projects? I have so many that I want to do! I wish I was faster at cross stitch!

Pumpkins-Mine-ImFeelinCrafty

And I have to share our pumpkins! This is Little Miss Vampanda! My contribution to the family pumpkin patch!

Pumpkins-Light-ImFeelinCrafty

And the rest of the bunch! With my husbands porch decorations! He’s really excited to get his smoke machine and black light out for the trick or treaters. Any maybe even put our ring doorbell to use for a little bit of scaring… Hmm!

Pumpkins-Dark-ImFeelinCrafty

Happy Halloween!