Sewing Parts Online Giveaway Winner Announced!

Thank you to everyone that entered the Giveaway from our new sponsor, Sewing Parts Online, for the Dreamworld Bendable Bright Sewing Light!

Brightlight-LIght1-ImFeelinCrafty

And the winner is……

Comment number 6, thanks to Random.org! Congratulations Megan!

WinnerCOmmentI’ve emailed you to get your contact info! Hope to hear back from you soon! Thanks! And a very special thanks again, to you Sewing Parts Online!

And I’m sorry I didn’t get this posted sooner! We’re on vacation with very limited internet!! And with that, I’m signing off for the rest of the week to enjoy vacation with my family. I’ll see everyone back here on Monday for more crafty goodness!

IMG_9107

Painted Headboard DIY-a Guest Post with Our Lady of Second Helpings

Remember the other day how I mentioned that I was meeting new blogger’s in the Seattle area??? Well, I’ve also met Rose from Our Lady of the Second Helpings, a wonderful food blog! She has tons of great recipes! I really, really want to try the Tomatillo-Apple Guacamole! But low and behold, I find out she’s crafty too! And a great photographer! I’m so happy to welcome her here today to share a DIY headboard with us!
Welcome Rose!
SONY DSC
This headboard uses a painting technique that could be applied to many other DIY projects. I have also thought about painting a park bench, table top, or making an indoor/outdoor wall hanging using the same method. The tape stencil and headboard were inspired by various images of repurposed pallet wood. We happened to have a supply of weathered cedar from a portion of fence we took down. The old fence boards have proven to be a valuable material. In addition to this project they have become planter boxes, table tops, garden edges, and a sandbox!
SONY DSC
The headboard project was a joint effort between myself and my husband and our son. He is a more precise worker and I am more free form. It was a good match for our individual approaches to being crafty – I designed, he constructed, I decorated, and he installed. We made this for our Queen size bed. The width is similar to the mattress and the height puts the top of the board a little above our pillows when the bed is made. It could be made really tall and have little shelves or wiring built in – we aren’t quite there in our fancy skillz development.
Materials Used:
Fence boards (or pallet boards or other recycled wood material)
Sandpaper (medium and fine grain)
Electric Sander – Recommended
Electric Drill
Wood Screws
Latex Paint
1 & 2 inch paint brushes
Painters Tape
Silver Sharpie
craft knife
1-1/4 inch screws with ribbed plastic anchors (for hollow walls)
To make your headboard:
Construct
SONY DSC
Measure, cut, smooth: Cut your boards to fit your project. Our headboard is modestly sized at 5 ft x 21-1/2 in or 4 boards high. We added legs so it would rest on the floor rather than putting all the weight on our wall. The legs extend from the top of the boards to the floor. If you aren’t using legs cut short cross pieces to go behind the boards vertically. Use a medium to fine grain sandpaper to smooth the boards, blend in the fresh cuts and bevel (round) the edges if you like that effect.
SONY DSC
Assemble: Arrange the boards the way you want them to look when finished with the vertical pieces behind the horizontal boards. Choose wood screws that will go through the horizontal boards and about halfway into the vertical cross piece. Use an electric drill. Begin by making small pilot, or guide, holes with a thin drill bit, everywhere you intend to put a screw. This step should prevent any splitting of the wood when you install the screws. Swap your drill bit for the appropriate screw driver and drive the screws straight into the wood until they are even with the surface.
Paint
SONY DSC
Base Coat: I created the base coat using a couple of sample pots of various white wall paint. The samples had both yellow and grey undertones providing a more aged appearance. Use any color or colors you choose for your base coat. Make sure your boards are dry and dust free. Grab a dry 1 or 2 inch brush, dab it lightly into one color of paint and begin lightly brushing the paint on the boards. Don’t try and get a uniform coat of paint. Allow the paint to go on heavier in some places and feather light in others. Give the heavier spots a good stiff brushing to blend the edges into the surrounding area. Apply the paint as lightly or heavily as you desire. Between coats buff the boards with fine grain sandpaper. Sand the paint unevenly to maintain a weathered look. Brush or wipe the dust away after sanding.
Create your stencil: Make sure the painted surface is dry and dust-free. Cover the entire board with overlapping strips of painters tape. Use a silver Sharpie or other easy to see, smudge-proof, marker to draw on your design. Shapes that are a little larger in scale will be easier to cut and you will have less chance of paint bleed than a delicate design. If you are a less confident crafter/painter I recommend sticking to large scale images. Google images has a lot of stencil designs you can use for inspiration. Use a craft knife to cut away the area you want to paint your background color. You can remove the stencil and create a relief effect or leave the stencil and paint around it as pictured.
Paint the background: Once the area you want to be your background color have been revealed apply the background paint. Use the same light coating and sanding technique as the base color application. This layer can be minimal or heavy depending on your preference. Once the paint has completely dried remove the remaining tape. Tip – Brush away from the tape edges to prevent paint from collecting under the tape. Add as much or little detail to your image as you desire. I filled in the stencil with a bit more latex wall paint and then sanded the heck out of it to give the finished piece a well worn appearance.
SONY DSC
Finish Coat: To give the headboard a uniform sheen and added protection I sprayed the finished project with two coats of a satin finish polyurethane clear coat.
Install
Be sure to check the wall for any electrical wires, plumbing, or other stuff that could be damaged by drilling!
When mounting something heavy, you will want to locate the studs so that you can bolt right into it, but for something reasonably lightweight, you can use plastic ribbed anchors. Drill small holes through the legs of the headboard and into the drywall behind. Re-drill the holes in the drywall to fit the anchors, and press one into each hole. Then screw the legs in place.
We completed this project over about three days. Day 1: sanding and assembling, Day 2: Painting, Day 3: Installing. It can be done faster but we just laid everything out on our patio during a stretch of nice weather and worked on it between other activities.
Thank you Rose! I really appreciate you sharing this with us!
Be sure to check out Rose’s blog, Our Lady of the Second Helpings,  and all her fantastic recipes!

Spring Thyme- a Book Review with a Free Printable!

Recently I was contacted by the lovely and sweet ladies at Bittersweet Walnut Grove! They have been awesome putting up with my scatter brained ways these last couple of months! See? I started to tell you why they contacted me and I have already gotten sidetracked….

IntroTheir wonderful e-book! That’s why they contacted me! I’m so lucky to get to review their wonderful e-book, Spring Thyme! It’s full of spring time recipes, craft projects and family memories!

Authors

The book is a family project between Mother and Daughters! It’s the family memories and  anecdotes from these beautiful ladies that make their series of books stand out from the rest of the craft books I’ve seen lately. The ladies intersperse tid-bits about growing up on the farm and I just wanted to run around with them in the fields and look out the window of the farmhouse next to them. They do a great job making you feel like you are a part of this creative and nurturing lifestyle that they are writing about!

The series of e-books that have written correspond with the changing seasons and are meant to connect you and the season thru the recipes and projects! A lot of the recipes are focused around strawberries and that’s perfect for this family who can go through a carton of strawberries like none other! All the recipes have gluten free options, as well.

StrawberryLemonade-I'mFeelinCrafty

I picked two recipes to try. Yes, both involve strawberries! With the first being the Strawberry Lemonade! Delicious! I don’t think I’ve ever made lemonade from scratch before! Not only is it really pretty, but it’s tasty too! And even better the day after you make it.

StrawberryDip-Bowl-I'mFeelinCrafty

And then we made the DELICIOUS Strawberry Fruit Dip! You could dip anything in this and it would be delicious! It’s super simple and the whole family LOVED it! I’m so glad to have this one. I wonderful new recipe to take to spring and summer potlucks!

StrawberryDip-kiddo-I'mFeelinCrafty

I just happened to try a couple of recipes, but the book is full of fun craft projects, like the Strawberry (yes, more strawberries) Sugar Scrub and the Garden Pots, printables, including the adorable pie boxes,  and sewing projects as well, like a really precious bunny doll and little baby chick applique pattern. Fun projects to keep or share! And they are all really easy and quick!

I really want to share all the projects with you, but I don’t want to give it all away either!

PrintableGift

And for you…. A lovely printable for bag toppers! The mini bag toppers coordinate with the Gratitude Gift Project series in the book! Click here for your free printable!

You can get your copy, either the kindle edition or paperback, at Amazon, or a paperback version at Barnes and Noble. It’s great! I’m tellin’ ya! Get you own today to see all the other projects I don’t have time to write about!

And be sure to follow the ladies on Facebook!


I have been compensated with either payment or product for this post. All opinions are my own, honest opinions!


Blogger’s Quilt Festival- Kaleidoscope

For my second entry in the Blogger’s Quilt Festival, I decided to enter my Kaleidoscope mini/doll quilt.

DollQuiltSwap-Mine-ImFeelinCrafty

This is another one that I LOVE, but gave away! I made this for the flickr Doll Quilt Swap.

DollQuiltSwap-Sketches-ImFeelinCrafty

This was a little one that I sketched and then fell in love with! My intention was not that it would match the drawing exactly, but once I saw the sketch and the undulating patterns, I knew I had sketched it just how I wanted it to be!

DollQuiltSwap-MyBack-ImFeelinCrafty

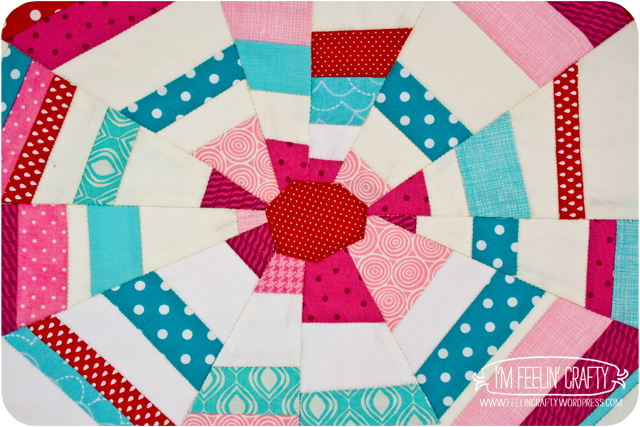
The colors were picked by my partner in the swap. But, yes, I love them too! The back used the same colors. And since I quilted in the ditch for this one, on the back it ended up looking like a spider web. Kinda hard to see in this picture though.

DollQuiltSwap-Dtl-ImFeelinCrafty

The mini wall hanging ended up being about 18 inches square And was done all by little ‘ole me!
Print

Did you enter the Blogger’s Quilt Festival this year???

Blogger’s Quilt Festival- Star Quilt

Over the years I’ve been seeing the Blogger’s Quilt Festival online and always wanted to participate, but never have. So even though I’m on vacation, I decided I’d play along this year and enter a quilt or two!

do_Good-Feb-Finished-Main-ImFeelinCrafty

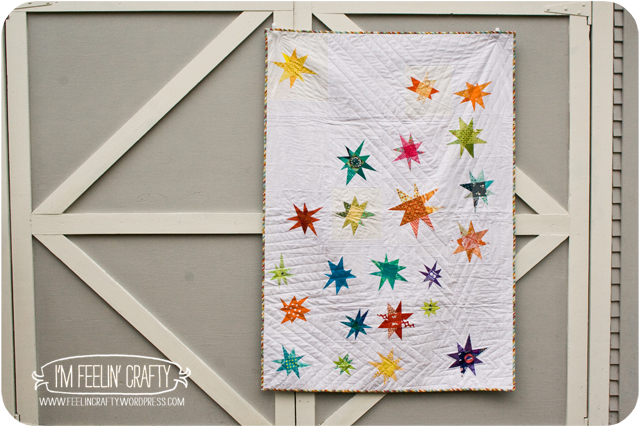
For the Group/Bee Quilt category, I’m  sharing a quilt that you have seen before quite recently…. The Nurture Group of do. Good Stitches Star quilt.

do_Good-Feb-Finished-corner-ft-ImFeelinCrafty

I’ve had a bit of an obsession about star quilts lately, as you probably know. Which means when it was my time to pick a block design I decided to use my own star block tutorial and have the group help me make the stars!

do_Good-Feb-Finished-Back-ImFeelinCrafty

Each group member made 2 blocks, and size and any bright color! Once my son and I decided on the layout the quilt finished around 46” by 60”.  The group decided to hang it in the Seattle Modern Quilt Guild’s Star show coming up next month and then it will go to our group’s charity, My Very Own Blanket.

do_Good-Feb-Finished-corner-bk-ImFeelinCrafty

I quilted it in a star pattern as well. Starting with the one in the bottom and working out from there across the quilt! I love how it turned it. I do hope whoever receives it loves it as much as my household does!

Print

A Bendable Bright Light for You and Me! A Giveaway!

So recently I have found a couple of new favorite sewing tools! And today I can’t wait to share with you something I received recently from our new sponsor, Sewing Parts Online! The Dreamworld Bendable Bright Sewing Light!

Brightlight-Main-ImFeelinCrafty

My sewing studio is in a windowless room in our downstairs (which is technically a day-lit basement, but I like to call it our downstairs!). It’s pretty bright when all the lights are on, but the shadows from the lights, etc, make the space under my machine kinda dark. So when I was contacted by Sewing Parts Online, to try out their new product, the Bendable Bright Light, I didn’t think twice and said, ‘Oh, Yeah!’

Brightlight-Before-ImFeelinCrafty

So this is what my machine area looked like before the light!

Brightlight-After-ImFeelinCrafty

And this is what it looks like now!

Brightlight-LIght3-ImFeelinCrafty

So some of you might not understand what I am about to explain, but bear with me… I live in Seattle, right? It’s pretty grey here most of the year, right? So when the some first comes out in the Spring, we don’t really know what to do! Who knows what we did with our sunglasses since the list time the sun was out! So we kinda wander around squinting for a while…. And that’s kinda what I did when I plugged in my light for the first time! It’s so bright and wonderful!

Brightlight-LIght1-ImFeelinCrafty

The light comes with a little ‘stand’ you could call it that sticks to your machine. You can take the light out if you need to move your machine, etc.

Brightlight-PLug-ImFeelinCrafty

The only thing that some people might not like is that it has to plug in. To me, this isn’t an issue. For one, I don’t have to worry about batteries. And I have a plug right next to my machine that it can plug into and the cord won’t get in the way of sewing. It does also come with six removable adhesive clips to hold the wire out of the way.

Brightlight-LIght2-ImFeelinCrafty

The light is perfect for sewing! But it’s also flexible so that you can move it around for when you are seam ripping (which doesn’t happen often at my house! HA! just kidding!) or when you are threading a needle. And of course, you can use it for anything. Woodworking. Trying to read the fine print. Since I’m sitting at the beach, making fishing lures comes to mind! Not that I make those, but you might!  It doesn’t have to just be for sewing! But of course, that’s what I’m going to use it for!

And guess what?? Sewing Parts Online is offering one for one lucky winner!!

Ready to WIN? You have FIVE ways to enter! And come back and leave a separate comment on this post for each entry!

1. Visit the Sewing Parts Online website and sign up for their once a week newsletter with fun instructional videos and project tutorials!! Leave one comment. (one entry)

2. Like Sewing Parts Online on Facebook for silly sewing comics and videos. Leave one comment. (one entry)

3. My blog followers get an extra entry. Leave one comment. (one entry)

4. Like I’m Feelin’ Crafty on Facebook. Leave one comment. (one entry)

5. Share the giveaway on your blog, FB page, or tweet about. Leave one comment. (one entry)

That’s 5 possible entries! You must comment on this post to win. Open to both US and International readers. The giveaway will close on Friday, May 27th at 11.59 PST, and we’ll choose one winner using Random.org.

I have been compensated with either payment or product for this post. All opinions are my own, honest opinons!

Thank you Sewing Parts Online!

Quilting for Boston

The recent events in Boston are absolutely horrible and I do not have a clue how people can do these types of things to others. In any case, the quilting community is coming together to show that despite the hatred in our world, there is still love, too. The love part just doesn’t get as much TV news press. I guess it’s not as ‘exciting’ for the press. Ok, if you can’t tell, I have an opinion, but I’ll keep the rest of it to myself since I’m supposed to be sharing the love here in this post!

To Boston With Love

I’ve participated in two projects for the Boston area! The first one is the To Boston with Love project. This project was started by the Vancouver Modern Quilt Guild as a collaborative effort of quilters ‘to bring peace and love from far and wide.’ The idea is, in my words, to give Boston a hug. To let them know that the world is thinking of them!

The flags will be exhibited by The Museum of Fine Arts, Boston from May 23-June 16, 2013!

Boston-Flag1-ImFeelinCrafty

My flag didn’t turn out quite the way I had envisioned it. I wanted it to be a little improv and not perfect. And it did turn out that way, I just had it looking different in my head!

Boston-Flag2-ImFeelinCrafty

I went with the blue and yellow color scheme from my next project, Quilts for Boston project. More about that shortly!


This project became a little impromptu project for our quilt guild. We had a few participatns and a bunch of really great flags!  I wasn’t able to be at the meeting, so I’m not sure who all else participated. Once I find out names, I’ll add the credits for the flags!

Quilts for Boston

And then I also participated in the Quilts for Boston call for quilt blocks from the Boston Modern Quilt Guild. In the aftermath the guild was looking for a way to help those that had been directly affected by the bombing. They decided to make quilts and are looking for blocks and donations of fabric for the backs and bindings, etc.

Boston-Block2-ImFeelinCrafty

For this project you have until May 24th, 2013 to get your blocks to the guild. All the information, size, colors and address are all listed on their blog here.

Boston-Block1-ImFeelinCrafty

Personally, I love the colors! I can’t wait to see the finished quilts!

Boston-BlockMat-ImFeelinCrafty

See… I really do love the colors! Inadvertently, (no, I wasn’t planning a blogging photo-shoot when I bought this cutting mat) I just bought a new cutting mat that just happens to be blue and yellow!

Fab Little Quilt Swap

Yes, another one! I kinda overloaded on swaps this spring! I think I might have to sit some out for the next rounds…

FLQS-Main-ImFeelinCrafty

But it’s hard when they are so much fun! And I included a little La Petite Pouch and one of my new favorite quilting tools, a Frixion pen.


This one was a little quilt that I thought was a shooting star. Then someone said it looked like a kite with it’s tails flowing behind. I actually like that description even better!

FLQS-TheStart-ImFeelinCraftyIt began looking like this… And it just needed something…

FLQS-Finished-ImFeelinCrafty

So  I added something!

FLQS-Dtl2-ImFeelinCrafty

I’m loving the hand stitching and the embroidery thread. Now I just need to learn a few ‘real’ stitches!

FLQS-Back-ImFeelinCrafty

And the back looked like this with my little tag.


And are you wondering what I got in this swap???

FLQS-MinePackage-ImFeelinCrafty

This amazing bundle from She Can Quilt! And boy can she quilt! I saw this piece during the progress photos and loved it! LOVED it. Then I saw her quilting and was really in love.

FLQS-MinePackageDtl-ImFeelinCrafty

Check it out. It’s amazing! This quilting seems to be her style! Very cool!

FLQS-MinePackageFrnt-ImFeelinCrafty

And this is what it looks like.

Have you joined a swap yet???

Monster Cake from Sowdering About in Seattle!

I’m in a FB group for Seattle blogger’s and have met (online anyway) some very talented people, including Randi from Sowdering About in Seattle. When I sew her monster party, I knew it would be a perfect fit for her to join us! I couldn’t decide if I wanted her to share how to she made the cake or the headbands… We decided on the cake! It looks so delicious and I wish I had some now!!!! Be sure to check out her blog and all her fun food ideas and crafts!

Welcome Randi!

My son turned one in January and in celebration, we threw him a “monster” themed birthday party. It was very fitting for him since he is, well,  a monster. 

We had various decor, that was mostly homemade, including but not limited to a pretty awesome cake. I really loved how it came out, it probably was my most favorite thing we had at his party. I thought it would make a great tutorial, so here I am.

Because I baked this cake while we were on vacation in Las Vegas, I didn’t actually take pictures while I made it, so instead, I did what any normal person would do. I made another one. I mean, there is never BAD time for cake right? Lucy decided that she wanted our new monster cake to be a purple cake with red frosting.  I used a basic white cake mix from the store and just added some Wilton’s frosting dye to it.

icing copy

Once it was all mixed, I cooked the cake according to the directions on the box and when it was done, I froze it.   Freezing the cake turned out to be the best for me because where I had planned to have this cake done in just a couple of days, life got in the way, kids got sick, we got super busy.  Anyway, the cake was frozen so it lasted longer.   When I was ready, I brought the cake out and started frosting it before it was defrosted.  Also, this is where you would normally put on the “crumb layer” of frosting.  This is basically a thin layer of frosting all over the cake which “captures” all the crumbs so that they don’t get tangled up into your top layer of frosting.  I normally do this.  I did not do the crumb layer on this cake.  Not for any particular reason except that I just plain forgot. I mixed the frosting together with Wilton’s frosting dye like I did with the batter.

IMG_4769 copy

The recipe I used for the frosting was super easy:
  • 1 cup butter (salted)
  • 4 cups powdered sugar
  • 2-3 tsps vanilla extract (I didn’t measure, just put some in)
  • a splash of whipping cream
Cream the butter and sugar together on low.  Slowly add vanilla and your splash of cream (I left mine a little thicker so I didn’t add a lot of cream).  Mix on med-low until it’s fluffy.  At the end, I added the color and mixed until it was the color I wanted, which ended up being pink, not red.
I noticed with the Wilton’s dye, that if you let it sit a little, it will darken.  So that’s what I did.  After it was all mixed, I let it sit for about 15 minutes.  When I was ready, I pulled out my frosting bag and I used the grass frosting tip that you can get from any craft store.
I always make a HUGE mess when I am frosting.  I will save you from those pictures.  Once my bag was full of pink frosting, I just started piping.  I made small downward strokes to get the “hair” look I was going for.
The best part about this particular style of cake, is that it doesn’t need to be perfect.  It’s actually the imperfections that make it the best.  I mean, what monster have you ever seen with perfectly combed hair?  None.
On Dexter’s cake, I just used large marshmallows on a skewer for the eyes and I used a food marker for the eyes balls.  However, Matt said that we should do something different with this one, so he grabbed some Fruit Loops and we shoved small marshmallows into the holes and then stuck a toothpick in them.  I like how it came out, a little more colorful and fun if you ask me!!
I struggled trying to figure out the best way to cut into this cake to show you the middle.  I didn’t want to just cut into it without a special reason, even though really, Tuesday is a good enough reason to cut into a cake.  But, as it turns out, we were having some friends over for a space craft to celebrate National Space day.  What’s better than a monster cake that you call an alien cake on Space Day right?

Dexter was totally impressed with his cake.  He said it even tasted good with the dirt he had just eaten too.

I thought it turned out pretty amazing.  The colors were great and all the kids loved it.  But what kid doesn’t love a purple cake right?
I hope you all enjoyed this and have fun making your own monster cakes!!!
Randi blogs from a blue recliner in the wet city of Seattle where she lives with her husband and two kids.  To read more about their shenanigans and crafts, please visit her blog Sowdering About in Seattle.  Also, be sure to like her facebook page!

Happy Mother’s Day!

I hope every Mother out there is having a wonderful day today!

MoodKids Moederdag Posters-2


I love this free printable from MoodKids! How fitting for Mother’s Day! I can’t wait to print and frame this! They also have two other great printables, ‘Home is Where Mom Is’ and ‘Keep Calm and Call Mom’. All three are great!