Happy New Year!!!

Our New Year’s Eve is far from the glitz and glamour you see on TV, the internet and the movies. The brightest lights we’ll see will probably be the zoo lights in Tacoma! And I am perfectly content with that… Excited even!

But I have enjoyed seeing all the sparkle and glitter of the upcoming celebrations. Since I have done absolutely nothing for New Years, I’m living vicariously through these lovely pieces.


1. I love this photo of sparklers by Leslie Williams Art. That reminds me, I need to get some sparklers for this evening!

2. 2011 here we come! Glitter numbers by Mandie Candy.

3. I first saw this glitter star headband from Giant Dwarf on Design*Sponge and it would be great fun for a night out on the town!

4. Love the DIY glitter party hats! Check out Design*Sponge for the how to.

5. mmmm, mmm, mmm! Now if I was having a New Year’s Eve party, I’d want this set-up for sure. This might even inspire a party for next year…. Design by Chris Nease with Celebrations at Home.

6. And Happy New Year!

More fun to come in 2011…

Sally Sells Seashells

Another Christmas present I made that I couldn’t post until after Christmas… (I have a few of those…)

My Mom is a huge shell and coral fan. She loves anything beach and shell related. So years ago I saw this picture in a 2008 Real Simple magazine. These shells, by Ruzzetti and Gow, are beautiful, coated in sterling silver and range in price from about $100.00 to over $1,000.00. Needless to say, that’s out of my price range for a knic knack….

So I thought to myself, ‘I can make that.’ (I remember cringing as a child when my mom said those words. Now I say them All the time!)

Two years later, armed with a can of spray paint and two shells that I got on our yearly pilgrimage to Orange Beach, AL, I headed out to make my own silver seashells. They aren’t quite as shiny as sterling silver, but they are darn cool.

I also filled them Plaster of Paris so that they can now be used as bookends…

My wedding was at the beach and we had tons of shells. Still have tons of shells. Still have spray paint…. Have an idea of where I’m going with this…. Maybe a silver sand dollar, anyone??

3, 2, 1 Countdown to the New Year!

My very first appearance in an etsy treasury, A Spacey New Year!

I was featured along with some other very cool, space inspired handmade art.

1. Frank the Robot Screen Printed Notecards by naomicayne

2. Someday I’ll Fly to the Moon print by pumpkin and butterfly. I totally want this for my son’s playroom. He got an awesome spaceship for Christmas…  How perfect would this be next to that???

3. Robot Love Apron by sweetharvey

4. And my Rocket Wallet….

She Likes It!

Ahhhhh… I sent Katie from oohmoon pictures of my Advent Calendar and she likes it! I’m honored to be the first reader project featured on her blog!

And my son loved it too!

blushing….

Happy Holidays!

Have a Book that needs Wrapping??

Here’s a last minute tutorial for any of those books you’re wondering how  to wrap! The gift bags that I make, I love, but they aren’t great for the really flat items like books or calendars. So I came up with this gift wrapping technique.

Materials:

Fabric

Thread

Scissors

Ribbon

Step 1-  Measure the books (or anything flat that needs wrapping). Be sure to overlap a few inches.

Step 2- Cut your two pieces of fabric.

Step 3- Pin ribbon to fabric. Pin the fabric about 1/2 inch to an inch from the top edge.

Step 4- Sew two pieces of fabric, right sides together. Leave a 2 inch hole in the side. I try to locate my hole on what will be the back of the bag.

Step 5- Pull the fabric through the hole.

Step 6- Iron the fabric bag. Layout the fabric to get the flaps overlap how you want them.

Step 7- Topstich. Start at the bottom corner and stitch around.

Step 9- Insert your book, pull the ribbon around the back and to the front. Tie your bow.

Step 10- Give that book to someone you love!

On Dasher, On Bitzen, On Silver Spray Paint

These are reindeer! My Christmas decor consists of mostly bright green, bright tealish blue, orange, pink, white and silver. I’ve been wanting some silver reindeer, but they are usually pretty expensive, at least the ones I”m drawn to…

I’ve had these cute vintage reindeer, but they just don’t really go with the decor I’m using right now.

So I found these at the drug store…

Exactly the right size, and nice and cheap.

Growing up I remember my Mom having this book, The Official Guide to Christmas in the South: Or, If You Can’t Fry It, Spraypaint It Gold. When I saw these reindeer in the store, the title of  the book popped in my head and I had to laugh! Only I knew I was going silver, not gold.

I spray painted their wreaths as well, but not sure I want the wreaths. If I go with wreaths, I think they need some glitter!

Wreath or no wreath?

On Gracie, On Woody, On Gus

OK, so it’s not Santa’s reindeer, they are our ‘cousin’ dogs! And it is another Christmas present checked off the list.

I’m totally loving silhouettes right now. (hint hint, upcoming link love to some other really cool silhouettes…) So I wanted to make one of my in-laws pups. My sister-in-law has been away from her loved ones for quite a few months now and as we were walking with the rest of her family, I saw a silhouette bag of these pups.

It was made with all scrap fabrics lying around the sewing room! I used my gift bag process, but put the seam down the side to make it a bit easier to add the straps. The longest part of the process was cutting out the dogs.

Gracie is the white one, Gus is the old grey Scottie and Woody is the crazy youngester of the bunch, the black Scottie. I’m very happy with how it turned out, except for one thing. In some light, Ms Gracie is hard to see. I should have used a more contrasting background. Hindsight, gotta love it.

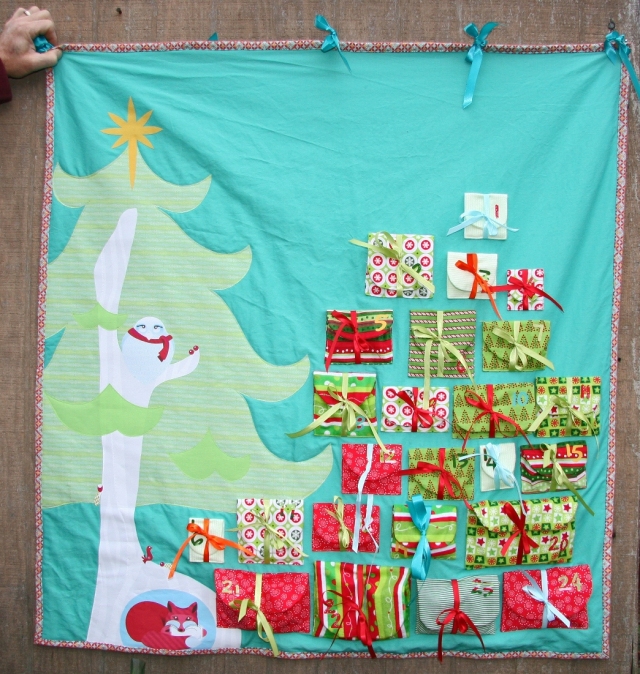
12, 13, 14… Advent Calendar = Check!

OH MY! That only took two weeks longer than it was supposed to! Finally finished on Day 14…

I checked out all sorts of Advent calendars and designed one made of 4 or 5 different houses… Well, I made one and hated it. I just really disliked it.  Here is Plan A:

So, Plan B. Technically I didn’t have a plan B, but I was determined that I was making an Advent calendar this year! So, Plan B actually included coming up with a new design…. I didn’t really have a clue what Plan B was going to be and I was already behind schedule…

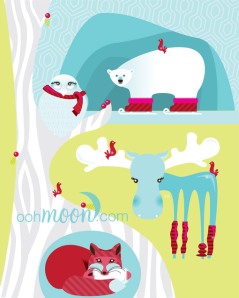
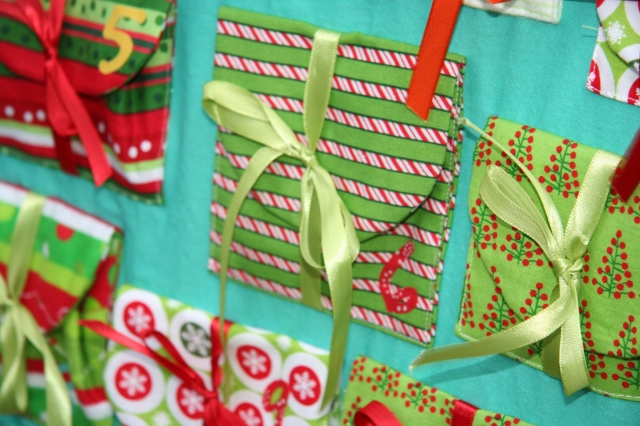
I came up with the idea of all the pocket being presents. Maybe under a tree?  Maybe just presents? Or another house theme?? Then I started following this awesome blog, oohmoon. Katie, from oohmoon is making an art piece everyday and then giving it away for free for 24 hours. (If you haven’t already seen this, you should.) She was working on a series of animals and I had fallen in love with the owl. Then she made the owl in the tree with the fox. When I saw that, the design just popped into my head instantly!!

That was the design process. Then I made all the present pockets, positioned the tree pieces and Katie’s art, sewed on the pockets, layered the quilt pieces, appliqued the tree pieces, finished the edges and wah lah…

There is one other thing I have planned for this quilted advent calendar. I have a bunch of pearl beads that fell of the pearl fabric I used for the stockings. I want to stitch those to the quilt for a little snow effect. Cool? Leave it alone? Let me know…

As I was making this, almost done, probably about the 10th of December, my husband asks, ‘Is this something he’ll use every year?’  My answer was basically a look of shock, of course he will! Until he’s about 40 years old…

Letterpress Calendar, revealed…

Finally! I got it all photographed and put together. My Calendar! My first ever attempt at linoleum cutting and printing.


“Snacks and Naps For the Year 2011”

The calendar project is a project I collaborated on with thirteen great artists. I should say 15, including the printers. Thirteen artists carved illustrations in linoleum blocks. We then turned them over to the 2 printers and the calendars were printed on a Vandercook proofing press under the guidance of Master Printer Lynda Sherman at Bremelo Press in Seattle by Kyle Hanson. The month names are vintage woodcuts and the dates are perpetual calendar 18 point metal type. And together we produced a beautiful “Snacks and Naps For the Year 2011” wall calendar.

This was my first ever attempt at lino cuts. I decided to make mine with the image as white space and the background as dark. Then I tried to print it. No luck, what-so-ever! But the two printers were amazing and said no problem. And here is what became of my lino cut…

My image is from a photo of my son napping while dressed as Max, King of the Wild Things!

The calendars are printed on assorted colors of a high-cotton content, acid-free paper from Canson. The pages, 6 inches wide by 8.5 inches high, are loosely bound to a bookboard backer with black elastic bands.


Illustrations

Cover   Curtis Taylor

January   Magda Baker

February   Emily Forland

March   Gigi Grinstad

April   Saya Moriyasu

May   Molly Magai

June   Sedora DeBondt


July  Sara Varon  

August   Clyde Petersen

September   Nine Frenkel  

October   Louise Wackerman

November Michael Getz

 December  Aya Kakeda

Calendars are ready for shipping in my etsy store.

Would you like that Gift Wrapped?

Paper or fabric? Fabric? Great, I’ve got a tutorial for you! In about 10 minutes, a beautiful re-usable, multi-purpose lined bag can be yours.

I’ve been meaning to get this tutorial for my fabric gift bags done. (A while back someone asked, my apologies for the delay!)

Drumroll please…

Fabric Gift Bag Tutorial:

Materials

Fabric (new or scrap… I try to use scrap whenever possible. Christmas fabric I buy new after Christmas. Other gift bags get scrap. Although, scrap doesn’t have the right connotation… You know what I mean!)

Scissors

Thread

Ribbon

Step 1: Cut 2 squares or rectangles. Get an idea of how big the package is. I typically size the height by 3/4 of the bottom of the gift + 3/4 the top + the side + an additional 3 inches for the fluff on top. I’m not very exact when cutting this step, as long as the top is straight. 

Step 2: Sew the top, fabric right sides together. Iron flat the top seam.

Step 3: Cut again. This is where I square up the edges. If you want to be more exact, you can do this in step one.

Step 4: Fold the bag so that right sides are together. Right side of ling to right side of lining and right side of outside fabric to right side of outside fabric.

Step 6: Sew along this edge. Leave about a 2-3 inch hole in the inside fabric.

Step 7: Rotate the fabric so that the seam is centered on one side of the bag. Sew the bottoms of both the inside and outside fabric. (bag is still inside out)

Step 8: This step isn’t required, but I like it. Sew the corners. Pinch the bottom corners to create triangles. The side fold and the bottom seam should be aligned. Sew across the corners and trim.

Step 9: Pull bag through the hole.

Step 10: Sew the hole closed.

Step 11. Turn the bag inside itself, iron the top edge and topstitch.

Step 12: Add the ribbon. I stitch the ribbon on for 2 reasons. 1. Next time I or whoever else uses the bag won’t have to look for ribbon. And 2. It makes it easier to keep the bow in place! Tack it down about 3 inches from the top at the seam on the back.

And there, a reusable gift bag!

This can easily be used for a tote bag tutorial as well. Just add some handles when sewing the top together. And maybe, don’t add the ribbon! Or maybe you do, what do you think?