Call for Quilts for Oso

This week our state has experienced a devasting loss. They are saying the mudslides are our worst natural disaster since Mt. St. Helens eruption. Last I heard the death toll is around 20 and 30 are still missing. Unfortunately this is part of the better news, in that the missing has been dropped from 90 to 30.

oso

Families have lost everything. It’s just hard to even write about it…

I just keep thinking about one of the stories I heard in the very beginning, about a rescuer trying to find people. They could hear them, but couldn’t get to them due to the amount of mud. Can you imagine? That person is going to hear that voice for years to come. I can only hope that eventually he was able to get back to those trapped.

untitled

image via CNN US

And I read this:

“There was this gray cloud . . . and then I saw it taking out trees 100 at a time,” she said. “I started screaming for my kids to get out of there. I’m screaming, ‘It’s a mudslide!’ ”

Within minutes, the roar was gone, and Langton opened the back door.

“I looked out on complete devastation,” she said. “I heard two ladies shouting for help. I heard another voice screaming, ‘Help.’ I couldn’t see him. I said, ‘Sir, could you raise your arms so I can see you?’ He said he only had one arm. The other one was just hanging there.”

She helped rescue them. -excerpt from The Washington post,  for the full article click here.

untitled1

image via CNN US

Between the stories of the immense loss there are more stories of hope and of people helping people.

Like this one from the pastor of Oso Community Chapel:

“I was expecting someone to say, ‘I lost my brother or I lost my house and I’m angry’ — and that would have been OK,” he said by phone Sunday. “But today what we heard was, ‘I was in trouble and a stranger stopped and helped me.'” – excerpt from CNN, read the whole article here. It’s a good one.

washington-mudslide-beforeafter-aerial-620x350

the before and after, image via CBS NEWS

I don’t know these people, but they are only about an hour from me. The only thing I can think of to help is to give them something made with love. And that’s a quilt. They lost everything. I know they need so many more things than a quilt. But the love that comes with something hand made can truly make a difference.

Online I have found a woman called the Quilting Granny from Layers of Hope. She is spearheading a quilt drive for the community.  I’ll be making one to give and I’m hoping you will too.  There is tons of information on The Layers of Hope blog, but a brief run down is:

Only new, handmade quilts, please.

Needed by April 19th!

Sizes should be at least:

  1. Baby sizes 42 x 42
  2. Toddler sizes 52 x 52
  3. Twin Size 68 x 86
  4. Full Size 78 x 86

We want them to cover for adults at least someone who is 6′ tall for length.**They can be quilted, crocheted or knitted, they must be handmade, no store quilts!**

If you can, you can drop off or send directly to any of the following locations:

Town Square Fabric and Yarn
445 SW 152nd Street
Burien, WA 98166
Tell Christina or Cynthia they are for Layers of Hope – Quilting 911 Oso quilt drive and they will hold them.

If you live closer to the Oso area or Canada, you may drop them off with:
Mary Udman at the Skagit Valley YMCA
215 E Fulton Street
Mt. Vernon, WA 98273

In the Centralia/Chehalis Area there are two drop off points:
Sisters Fabric
476 N. Market Street
Chehalis, WA 98532
Tell Jody or Bobbi they are for Oso

and

Quilters Junction
1728 Gold Street
Centralia, WA 98531

Or you can send to me and I promise I’ll get them to one of the drop off locations before April 19th. Just email me for my address!

oso

There is a huge need for all quilters to help! And yes, the timeline is short, but please help if you can!


A Crazy Crown Tutorial with Sculpey

Not long ago I received the opportunity to receive some fun Sculpey projects if I will make something with them. Um…. Trust me, this family can make things with just about anything and clay was a super hit!  Sculpey-Main-ImFeelinCrafty

The day the mail came was such a surprise!

Sculpey-HappyMail-ImFeelinCrafty

I hadn’t told my son that we were getting the package. And it turns out that they had been making things with clay st school and he had just asked Dad for clay to have at home! And viola… Sculpey Clay appears at our house!

Sculpey-FamilyCrafting-ImFeelinCrafty

We got right to work! We’ve made quite a few creatures since we’ve had the clay, but these are the creatures we made the first night. Unfortunately, I’m not writing a tutorial on making creatures, because I’ve still got a lot to learn on that subject. Most of these guys have brown sense we made them!! Oops! I know there is a trick….. But we haven’t figured it out yet! The two end creatures are the kiddos, mine’s the blue one and Dad made the penguin!

Sculpey-CrownOn-ImFeelinCrafty

So since we haven’t mastered figures, wanna make a crazy crown with me???

Sculpey-Materials-ImFeelinCrafty

Basically, I used the clay, the Sculpey tools, a glass, wax paper and some elastic!

Sculpey-Step1-ImFeelinCrafty

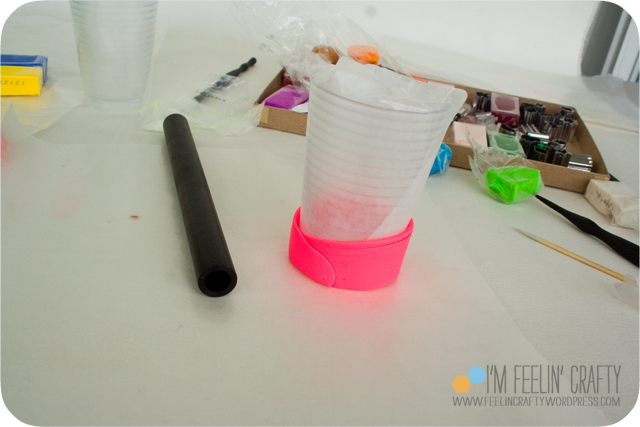
The little glass I have was the perfect size for me. It might have been a little big for the kiddo, but it worked! I wrapped the glass in the wax paper.

Sculpey-Step2-ImFeelinCrafty

Then we got to work rolling out the stripes. You kinda knead the clay for a while, then roll it into a worm and then flatten.

Sculpey-Step3-ImFeelinCrafty

Sculpey-Step3-1-ImFeelinCrafty

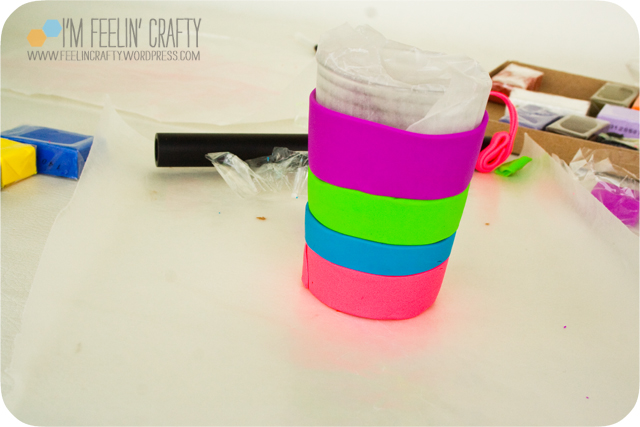
Wrap the clay around the glass. And repeat for however many layers you want to do.

Sculpey-Step3-2-ImFeelinCrafty

I was pretty into moving along, while my partner was more into chatting and singing and movin’ like a turtle and sculpting with his feet in his Hulk costume!

Sculpey-Step4-ImFeelinCrafty

And roll it out! One thing I did learn with my creatures is that the clay needs to be worked together, not just pushed together! You might be saying, how did she not know that??? Remember, sewing is more my thing than clay… Don’t get me wrong, I’m loving the clay, I just don’t know as much about it!!!

Sculpey-Step5-ImFeelinCrafty

Sculpey-Step5-1-ImFeelinCrafty

And emblish! I used the carving tool for the points, a rolling stamp for the texture and the fun little cookie cutter like pieces for the sea stars.

Sculpey-Step6-ImFeelinCrafty

The tricky part…. Removing the glass is easy, but removing the wax paper is a bit trickier! The clay will stick to the wax paper, but just move slowly and pull it away to retain the shape of the crown!

Sculpey-Step7-ImFeelinCrafty

Poke holes in the side. I poked two on each side. Then bake per directions!


Sculpey-Step8-ImFeelinCrafty

Thread your elastic through the holes. I used a 33″ piece of elastic. I ran it through two holes on each side, just to give it a bit more stability on the noggin’.

Sculpey-Crowns1-ImFeelinCrafty

And viola! The Crazy Crown! The kiddo also made a rolled clay crown. We love our crowns! Which one is your favorite?

Sculpey-CrownOn2-ImFeelinCrafty

Sculpey-CrownsOn-ImFeelinCrafty

What a fun time! We’ve really had some great family crafting with this project! And I know we’ll have more! What would you make if you got a box full of Sculpey fun???


I have been compensated with either payment or product for this post. All opinions are my own, honest opinions!


The Square Neck Top

I told you that I was making a little something from one of the Tie Dye Divas Patterns (affiliate link). I did!

TieDyeDivaDress-Main-ImFeelinCrafty

I made the Square Neck Top, dress variation (affiliate link). It’s a simple little dress, but I love how cute and simple it is!

TieDyeDivaDress-Before-ImFeelinCrafty

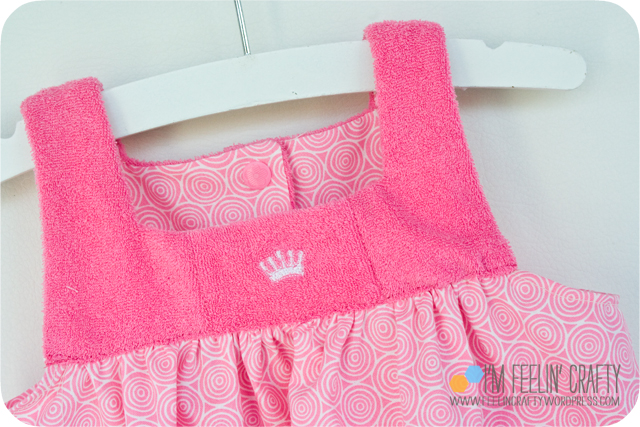
One of my best friend’s from home gave me two shirts that she wanted made into something different for her daughter. This pink shirt is a terry cloth with a tiny little crown. I wasn’t exactly sure what part of the shirt my friend wanted to keep, but I knew I wanted to keep the crown. And luckily, her daughter LOVES pink! It was kinda hard though, I don’t have much pink in my stash.

TieDyeDivaDress-FrontDetail-ImFeelinCrafty

So I cropped out the crown for the ‘square neck’ part of the little dress. The pattern (affiliate link) is beautifully detailed and photographed. I didn’t have to redo a single thing from not understanding the directions. Well, I didn’t actually have to redo anything period! I got it right the very first time!

TieDyeDivaDress-Back-ImFeelinCrafty

I always feel that the first time I make a pattern it seems to take a little while longer. I read every little line, because I don’t want to miss anything! But I know, the next time, it’s going to fly by!

TieDyeDivaDress-Button-ImFeelinCrafty

For the back, the instructions give you tips for buttons with holes or buttons with a little elastic loop. But of course, I used a snap! And look! I just happened to have some pink snaps that are just the right color!

TieDyeDivaDress-Seams-ImFeelinCrafty
For the seams I used a  mix of techniques. For the sides I used French seams. for other exposed hems, I finished off with an overlocking stitch and I know it will hold up beautifully! I try to not leave hems exposed, but there were a few, just a few, in this pattern that leaves the seams exposed!

TieDyeDivaDress-End-ImFeelinCrafty

I can’t wait to see if it fits! And maybe take a few pics next time I see my friends!

Have you signed up for the pattern giveaway??? Don’t forget!

Tie Dye Diva Intro and Giveaway!

I happy to introduce my newest affiliate sponsor, Tie Dye Diva Patterns!

Capture

Not too long ago, Jen contacted me and asked if I’d be interested in being an affiliate with her pattern shop. Of course I said yes! I took one look at her shop and was amazed with how many patterns she has. And they are so cute!

mousehousehalterwm

The majority of the patterns are for girls. And there are some cute ones! The fun thing for the little ladies is that a lot of the patterns also include a pattern for an 18″ doll! Matchey Matchey! I can’t wait to show you the Square Neck Dress I made! Stay tuned for that!

collage

And of course, no pattern shop is complete without boy’s patterns too! I love the hoodie vest. Jen and I were chatting and there’s more boys patterns on the way! I can’t wait to see what she has in the works!!

bunnyhat2

Since Easter is coming soon, doesn’t every kid need a bunny hat? Jen has a fun selection of hat patterns, too. From baby to ladies and everything in between including a pattern with the bunny and other fun animals!

peasvertical

I’m not done…. There are stuffies and dolls!! I can’t believe it! She has everything! I sooooo want to make the peas in a pod stuffie! Isn’t it adorable???

hearthands

The next pattern I want to make is the fingerless glove pattern. I got a cheap pair at Old Navy and they were cute for the first couple of days and then their cheapness showed through! So this is exactly what I need. I love fingerless gloves!

Please take a look and see what she has! I bet there is something there you’ll like. And while you’re there, go ahead and pick out your three favorites, because Jen is giving one lucky reader a 3 pack of patterns! Thank you Jen!!!

Ready to WIN three patterns? You have THREE ways to enter! And come back and leave a separate comment on this post for each entry.

1. Head to Tie Dye Diva’s Website  and tell us which pattern is your FAVORITE !. Leave one comment. (one entry)

2. I’m Feelin’ Crafty followers get another entry! Follow via email or RSS. Leave a second comment. (one entry)

3. Tweet, Facebook IG or blog about this giveaway and leave a third comment. (one entry)

That’s 3 possible entries! You must comment on this post to win. The giveaway will close on Monday, March 31st at 11:59 p.m. PST, and we’ll choose one winner using Random.org

This post contains affiliate links! All images are via Tie Dye Diva’s website. Thank you!

A Little Spring Cleaning!

Tomorrow is the first day of Spring so I thought a little spring cleaning was in order! Change the blog a bit! Freshen her up!

blogheader2.jpg

What do you think of the new look? I kept the old graphics. Just spruced up the overall graphic. The other night I was headed to bed and was like, Hey, I have an idea… Sat back down and this is what happened! Since I’m obsessed with hexi’s, I thought that was a pretty fitting design!

SandwichBag-07-topstitch3-ImFeelinCrafty

If you were paying close attention on Monday I snuck in a little glimpse of the new do with my watermark on my pics. But I’m not sold on it…

SandwichBag-test2-ImFeelinCrafty
Tonight I tried out this watermark… I want to keep it white, but I’ve always struggled with it fading into the background… I haven’t quite nailed down the watermark yet. Suggestions?

Capture

And the footer….

So what do you think about the new ‘do’? I’d love to hear… I’m debating what else needs to be revised…. Thanks!

A Super Simple (reusable) Sandwich Sack Tutorial

Or you could just call it a Lunch bag, or a snack sack, a baggie… Gotta come up with something catchy for a title you know!

SandwichBag-title-ImFeelinCrafty

At our house we try to use as little throw away stuff as possible. Our recycling bin fills up much faster than the trash can. A while back the city was talking about stopping trash every week and only coming every other week like they currently do with our recycling. Which would be fine with me, if the recycling would be picked up every week!  So if anyone out there can make that happen at my house, I owe ya! Anyway…

SandwichBag-Pile-ImFeelinCrafty

For my son’s lunch I don’t think I’ve ever used disposable packaging in his lunch. My husband has been using those plastic baggies that I hate. He does recycle them a few times before they get thrown away. And he’s starting to move over to my boxes… I use a bunch of plastic boxes. Which sometimes make getting the kiddos lunch into his lunch box a big puzzle. So bags are my answer!

SandwichBag-Materials-ImFeelinCrafty

First you need to gather your materials. I’ve been wanting to make these for ages, but have been hesitant because I couldn’t find the right material to use. You can search for articles about food safe materials all over the place, but I finally decided to go with the Eco-PUL from Diaper Sewing Supplies. The reason is that is solvent-free, environmentally friendly, releases no volatile organics, machine washable and is food safe! Cool.

SandwichBag-Cut-ImFeelinCrafty

So here’s how I made my sacks, or bags, or pouches! First, obviously, you need to cut them down to size. For the sandwich size, I cut a piece 8 inches by 16 inches. I ordered the Diaper Cut Pack to get more colors. So I cut two sandwich sized bags, then divided the rest into smaller snack sized bags. I got about 6 bags per piece of Eco-PUL.

SandwichBag-03-Cut-ImFeelinCrafty

Secondly, I used a plate to round off the top. Trim.

SandwichBag-04-sewTrim-ImFeelinCrafty

With the pieces right sides together, sew around the edge. I used a 1/4 inch seam allowance. And don’t forget to leave a hole! Trim the corners.

SandwichBag-05-turn-ImFeelinCrafty

Turn the bag right side out. And then I ironed the seams, but use a low heat and iron on the fabric side, not the PUL side!

SandwichBag-06-velcro-ImFeelinCrafty

SandwichBag-06-starwars-ImFeelinCrafty

Sew on the Velcro. Yep, had to make a Star Wars bag!

SandwichBag-07-topstitch-ImFeelinCrafty

SandwichBag-07-topstitch2-ImFeelinCrafty

SandwichBag-07-topstitch3-ImFeelinCrafty

Topstitch. First topstitch across the top. Next, fold over the bag, start at one corner and top stitch all the way around to the other corner!

SandwichBag-Bags-ImFeelinCrafty

And before you know it, you’ll have a bunch of bags!

My husband and son are already asking for more!

Have you made sandwich bags before??

WIPS on Wedn… I Mean On Thursday! (and a request for pattern testers)

Man, I’ve been having some horrible eye issues that have been slowing me down! 4 doctors, 5 medications and 3 diagnosis… And it all comes down to allergies and Dry Eye! Who knew?? I’ve seen commercials for it and never ever would have thought that dry eye could be so painful! It’s getting better though! Yea!

WIP-Binding-ImFeelinCrafty

Between keeping my eyes closed I’ve been working on some quilting projects! Coming soon will be more kids clothes, but…. I had totally forgotten that I was totally down to the wire on time, so I did a super quick machine binding on it. So I’m going back and finishing the binding by hand and removing the hanging strip.

WIP-BrownBlue-ImFeelinCrafty

I’m working that hand sewing thing! A neighbor put a call out for rec’s on someone to fix a quilt, so I said I could probably help her. This had a bunch of seams failing around the blocks, so I fixed those. After I was about 80% through with it, I realized I should have just taken out a side seam, turned it inside out and fixed it on the machine… Oh, well….

WIP-BrownBlue2-ImFeelinCrafty

It also has one hole in it that she wanted patched. So I added a little ehexi with fusible interfacing then went back and added a blanket stitch.

WIP-Gators1-ImFeelinCrafty

And lastly… it’s that alligator again! I know you’re probably tired of seeing it…. But sorry! I’m going to be showing more of it in the months to come! I’m also looking for pattern testers! I need some for the whole quilt top and some for just the gator itself! Please email if you’re interested!

WIP-Gators2-ImFeelinCrafty

The quilt is actually going to have 3 gators… I’m almost done with 2!!!

What have you been working on? Are you getting ready for Kids Clothes Week? Or sewing along with Project Run and Play? I’ve been planning, but only in my head!

How I Travel Handmade!

Sorry for the recent repost! As you probably remember, I recently posted this bag not too long ago, but I also wanted to share it on Ellison Lane’s Crafty Traveler Link Up!

RileyBlake-Front1-ImFeelinCrafty

RileyBlake-Back-ImFeelinCrafty

For the last few weeks there have been many great bags featured over on Ellison Lane! One of my favorites being the Cargo Duffle Bag!

RileyBlake-MeFront-ImFeelinCrafty

I needed a bag for carrying my quilts around in while I am doing the binding, etc. I’ve been just stuffing them in the closet grocery bag I can find. Since I needed that, I made one!

RileyBlake-Back-dtl2-ImFeelinCrafty

RileyBlake-ScissorPocket-ImFeelinCrafty

RileyBlake-ClipPocket-ImFeelinCrafty

On the inside I added a couplke of quilting pockets. One for scissors and a seam ripper. And one with Velcro to hold my hair clips that I use for holding the binding in place.

RileyBlake-NeedlePocket-ImFeelinCrafty

I also added a little needle holder! Right now in my little quilting bag, I just stick them in the side and I have found myself getting stuck. I’m hoping this will help!

RileyBlake-Me-ImFeelinCrafty

I wanted the bag to be big, but I wasn’t actually planning on it being this big! But I think it will work for what I need.

RileyBlake-End-ImFeelinCrafty

Be sure to check out the original post, if you missed it, for more details and photos!

Mr Peabody and Sherman Opens Today!!

Are you excited to see it? I was!!

1382953548_mr-peabody-sherman-2014-wallpaperRecently I was contacted and offered tickets to go see an advanced screening of the new movie Mr. Peabody and Sherman! Of course I said yes, because if you follow me on IG, you know that the kiddo and I love going to see movies! And this time we took Dad along!

MrPeabody-MaxMovie-ImFeelinCrafty

MrPeabody-MaxMovieDad-ImFeelinCrafty

We braved the end of 5 o’clock traffic to head north for a 50 minute, 10 mile drive to the theatre! Only to get there and see the LONG line! I got in line. The end of the line… Then I read my instructions that said to check in with someone and my husband saw this lady… And yep, the lady was the right person to talk to and the line wasn’t for us, ‘cuase we were with ‘The Press.’ How fun!

MrPeabody-Press-ImFeelinCrafty

What I didn’t know was that Mr. Peabody was a cartoon from back in the day! Did you know that? Well, now I do! But when we went, I didn’t know how smart this dog is or what crazy adventures he’d go on!

Mr_peabody_and_sherman_xlg

The movie synopsis is this:

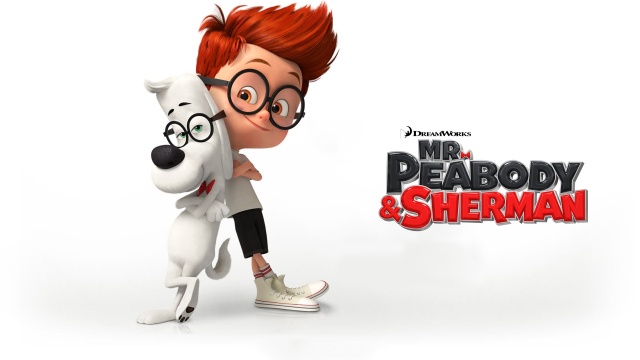
Mr. Peabody, the most accomplished dog in the world, and his mischievous boy Sherman, use their time machine – the WABAC – to go on the most outrageous adventures known to man or dog. But when Sherman takes the WABAC out for a joyride to impress his friend Penny, they accidentally rip a hole in the universe, wreaking havoc on the most important events in world history.  Before they forever alter the past, present and future, Mr. Peabody must come to their rescue, ultimately facing the most daunting challenge of any era:  figuring out how to be a parent. Together, the time traveling trio will make their  mark on history.

peabody-an-sherman-collage

They go so many places! Some seem to be a bit more fun that others, because they are always getting into some sort of mischief!!

MrPeabody-Pass-ImFeelincrafty copy

And it’s in 3D! My husband thinks it’s the best 3D movie he’s seen! And I agree, the 3D was perfect!! The effects were just so much fun! The kiddo didn’t want to take off his glasses the whole way home!

We really enjoyed our family night out at the movies! The movie is a kids movie, yes, but Mom and Dad had quite a few laughs! There were so many jokes about these historic events that the kiddo didn’t really get, but they got a laugh out of the parents! And just so many funny and silly things that got some good laughs from the kiddo!

peabody-sherman-banner

And be sure to check out their website for cute downloads and games and videos and paper dolls! There’s a set of Find the Difference picture games. Max LOVES those games right now!

If you could venture back in time with Mr. Peabody and Sherman in the WABAC, where would you go? Wherever it is, you should start by heading to the theatre to check this awesome father, dog, son adventure!

I have been compensated with either payment or product for this post. All opinions are my own, honest opinions!

A Quilted Pouch Tutorial

I’m obsessively sewing on a quilt, so I’m using today to bring home another project I made for Go To Sew!

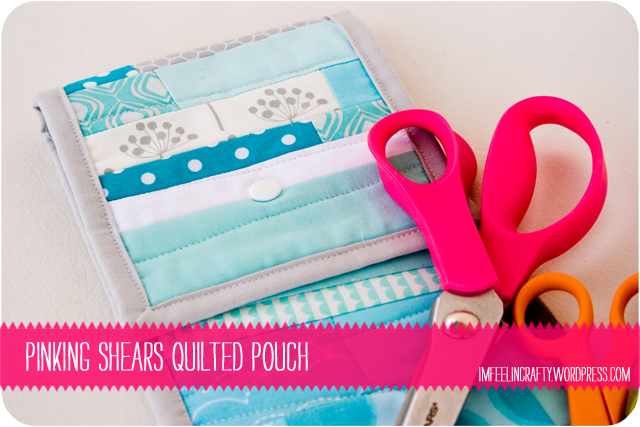
I recently made this pouch as a pouch for pinking shears. Then the other day I bought a pencil box for my son. As we were walking out of the store, I was struck by a moment of confusion…. Um, why did I just buy that when I could make one, super fast and for the same price (if not less, since this only uses scraps)???? No clue! I just kept on walking….

QuiltedPouch-main-I'mFeelin'Crafty

So not only can this be a pinking shears pouch, but it can be an eyeglass case, a marker pouch, a credit card holder, a cash holder…. Basically anything you want to hold…. Ok, maybe not ANYTHING, like it probably wouldn’t work for a puppy. You’d need something else for that. But small things, this will work!

QuiltedPouch-pouch2-I'mFeelin'Crafty

Ready? It’s simple!

QuiltedPouch-Materials-I'mFeelin'Crafty

Materials:

Scraps!

a small piece of batting

Cutting devices

Thread

Snap (or you could use buttons or magnets)

QuiltedPouch-Step1-I'mFeelin'Crafty

Step 1: Sew the scraps together. But, before you can start sewing you need to determine the size you need! For my pinking shears I decided that the pouch needed to by 11 inches wide. That’s about 5 ” for the front and back, plus your seam allowances. Then the shears are about 10 inches tall, so the pouch needed to be 20″ plus the flap, which I made 5″. So for this pouch I needed a pieced piece 11″ x 25″. Once you figure the size you need, just start sewing those scraps together!

QuiltedPouch-Step2-I'mFeelin'Crafty

Step 2: Trim your piece to the exactly dimensions that you need.

QuiltedPouch-Step3-I'mFeelin'Crafty

Step 3: Fold the piece in half.

QuiltedPouch-Step4-I'mFeelin'Crafty

Step 4: Sew together one end, right sides together. It’s hard to see in this picture, but I really did sew the end together there along the line I drew! Then turn it back, wrong sides together.

QuiltedPouch-Step5-I'mFeelin'Crafty

Step 5: Trim the batting to the same length and width of your folded piece.

QuiltedPouch-Step6-I'mFeelin'Crafty

Step 6: Insert the batting between the folded pieces.

QuiltedPouch-Step7-I'mFeelin'Crafty

Step 7: Quilt the pieces together!

QuiltedPouch-Step8-I'mFeelin'Crafty

Step 8: Cut the binding. 2.5 inches by the perimeter of your pouch. Mine was 5.5 + 10 + 5 + 5.5 + 10 + 5 = 41 inches, plus extra.

QuiltedPouch-Step9-I'mFeelin'Crafty

Step 9. Fold over the pouch so that the sewn end is the exposed end under the flap. Sew on the binding.

QuiltedPouch-Step10-I'mFeelin'Crafty

Step 10: Add the snap.

QuiltedPouch-pouch1-I'mFeelin'Crafty

Step 11: Add the pinking shears! You’re done!

QuiltedPouch-pouch2-I'mFeelin'Crafty

What would you use your for???