Pansy Mini Mini Quilt

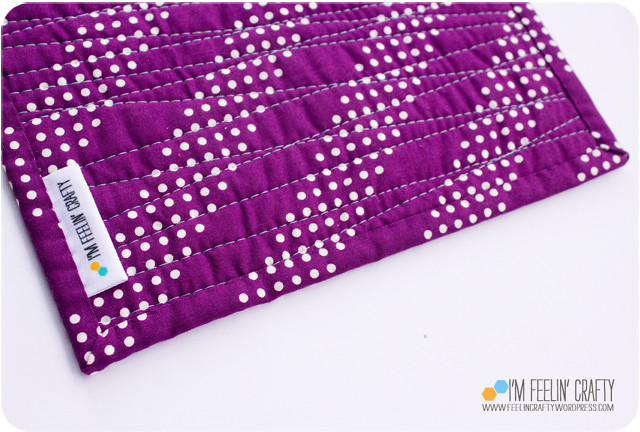
This is a little mini quilt I made and gifted this holiday season. It’s only about 9″ square and was a fun one to sew. I’m really loving making minis and adding the leather hangers to give as gifts. Remember the Valentines mini quilts I made last year? I’m still in love with those too!

PansyMini-Pattern-ImFeelinCrafty

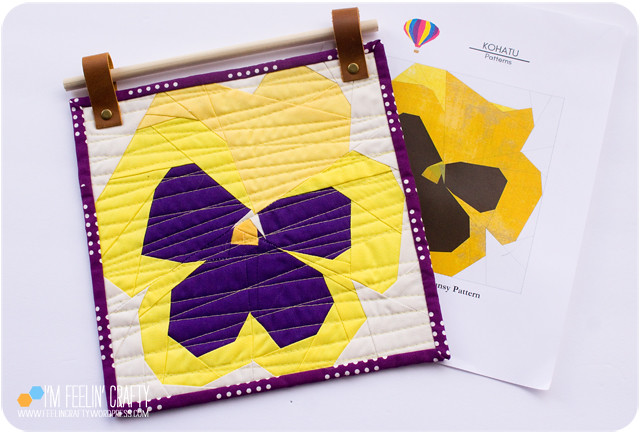
The pattern is from Kohatu Patterns on etsy. Back when the war started in Ukraine, she was doing a fundraiser to support Ukraine by selling her sunflower block. I purchased that, but I also found this pansy in her shop and purchased that one too. I knew exactly what I was going to do with it and who was going to get it!

You know me, I seem to like to change things just a little bit. I changed the top, back petal slightly. But it was a super easy sew foundation paper pieced pattern.

I still need to make her sunflower block, too.

PansyMini-Back-ImFeelinCrafty
For the back and binding, I used a coordinating purple fabric. I like that it is a print while the front is all solids.
PansyMini-Binding-ImFeelinCrafty
And just in case you didn’t notice… Check out how perfectly the binding lines up with the back… Perfect! Not planned at all, but I’ll take it! 🙂
PansyMini-Front-ImFeelinCrafty

Time to start thinking about the next mini quilt to hang!

I’ve Got My Eye on You!

I feel like it’s kinda early to start posting about Valentine’s Day, but since this month is flying by, I realized Valentine’s Day isn’t really that far off!

Valentine-Main-ImFeelinCrafty

Not long ago I had an etsy customer ask for a set of my pirate eye patches and a set of heart shaped eye patches. Of course, I said I could do hearts! While I was making them, I knew that there had to be a way to incorporate these into a Valentine’s Day card!

Valentine-CardFace-ImFeelinCrafty

And I did!

Valentine-BothEyes-ImFeelinCrafty

The silly card is printed on cardstock and is a flat card with eye patch wrapped around it. And once you remove the eye patch, the other eye is revealed!

Valentine-EyePatch-ImFeelinCrafty

I think they are pretty funny myself! And it seems like someone else did too!

Valentine-End-ImFeelinCrafty

You can print them here and make your own eye patches. I sew two pieces of felt together with the elastic sandwiched between the two.

Valentine-EyePatch2-ImFeelinCrafty

Valentine-Muliple-ImFeelinCrafty

But if Valentine’s Day is sneaking up on you fast and you want someone else to make them for you… I got you covered! You can buy them as

1. an Individual Card with the eye patch and an envelope on my etsy shop here OR as

2. a Set of 10 for classmates with the eye patch and no envelope on my etsy shop here!

Shared with these Link Parties!

and
Visit thecsiproject.com

Busted.

A crazy thing happened this week. My etsy shop was busted. Is it a good thing or a bad thing? Is the glass half full or empty?

etsyshop

As most of you probably know I started an etsy site where I sell party supplies. It actually started with the Dr Seuss party food labels and invitations. Then came my Dragon Wings. And lastly the pirate party. I’m working  on more parties now. I got pretty close to finalizing the Dinosaur party when I got sucked into my LEED certification! Anyway….

8140922583_218b507dbc_z copy

The etsy shop has been doing well, with all three parties. But I’ve always debated if selling my Dr Seuss things was the right thing to do. And there’s really no debate. It’s not. But I kept doing it. Knowing in the back of mind that it was wrong.

PirateHat-I'mFeelin'Crafty copy

Then this week I got a notice that etsy had deleted one of my listings. Supposedly, someone from the Dr Seuss foundation has complained. I was out to lunch, but as soon as I got back to my computer, about 10 minutes later, I deactivated the rest of my Dr Seuss inspired party listings.

IMG_7552sm copy

I’ve been reading a lot lately about people getting mad at etsy for shutting down their sites or deleting their listings, etc. Honestly, this has been a weight off my shoulders. I had no choice but to deactivate the listings now. I can’t keep debating with myself.

FoodLabels-I'mFeelin'Crafty copy

My shop is doing well, but I do no promotion. I know it could be even better if I promote it better. But I haven’t wanted to draw much attention to the shop because…. My good conscious kept telling me the truth!

IMG_7679sm copy

It does make me wonder though…. After this happened, I typed Dr Seuss into the etsy search engine and 12,225 items came up. I wonder why me? And what about all those other listings? It doesn’t matter. I’m not challenging etsy’s decision to contact me or delete my listing. I’m not going to report or challenge the other sellers. But I do wonder!

Luckily, they just deleted the one listing. Technically, they didn’t say to take down the others, but…. Like I mentioned, I have heard too many stories about people’s whole site being deleted! For me it was only the one listing and I did the rest!

8140953384_71ba126976_z copy

And now I just have to work even harder to get more parties up on the site to share! I can promote my shop without any misgivings. I’m excited to make my own p I’m planning superheros, dinosaurs and a spy party. What else would you like to see?

WIP Wednesday!

What are my Works in Progress?? If only there weren’t so many!

MadronaRoadHexi-ImFeelinCrafty

You know I’m in love with hexi’s… I finished my Madrona Road Hexi insert. Now I need to finish the quilt it goes in!


FlipHexis-ImFeelinCrafty

FlipHexis2-ImFeelinCrafty

Since I finished one hexi project I had to start some more! So I started 2 more hexi projects! The first one is tiny little hexi’s for a swap. Luckyily it’s a pin cushion, or else it could be taking years! I was debating between all random or mostly green and blue with a couple of orange pieces thrown in. I’m going with the latter!

DoubleSidedHexi-ImFeelinCrafty

And I started a double sided hexi scrap quilt! With the batting already inside! It took me a while to figure out how to actually make it work with sewing the four pieces together at once. Now this one is going to take forever. And I’m ok with it! I raided my scrap bags and have started, but I’m trying to only use scraps on this one, soooo… I’m planning on it taking a while!

DinoPeek-ImFeelinCrafty

It’s not sewing, but…. And my party shop! it needs something new! How about dinos? I’m working on dinos now, but at the same time, in my head a spy party and a super hero party are floating around. Hopefuly soon they will all be for sale!

awesome

And lastly, another not sewing project… I’ve got to get in 30 hours of continuing education credits to keep my LEED (Leadership in Energy & Environmental Design) certification before mid August! Yep. You heard right. mid-August! AHHHHH!!! So I’ve been taking a bunch of online classes and each one has a quiz at the end. Last night I passed a quiz on Brownfield sites. Lovely subject. But the response to passing the quiz was nice! All tests should end this way!

OK, now I need to go take another one!

Etsy and Instagram and Facebook, Oh, my!

Are you flashing back to The Wizard of Oz??? I am… Lions and Tigers and Bears, oh, my! Ok, maybe it’s just me…

So many updates today!

First, Etsy

Do these cards look familiar to anyone? I designed them all last year for a free printable. Well, this year, I’ve updated them all and they are available in my Etsy shop! You don’t have to hassle around with the files. I’ll do it for you! You purchase and send me your pictures. I’ll set the whole thing up for you and send it back to ya! Easy!!!! So if you haven’t already ordered your Holiday cards, check out mine! Each card come with a PDF of corresponding address labels and envelope liner paper! What do you think??

Next, Instagram….

My Instagram account has been private for the last couple of years that I’ve been using it. Until today… I’ve opened it up to be public. I’m a little hesitant… But I want to get to know you. I’ve been writing to you for the last couple of years, but I feel like I haven’t gotten to know too many of the people who read my blog… And I’m coming to a blogging place that feels very alone. I didn’t start this blog to be alone! I started it to make friends out there that I would otherwise not know. So I thought I’d try this out and see. You can now follow me on instagram! I’ve started taking pictures of my crafty projects and fun things I see out there. Not just my son… There will still be pictures of him, just a warning! He’s cute though, right?!

You can click here, the image above or the same image on the right hand side over there!

(I’m kinda excited about my little instagram image I just made!)

And Lastly, Facebook

If you follow any other blogs, you’ve probably already seen this…. But Facebook has made some changes and you don’t actually get updates for every page that you like… So, if you can do me a favor, I’ll let you know how to be sure to not miss a FB update!

Go to my FB page by clicking here. Then mouse over the blue LIKED button and you see the drop down menu in the image above. Make sure that you have checked ‘Show in News Feed’. This was you’ll never miss a post and if you comment, or like or anything else, probably, other friends will see it and so on and so on!

Big sigh….

That was a lot of information!

I’m so glad to have you and look forward to getting to know you even better with these little changes I’ve made and hope too see more of you on FB and Instagram!

For Sale: Dragon Wings

ok, remember last weekend when I mentioned I had a friend in from out-of-town that was trying to get me focused to get a few things off my to do list? Well, I marked one off the to do list! I finally got my Dragon Wings up for sale on Etsy!!

Yea!! If you’re one of those people who don’t want to or have the time to make your own… I’m here for ya!

Maybe I’ll get some more Dragon Party themed party pieces up soon, too!

Dragon Wings Tutorial

Yes, I’ve only posted about my dragon wings about 10 times, and here it goes again. Only this time I’m sharing how I made them.

OK, here is goes, my first ever tutorial…

Materials:

Fleece

2 metal hangers

Fusible Adhesive, like Steam to Seam or Heat’n Bond Ultra

Eleastic, 18inches

Thread

Scissors

Wire Cutters

Your Dragon is Waiting….  What are you waiting for!

Step 1- Print pattern, or use your own. Print Pattern here

Step 2- Lay the pattern on the fusible adhesive. (I used the Heat’n Bond Ultra roll.) Fold the fusible adhesive so that the non-paper sides are together. Trace pattern and Cut. I added a ¼” width around the pattern piece, but you don’t need to.

Step 3- Lay the fusible adhesive on the wrong side of the fleece and iron on. I never iron fleece directly. I always use a thin piece of cotton between the iron and the fleece.

Cut the fleece around the fusible adhesive wing pattern.

Step 4- Time for the wire cutting! Get out your hangers and wire cutters.

Hanger #1- Clip off the hanger piece. Then bend the hanger at the middle of the straight bottom piece, so that you have an upside W. Next, lay the hanger on the dragon wings and bend the hanger so that it somewhat aligns with the top edge of the wings. This doesn’t have to be exact by any means!

Hanger #2- Clip the bottom into 2 piece and the sides into 2 more pieces for the ‘bones’ of the wings.

Step 6- Next step, putting the wings and bones together.

Remove the paper side of the adhesive and lay out this set of wings with adhesive up. Layout the ‘bones’. Lay the second piece of fleece over the bones with right side up. Iron. This ironing step takes a little while to get the fusible adhesive to adhere to the fleece, so be patient. Last part of Step 6, cut out the dragon wings!

Step 7- Stitch! First, stitch around the edges. Second, stitch alongside each of the inside bones

Step 8- Elastic. Almost done… Add two 9inch pieces of elastic to the back side of the wings, spaced about 5inches apart. Although these lengths for the elastic were made for 2 year olds, they even fit some adults. Lastly, Stitch the elastic to the top and bottom of the wings.

And WA LA! You’re done! Get those wings flying!

Please excuse the photography! The lighting in my crafty room is not set up for photography… That’s a whole ‘nother project…. I considered making another set and taking better pictures along the way, but with Halloween just around the corner I decided to post what I have.

Comments and questions are greatly appreciated! Like I said this is my first ever tutorial, so I know there is room for improvement for my next one. I’d also love to see pictures of other little dragons.

And if you’d like to own a pair, but want someone else to make them… Check out my etsy site!