For Sale: Dragon Wings

ok, remember last weekend when I mentioned I had a friend in from out-of-town that was trying to get me focused to get a few things off my to do list? Well, I marked one off the to do list! I finally got my Dragon Wings up for sale on Etsy!!

Yea!! If you’re one of those people who don’t want to or have the time to make your own… I’m here for ya!

Maybe I’ll get some more Dragon Party themed party pieces up soon, too!

More Dragons!

I’m just so impressed with all the dragons that have been made this Halloween from my Dragon Wings Tutorial!! It’s just awesome to see people using my tutorial and blog and making such incredible pieces. I just have to show off a few more before I move on from Halloween and back to the Dr. Seuss Party Tutorials!

I can only say that I am totally wowed by Tamara’s dragon costume! Such amazing details, cool wings and love the baseball hat idea for the dragon head!

Check out this ‘Night Fury’ dragon from ‘How to Train Your Dragon’! I love the awesome tail detail! Ellie had such kind words, ‘Thank you so much for helping make me the coolest mom!’  ahhhh… I’m blushing!

I had mentioned that I had made a pair of wings for a reader and didn’t take a picture. Well, Natalie sent me a picture of her beautiful dragon wearing the pair that I made. Natalie told me that her son loves them, ‘taking them off last night after Trick-of-Treating was like torture for him.’ I actually had a great time pulling out the pattern again and putting another pair together!

Thank you all for your pictures and kind words! It really means a lot to me to see people enjoying my blog and seeing the projects in action! Thank you!

It’s a Dragon Halloween!

I’m so glad that so many people are attempting the dragon wing tutorial that posted last year!

I thought I’d share some reader dragons today!

These dragon wings were made by Make Jane Make and I love love love the sweatshirt she made to go with them!  I might just have to attempt this to go with my son’s wings.

And this little blue number is by Just Plumb Good.

I love how both of these use different colored fabrics.

I also just made another pair for a reader in Virginia. So beware… There’s a black dragon lurking on the east coast!

And a few more people have commented that they have made some wings, including a pair for a puppy. I’d love to see them! Please send pictures, upload them to the I’m Feelin’ Crafty flicker page or send me a link to your photos!

Gotta get on that Halloween costume. So behind schedule somehow!

Dragons, Monsters and Dinos, Oh My!

Yep, I’m blushing again! To my surprise the dragon wings were featured again and this time with Made by Rae’s Celebrate the Boy week in the Creature Feature Roundup!

And man, the dragon wings are in some amazing company!!

1. Dino Sike Crochet Hat and Pattern, 2. Amigurumi baby dragon, 3. Monster Snow Hat, 4. Monster Baby Hat and Shirt

5. Tissue Monster, 6. Dragon Sweatshirt, 7. Yo Gabba Gabba Fleece, 8. Pillow Tee Monster

9. Sweater Monsters, 10. Yep, that’s me, the Dragon Wings!, 11. Yellow Tee Shirt, 12. Monster Art Tote

13. Sock Dragon, 14. Winter Dino Hat, 15. Pipoooo dentinho, 16. Fiery Dragon

Sooo… If I have to pick one, my favorite would be (besides the dragon wings of course…) the sock dragon! I’m blown away by that one!

Check them out, most of them have tutorials as well!

Which one is your favorite?

And check back tomorrow for my very own CTB link love! I”ve found some great things!

Featured on Prudent Baby

I’m blushing!! I was included in Prudent Baby’s link love today!! I was sitting here with my husband and his siblings. Honestly, I really did start blushing and everyone started cheering for me! We’re a silly bunch!

The Prudent Baby blog is awesome! Every time I think, I want to make this or that, she has it!  Do check it out.

Thanks Prudent Baby ladies!

Dragon Wings Tutorial

Yes, I’ve only posted about my dragon wings about 10 times, and here it goes again. Only this time I’m sharing how I made them.

OK, here is goes, my first ever tutorial…

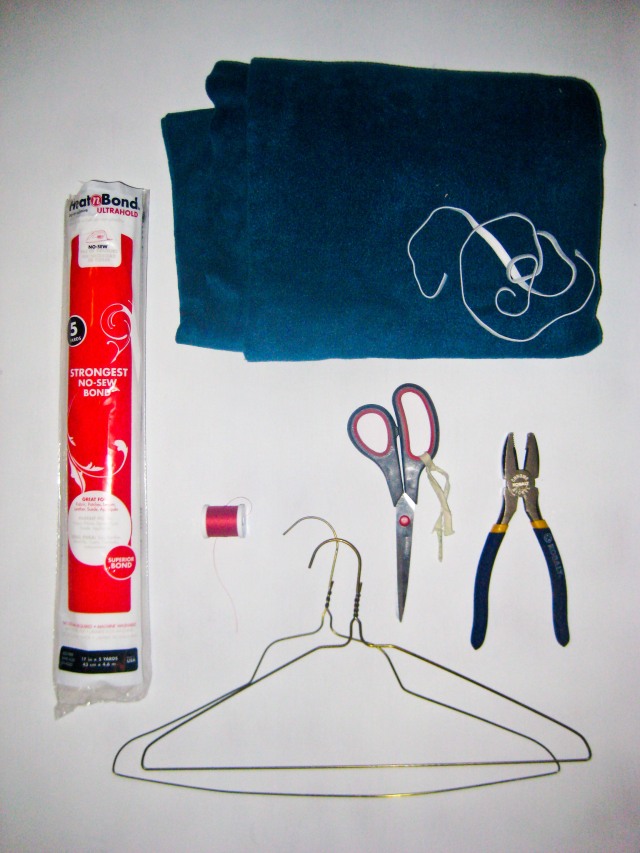
Materials:

Fleece

2 metal hangers

Fusible Adhesive, like Steam to Seam or Heat’n Bond Ultra

Eleastic, 18inches

Thread

Scissors

Wire Cutters

Your Dragon is Waiting….  What are you waiting for!

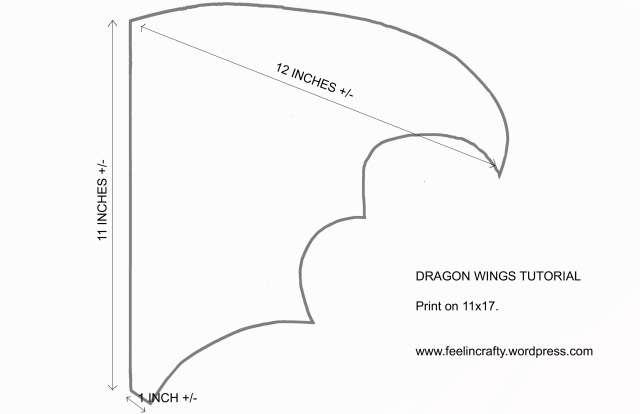
Step 1- Print pattern, or use your own. Print Pattern here

Step 2- Lay the pattern on the fusible adhesive. (I used the Heat’n Bond Ultra roll.) Fold the fusible adhesive so that the non-paper sides are together. Trace pattern and Cut. I added a ¼” width around the pattern piece, but you don’t need to.

Step 3- Lay the fusible adhesive on the wrong side of the fleece and iron on. I never iron fleece directly. I always use a thin piece of cotton between the iron and the fleece.

Cut the fleece around the fusible adhesive wing pattern.

Step 4- Time for the wire cutting! Get out your hangers and wire cutters.

Hanger #1- Clip off the hanger piece. Then bend the hanger at the middle of the straight bottom piece, so that you have an upside W. Next, lay the hanger on the dragon wings and bend the hanger so that it somewhat aligns with the top edge of the wings. This doesn’t have to be exact by any means!

Hanger #2- Clip the bottom into 2 piece and the sides into 2 more pieces for the ‘bones’ of the wings.

Step 6- Next step, putting the wings and bones together.

Remove the paper side of the adhesive and lay out this set of wings with adhesive up. Layout the ‘bones’. Lay the second piece of fleece over the bones with right side up. Iron. This ironing step takes a little while to get the fusible adhesive to adhere to the fleece, so be patient. Last part of Step 6, cut out the dragon wings!

Step 7- Stitch! First, stitch around the edges. Second, stitch alongside each of the inside bones

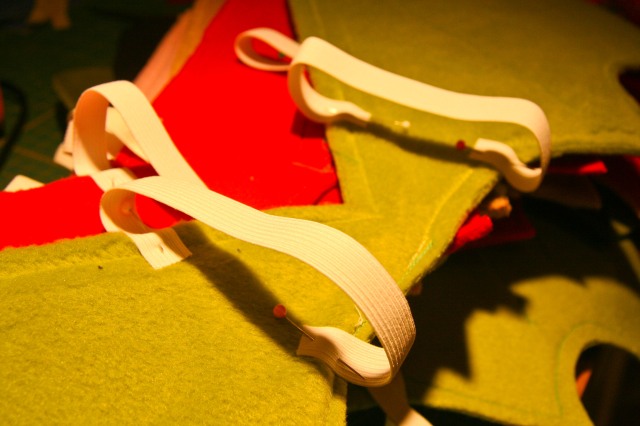
Step 8- Elastic. Almost done… Add two 9inch pieces of elastic to the back side of the wings, spaced about 5inches apart. Although these lengths for the elastic were made for 2 year olds, they even fit some adults. Lastly, Stitch the elastic to the top and bottom of the wings.

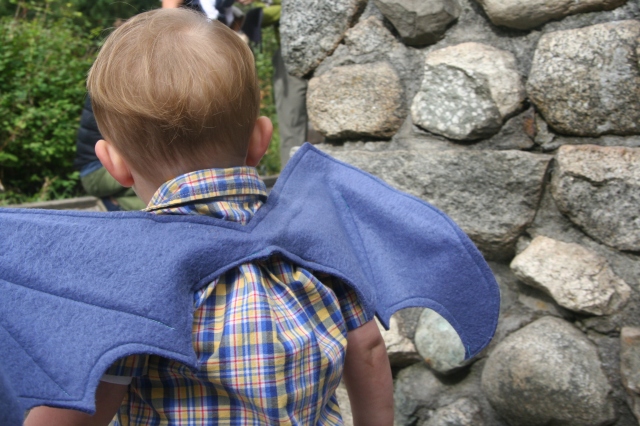
And WA LA! You’re done! Get those wings flying!

Please excuse the photography! The lighting in my crafty room is not set up for photography… That’s a whole ‘nother project…. I considered making another set and taking better pictures along the way, but with Halloween just around the corner I decided to post what I have.

Comments and questions are greatly appreciated! Like I said this is my first ever tutorial, so I know there is room for improvement for my next one. I’d also love to see pictures of other little dragons.

And if you’d like to own a pair, but want someone else to make them… Check out my etsy site!

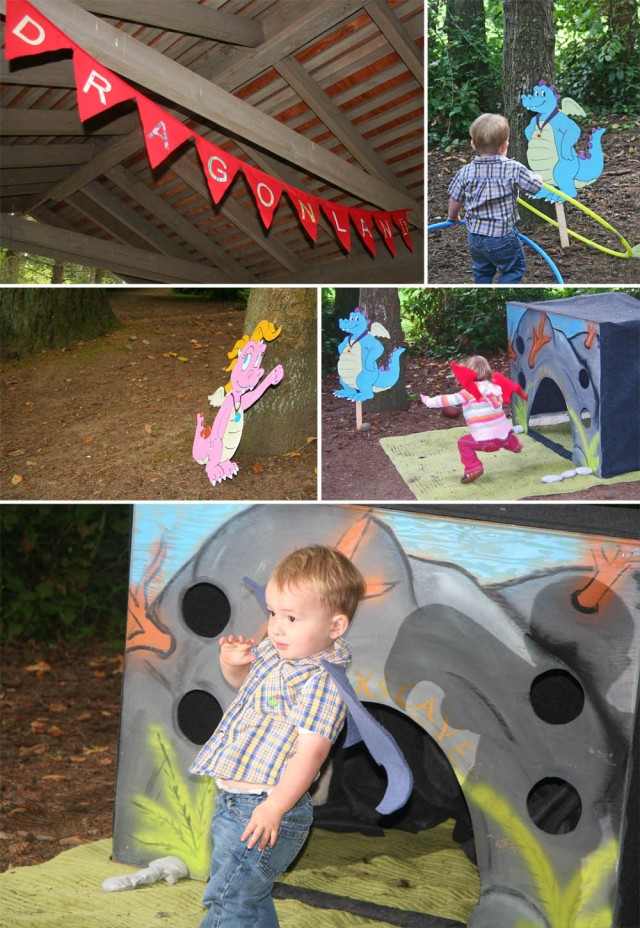
Party in DragonLand

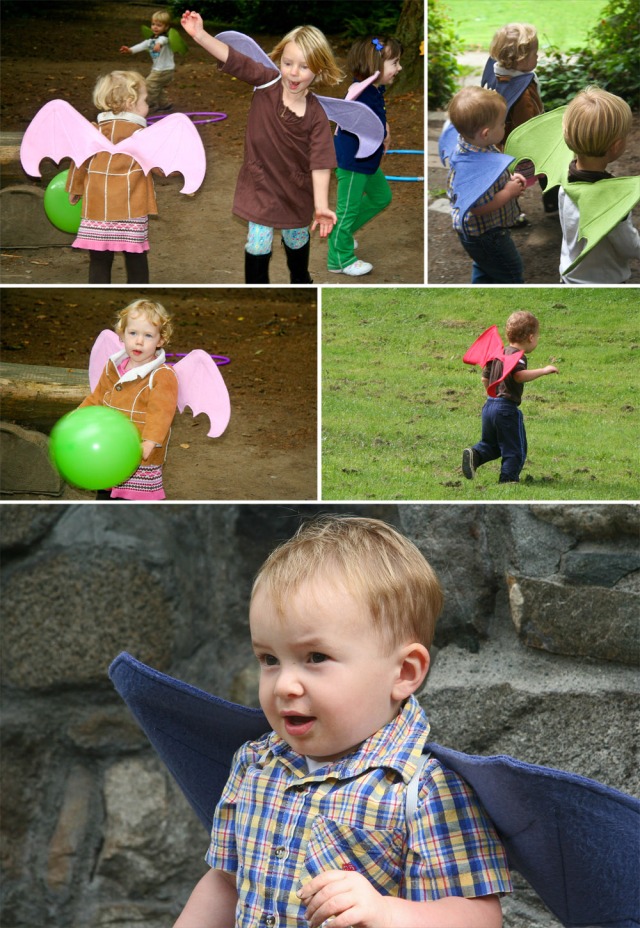
All the posts about the dragon wings were leading up to something bigger than just a pair of dragon wings for my kiddo. We were planning a dragon themed birthday for our two year old with all sorts of dragon fun. Including dragon wings for everyone. Well, the kiddos at least. Although there were some parents who wanted thier own. (You know who you are!)

I am working on my first ever tutorial for the dragon wings. Hopefully I can post that really really soon….

And we had a cave and dragons thanks to Dad’s craftiness….

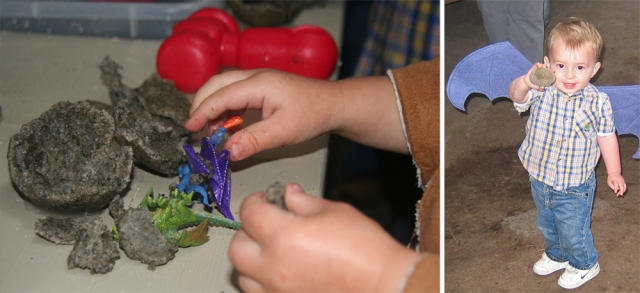
And last but not least, our other fun and crafty activity was dragon eggs! We had some trouble making these. We followed a recipe from online, but it didn’t really work out for us… 

The recipe called for:

  • 1 cup flour
  • 1 cup used coffee grounds
  • 1/2 cup salt
  • 1/4 cup craft sand or sandbox sand
  • 3/4 cup warm, not hot, water
  • small plastic dragons
  • And then cook the eggs at 125 degrees for about 25 minutes.

    A few things happened… We couldn’t get it to form the dough that it was supposed to form into, so our eggs were a gooey pile of the mush with a dragon sticking out! We cooked them anyway and they got harder, but they were still a bit playdough like. So we were able to mold the eggs and then bake them again at 300 for a while, probably about a half hour. 

    We made a few other alterations… We needed a lot more mix to make our eggs. But we didn’t have any more used coffee grounds so we had to ditch that ingredient. We’d start with the recipe portions, but added more dirt and flour until we got to a thick, gooey cookie dough like consistency dough. At this point we’d form the eggs as close to an egg shape as possible, bake them, shape them again and bake again…

    I didn’t keep track of the actual portions, but maybe I’ll make another batch and do a tutorial about that too…  hmmmm…. 

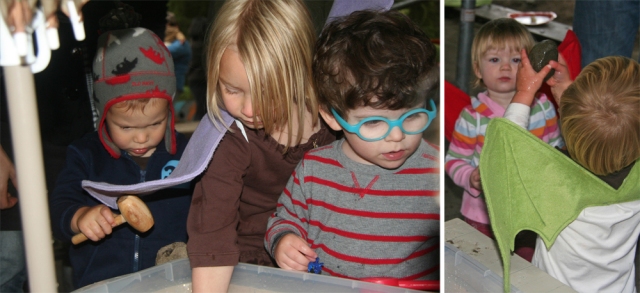
    However we got them made, the kids didn’t care. They only cared about hatching them to find their baby dragons inside! Dad made a table with a water box to soften the egg for the hatching process. The kids loved, loved, loved this.


    Dragon Wings Update

    Previously I said that the second set was going to be perfect…  Wrong…

    Third times a charm. For real! When it comes to my dragon wings it took a few tries to get it just right. But we got it…. 

    Tutorial coming soon!

    update… Tutorial is posted here

    Kids Clothes Week Challenge- Day 5

    Dragon Tales, Dragon Tales, It’s almost time for Dragon Tales. Come along and take my hand, Let’s all go to Dragon Land!

    Almost everyday in this house we have to get a few minutes of Dragon Tales in. We ask if the kiddo wants to watch anything else, but nope. So, this all leads me to last night’s project…. Dragon Wings!


    No tutorial here. Just a dry run… Maybe, I’ll make a tutorial! Hmmmm… There were a few flaws in my design, but with the help of my husband we’ve worked out the kinks in the design. Dragon wings set 2 will be perfect! 🙂 I’ll try that as part of tonight’s project.