Sew Ready to Play 2016 Recap!

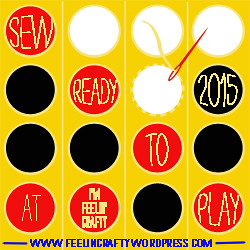
Time to say goodbye to this year’s season of Sew Ready to Play! it’s been another great one! Which project are you going to make? We’d love to know! I want to give a HUGE shout out to all the amazing guests that agreed to join me and play along this year! THANK YOU!!!

srtp2016button


pokemongo

Sept 9th- Liz and LiZ  from Simple Simon and Co

pokemon-shirt-1

Sept 14th- Stacey from Boy, Oh Boy, Oh Boy Crafts

snakes-and-ladders-quilted-playmat

Sept 16th- Narelle from Threadistry

img_9345labled2

Sept 19th- Debbie from A Quilter’s Table

sewreadytoplay-main-imfeelincrafty

Sept 21st- Louise from I’m Feelin’ Crafty

angry-birds-toss-childrens-game

Sept 23rd- Al from Shaffer Sisters

img_7267

Sept 26th- Michelle from Factotum of Arts

olivers22tunic11

Sept 28th- Ashley and Emily from Frances Suzanne

Sept 30th- The Recap!

Dominos with Frances Suzanne

Well, there’s good new and there’s bad news today! The bad news… It’s the last day of this season of Sew Ready to Play! It’s been a good one, but it’s almost over… The good news… My lovely ‘Bama friends, the ladies at Frances Suzanne, are here today with an adorable outfit for their niece! These ladies are truly inspiring with the beautiful pieces they make for their three adorable nieces!

olivers22tunic11

Their project is inspired by Dominoes this year. It’s so cute! What a great way to include the game into an cute outfit! Be sure to jump on over to Frances Suzanne to check it out!


srtp2016button

Sept 9th- Liz and LiZ  from Simple Simon and Co

Sept 14th- Stacey from Boy, Oh Boy, Oh Boy Crafts

Sept 16th- Narelle from Threadistry

Sept 19th- Debbie from A Quilter’s Table

Sept 21st- Louise from I’m Feelin’ Crafty

Sept 23rd- Al from Shaffer Sisters

Sept 26th- Michelle from Factotum of Arts

Sept 28th- Ashley and Emily from Frances Suzanne

Sept 30th- The Recap!

Angry Birds with Shaffer Sisters

Welcome back to another fun day of Sew Ready to Play! Today’s guest is another one of my favorite online friends, Al, from the Shaffer Sisters! Al has been awesome to also be a returning Sew Ready to Play guest for a few years now! I always love seeing what she sends over!

angry-birds-toss-childrens-game

And this year it’s Angry Birds! Come On!! Let’s head over to the Shaffer Sisters blog and learn more about what she did to make these guys! I love it!


srtp2016button

Sept 9th- Liz and LiZ  from Simple Simon and Co

Sept 14th- Stacey from Boy, Oh Boy, Oh Boy Crafts

Sept 16th- Narelle from Threadistry

Sept 19th- Debbie from A Quilter’s Table

Sept 21st- Louise from I’m Feelin’ Crafty

Sept 23rd- Al from Shaffer Sisters

Sept 26th- Michelle from Factotum of Arts

Sept 28th- Ashley and Emily from Frances Suzanne

Sept 30th- The Recap!

Zeus on the Loose with Me!

It’s my turn!! Yeah!! Have you ever played Zeus on the Loose?? We love it! It’s basically a counting strategy game. That description doesn’t do much for it, but take my word for it. It’s fun!

sewreadytoplay-main-imfeelincrafty

Originally I wanted to make a notebook cover for my son, but my Improv Lightening Bolts kept being too big, so it turned into a pillow! It was really hard to get it as small as I wanted it to be!

SewReadyToPlay-Zues-ImFeelinCrafty

I went through a few plans of projects to make this year. Usually I know exactly what I want to make. Not this year. Then I remembered our new favorite game. But what to make?? At first I got my Greek Gods confused and for a minute I was designing something with a trident… Um, hello, my to ‘I minored in Ancient History’ self…. Zeus and tridents do not go together. Lightening Bolt my friend!!!  Then I was all over it!

I’ll give you a super quick idea of how I made it! Since it’s improv, there are no dimensions or anything to go with! To make the Improv Lightening bolt is simple!

SewReadyToPlay-Step1-ImFeelinCrafty

SewReadyToPlay-Step2-ImFeelinCrafty

SewReadyToPlay-Step4-ImFeelinCrafty

First, cut out a ‘leaning’ triangle, then sew on a thin layer of the ‘bright light’ fabric and then a thicker layer of the background fabric. So that you end up with two ‘leaning’ triangles. And you want them to both be leaning in the same direction!

SewReadyToPlay-Step5-ImFeelinCrafty

Next, I folded over the top of the triangle to get an overlap. Once I liked where the overlap was, I ironed it flat. This ironed line is where I sew-ed it together.

SewReadyToPlay-Step6-ImFeelinCrafty

And then I trimmed a quarter inch seam. Repeat these last two steps over and over until you have each side of the lightening bolt how you like them. then sew the two halves together!

SewReadyToPlay-Pillow-ImFeelinCrafty

Add in the rest of the background fabric for the shape you need for either a notebook cover, a pillow top or quilt blocks…. And quilt away!

SewReadyToPlay-CHair-ImFeelinCrafty

I thought it turned out pretty cool. And once I got my husbands seal of approval, I knew it was pretty cool! (yes, he’s very honest and has no qualms telling the truth about his feelings on my work! Usually he likes it, but not all the time!) I think it’s going to be loved, along with it’s inspiring game!


srtp2016button

Sept 9th- Liz and LiZ  from Simple Simon and Co

Sept 14th- Stacey from Boy, Oh Boy, Oh Boy Crafts

Sept 16th- Narelle from Threadistry

Sept 19th- Debbie from A Quilter’s Table

Sept 21st- Louise from I’m Feelin’ Crafty

Sept 23rd- Al from Shaffer Sisters

Sept 26th- Michelle from Factotum of Arts

Sept 28th- Ashley and Emily from Frances Suzanne

Sept 30th- The Recap!


Ultimate Frisbee with A Quilters Table

Let’s kick off another week of Sew Ready to Play with my quilty friend, Debbie, from A Quilter’s Table!

img_9345labled2

Debbie and I have become great friends over the years participating in Seattle Modern Quilt Guild activities. And just recently we were roommates again at our retreat. I can’t wait to show you more about that weekend. Debbie came to retreat with a bunch of triangles and left with a finished quilt top! She’s speedy! And I’m so glad she decided to play along again this year!

Be sure to go to her blog to learn more about it!


srtp2016button

Sept 9th- Liz and LiZ  from Simple Simon and Co

Sept 14th- Stacey from Boy, Oh Boy, Oh Boy Crafts

Sept 16th- Narelle from Threadistry

Sept 19th- Debbie from A Quilter’s Table

Sept 21st- Louise from I’m Feelin’ Crafty

Sept 23rd- Al from Shaffer Sisters

Sept 26th- Michelle from Factotum of Arts

Sept 28th- Ashley and Emily from Frances Suzanne

Sept 30th- The Recap!

Snakes and Ladders with Threadistry

Yeah! Another Day of Sew Ready to Play!

Today we have a long term Sew Ready to Play player! She’s played along every year! Yea! Today is my blogger friend Narelle. She was originally from Cook, Clean Craft, but now blogs over at Threadistry.

snakes-and-ladders-quilted-playmat

She has a tutorial today for making a Snakes and Ladders game board. I’m used to Chutes and Ladders, so I had to google Snakes and Ladders! All sorts of interesting articles! What did we do before Google?? Sounds like it’s what Milton Bradley based Chutes and Ladders on! Head on over to her blog, Threadistry, to learn more!!!


srtp2016button

Sept 9th- Liz and LiZ  from Simple Simon and Co

Sept 14th- Stacey from Boy, Oh Boy, Oh Boy Crafts

Sept 16th- Narelle from Threadistry

Sept 19th- Debbie from A Quilter’s Table

Sept 21st- Louise from I’m Feelin’ Crafty

Sept 23rd- Al from Shaffer Sisters

Sept 26th- Michelle from Factotum of Arts

Sept 28th- Ashley and Emily from Frances Suzanne

Sept 30th- The Recap!

Pokemon- The Card Game with Boy, oh Boy, oh Boy Crafts

Pokemon is having a full fledged comeback if I do say so myself! It was big when I was a kid, then I don’t remember hearing much about it… Until the last few years! Now it’s ALL over! Even here on the ‘ole blog!

pokemon-shirt-1

And today, we’re welcoming back an awesome lady,  Stacey from Boy, oh Boy, oh Boy Crafts. Last year she was here and played along with the game Othello. This year, Pokemon! And she already has an idea for next year! My favorite game! I knew I liked this lady!

Be sure to go check out her project on her blog, Boy, oh Boy, oh Boy Crafts! Thanks Stacey!


srtp2016button


Sept 9th- Liz and LiZ  from Simple Simon and Co

Sept 14th- Stacey from Boy, Oh Boy, Oh Boy Crafts

Sept 16th- Narelle from Cook, Clean, Craft

Sept 19th- Debbie from A Quilter’s Table

Sept 21st- Louise from I’m Feelin’ Crafty

Sept 23rd- Al from Shaffer Sisters

Sept 26th- Michelle from Factotum of Arts

Sept 28th- Ashley and Emily from Frances Suzanne

Sept 30th- The Recap!


Pokemon Go with Simple Simon and Co

It’s time to really kick off this season of Sew Ready to Play! And to start us off right, our first guests are the ladies behind Simple Simon and Co!

pokemongo

Simple Simon and Co have a lovely blog chock full of fun inspiration! They are the ones behind the Skirting the Issue series I participated in earlier this year. The series collects skirts for foster kids. But not only skirts, blankets too!

Head on over to their blog to learn more about their Pokemon Go inspired project!

This year the ‘rules’ to game are a little different. Traditionally, the guest posted all the details on my blog. This year, I’m posting the teaser and sending you to their blog for more details! Enjoy!


Hopscotch with The Shaffer Sisters

Can you believe the series is almost over again!!? Where does the time go? Our last guest is Al, from the Shaffer Sisters! If I had a sister, I hope we’d do as many fun things together as the ladies behind the Shaffer Sisters blog!  They seem like so much fun and I love how they all craft together! They have been guests before and always make the sweetest dresses! So happy to have them back this year! Welcome Al!

This year when I considered the possibility of games I could choose from, I found myself daydreaming of simpler days. I remember spending hours upon hours outside with my cousins pretending with our red wagon and stick horses, playing hide and go seek, and kick the can at grandma’s house. As I reflected, I realized that this year I wanted my theme for Sew Ready to Play to be more timeless than the projects I’ve done in the past.


Hopscotch is one of those outside games that can be played anywhere with very little effort. A few weeks ago we were sitting on the sidewalk waiting for the local parade to begin when the kids found chalk in the stroller. Before we knew it, there were a few hop scotch designs down and the kids were contently playing instead of impatiently waiting.


I had started out this project with the intent to make another dress for my very girly daughter, but unfortunately the printer was set to fit and not to actual size. I ended up with a dress in which the finished bodice fit my 1 year old daughter instead of my 6 year old. I didn’t realize this until I was practically done and had spent hours embroidering the hop scotch design on the skirt. The simplest thing would have been to just have my baby wear it, but it didn’t seem fitting since there’s no way a baby can hopscotch.

I wanted to recreate the bodice the right size and stick with my original design, but I lacked the emotional energy to invest that much more time into it. So when life gives you lemons make lemonade, right!?

And on that same day her little brother cut some of her hair an inch long

I seam ripped the skirt off the bodice and attached it to some elastic that I’ve been saving for just the right project.

Ty in her hopscotch skirt and Sally in her butterfly tunic and polka-dot leggings

The detail on the skirt was done by lightly sketching the hopscotch design and then going back and adding embroidery thread of different colors.

Skirts that fly are the only way to go for a 5 year old

She is happy because it’s a skirt that flies when she spins and has plenty of room for movement to navigate the playground.

With love,

Al


Bocce Ball with Marci Girl Designs

Today’s guest is Marci, from Marci Girl Designs!!! Another online friend that I can’t wait to meet one day soon! My face to face friend Debbie, introduced us when I was looking for pattern testers and we’ve been online friends ever since! She makes such adorable things for her kiddos and quilts! You’ve got to check her out if don’t already know her! Welcome, Marci!!

Hi Guys!  I’m excited to be here today participating for the first time in Sew Ready to Play.  When I received the invite from Louise I instantly knew what project I wanted to create, Bocce Ball.  You see, back in the day before I had children (about 8 years ago now) my husband and I really got into the game.  We have a large yard, plenty of space and it was really fun to play and in my mind at the time a wee bit of exercise. HA!  The problem started once we had children, if you are at all familiar with the game it uses these really hard heavy balls, and you are chunking them (sometimes pretty far) across the yard.  This isn’t really safe to play around toddlers who want to play too but don’t understand that they can get injured (badly) if hit by one of these balls.  So sadly my husband and I picked up our set waiting for the day when our kids were old enough to understand and play along.  So how do I remedy our predicament?  Fabric Bocce Balls and now we can even play indoors!  Woohoo!  For any of you not familiar with Bocce Ball or want to know the rules of the game, click HERE for the basics and images of how the game plays.

23 Bocce Ball Marci Girl Designs

3.5″ Fabric Bocce Ball Tool and Supply Lists

Tools Needed:
Paper, Pen, Sewing Machine, Thread, Pins, Scissors, Ruler, Rotary Cutter, Self Healing Cutting Mat

Supplies Needed:
Drafted template onto paper.
6 fabric prints/solids for each ball, cutting 2 pentagons from each fabric for a total of 12 for each ball.
Iron on interfacing scraps, I used Pellon SF-101 in both black and white.
Fiberfill or Batting Scraps

How to Draft the Pentagon Template:

How to Create Pentagon

I wanted to include a PDF download template file for you guys, but alas my scanner decided to HATE me and isn’t working right now, but that is ok because I can easily show you how to draft the template yourself.  All you need is a piece of paper, pen and a ruler (preferably a quilters ruler that has both parallel and perpendicular lines on it.)

1.  Draw a dot, which will be the top of the pentagon.  Draw a line straight down from the dot that measures 3 1/8.”  Next draw a perpendicular line at the bottom that measures 2″.  This line should be centered with 1″ on either side.  Draw two dots, one on each end of this line.
2.  Measure up 2″ from the bottom line and draw a line that is perpendicular with the center line.  This line should measure 3 1/8″ and should be centered just like the bottom line.  Since this measurement is a bit odd, I just measured over 1 1/2″ and then marked 1/16″ over from that.  Do that on both sides and then check to make sure the overall line measures 3 1/8″.  Draw two dots, one on each end of this line.
3.  Now that you have 5 dots, ignore everything else and just connect the dots.  Voila!  You now have a finished pentagon template.  To double check and make sure everything is the correct size, each side of the pentagon should measure right at 2″.  Trust me, if the measurement is a little off, you will still be fine.  Now cut out the template and move on to the next step.

3.5″ Fabric Bocce Ball Cutting and Interfacing Instructions

1 Bocce Ball Marci Girl Designs

In order to play Bocce Ball, you need 8 balls, 4 for each player.  In a normal set, 4 of the balls are red and 4 of the balls are green.  I decided to change things up and instead made a cool color and warm color set.  Originally I thought of using prints but in the end thought solids would be fun and less distracting.  You can see in the above photo my fabric pull for the 8 balls.  You need to have 6 different colors for each ball if you don’t want any duplicate colors or prints touching each other.

2 and 3 Bocce Ball Marci Girl Designs

I didn’t worry with making the template on card stock, as long as you don’t cut the actual paper, it will be fine, you don’t have to be super accurate when cutting out the pentagons, just close enough.  The above left photo shows that I am using scraps.  I then line up my ruler along the edge of the template and cut with a rotary cutter.  Continue for each side just making sure not to cut the paper.  You can see on the right photo that I’m not even that close to the paper.  You need to cut 12 pentagons for each ball, ideally in 6 different prints/solids.

4 Bocce Ball Marci Girl Designs

The next step is key to getting a nice sturdy, tough and smooth ball.  You need to interface each piece.  So I used Pellon Shapeflex 101, which is an iron on interfacing.  As you can see I used scraps, they don’t have to be perfect and it is better to cut the pieces about 1/8″ smaller than the fabric.  This is also beneficial when Ironing as you have less chance of getting glue on your iron or ironing board.  I used both black and white interfacing.  White on the light colors and dark on the dark colors.  I also used the interfacing to create a subtle difference between solids that are really close in color.  For example the two orange pentagons were very close in color, the top has black interfacing and the bottom has white interfacing.  Notice how it creates a greater color difference between the two, subtle but different.  Now that cutting and interfacing are finished let’s get to sewing these babies!

3.5″ Fabric Bocce Ball Sewing Tutorial

Steps 1 through 4 Bocce Ball Marci Girl Designs

1.  You will be using a 3/8″ seam throughout.  You need to mark (I use the pins) 3/8″ in from each side.  Line up two pentagons, right sides together and pin them together.  Since I put these pins in at 3/8″ I just stitch from pin to pin.  Another crucial feature of making these balls sturdy is to lower your stitch length.  I used 1.5, it is a small stitch.  Back stitching at both ends is crucial, don’t forget to do this every time.  Remove pins.
2.  Open up the two pentagons and finger press the seam to the left.  Taking a third pentagon, right sides together, pin right where the seam is in the middle and pin the other end at 3/8″.  Stitch, remembering to back stitch at both ends.
3.  Open up the three pentagons.  Now here is the tricky or neat part, you need to connect these three pentagons together.  Gently rotate the upper right pentagon over onto the upper left pentagon. As seen on the green fabric that I am holding.
4.  Now pin these two together.  3/8″ in from the left side and then put a pin right where the other seam ends.  You can see I have this pin at an angle, be careful not to catch the fabric that is sandwiched in there because it is neatly tucked inside.  Stitch, back stitching at both ends in between the two pins.  Remove pins, open up and you should have three pentagons neatly stitched together like the blue one I am holding.  Congratulations if you can get this far, you can make a fabric ball and you have successfully sewn a Y seam!

Steps 5 through 8 Bocce Ball Marci Girl Designs

5.  Decide which pentagon you want to act as the “middle” pentagon and orient it on top.  Take a forth pentagon, pin (right sides together) right at the middle seam (finger press that seam upwards towards the top pentagon) and then pin the outer edge 3/8″ in.  Stitch.
6.  Remove pins, open up and it should look like the upper aqua set that I am holding.  You will then do the same neat rotating trick (the same as step #3) and attach the newly sewn forth pentagon to the now designated middle pentagon.  Pinning and stitching in the same manner as all the others.  Remembering to always finger press that back seam out of the way and not catching any of that sandwiched fabric.  Once finished you will have 4 pentagons sewn together.
7.  Taking a fifth pentagon, add it to the top of the forth pentagon, sewing the same way as all the others.  Open it up and it will look like the top blue set.  Then repeat that neat little rotating trick to stitch it onto the middle pentagon.  You should now have a middle pentagon and 5 other pentagons attached with just one opening as shown on the bottom pink set.
8.  This is what step #7 looks like when you rotate it to stitch it onto the middle pentagon.

Steps 9 through 12 Bocce Ball Marci Girl Designs

9.  Now close up that one last opening.  Rotate the right side pentagon onto the left side opening, right sides together, pin and stitch in the same manner as all the other seams.  Be careful not to catch any of the fabric or back seams.  Remove pins, open it up and it should look like this photo, which is now exactly half of the ball.  You will need to create the other half of the ball, so repeat steps 1-9.
10.  You now have 2 ball halves that you need to stitch together.  Rotate the halves around until you have no prints/same colors touching.  The key to joining the two halves together is to remember that the peaks join into the valleys as shown in the photo.  The upper half (peak) nestles into the lower half (valley.)
11.  Pin, finger pressing the left seam in the back towards the left and finger pressing the right seam to the right as shown in this photo.  Stitch.
12.  Continue to stitch around the whole ball, one short seam at a time, finger pressing the seams out of the way.  Stitch all nine joints, leaving the tenth open.  You can see in the photo I have my finger stuck in the opening, leave it un-sewn as this is where you will turn the ball right side out.

17 and 18 Bocce Ball Marci Girl Designs

Two techniques that I found helpful: 
1.  Once you have sewn all your seams and are ready to turn the ball right side out.  I found clipping the corners 1/4″ in on every intersection produced a smoother ball in the end.  I didn’t trim the seams, it wasn’t necessary.  You can see my clipped seam in the left photo above.
2.  Another key to stitching these and having a smooth ball with no tucks or puckers can be seen on the photo to the right.  When stitching each separate seam make sure you don’t overlap your stitching and you don’t even have to meet the adjacent stitched seam, it is better if you don’t.  You can see in the photo that my seams are about an 1/8″ away from each other.  I even messed up that top seam by starting out at 3/8″ and then gradually shifting to 1/4″ (old habits.)  You can see I just left it and restitched the seam correctly.  By leaving that little bit of space you are making sure not to catch other bits of fabric on the inside and creating tucks.  When in doubt, leave the space!  This is not the type of project where you have to be precise.

19 and 20 Bocce Ball Marci Girl Designs

Turn the ball through that little opening (yes it requires some work, pulling and a lot of tugging but it will work.)  You can see all eight turned above and you can see the opening really well on the yellow one  Now it is time to stuff them.  Stuff them really full, I mean really full, tight as you can stuff it!  This is a great project to use up all those random batting strips and scraps you have laying around, just stuff them in.  If you don’t have that, just use Fiberfill, one bag was plenty for all eight with leftovers.  Once it becomes too hard to put anymore filling inside it, you are ready to stitch it closed.  I used matching polyester thread (it is stronger) and stitched using a ladder stitch 1/8″ apart just to get the opening closed.  There will be some gaping and it won’t look wonderful.  I then went back over the seam a second time with a whip-stitch just catching both sides and stitching as close together as I could, pulling tightly.  You can see my stitching on the right photo.  Knot off the end with your preferred method and clip the thread.  Keep in mind this is for children to play with, it doesn’t need to be perfect, they won’t mind.

21 Bocce Ball Marci Girl Designs

Congratulations!  You are finished and now have a neat hand made fabric ball.  Stuff and hand stitch the remaining balls until you have a set of eight.  Play ball!

22 Bocce Ball Marci Girl Designs

Now if you have a good eye you might notice I am missing something, the jack or pallina, which is another small ball that you throw at the beginning of the game, it serves as the target in which you are throwing your larger balls at (or as close as you can get them.)  This ball measures about 2″ in diameter and is too small to sew using this method.  I plan to English Paper Piece this ball and sew it all by hand, but haven’t done that yet.  In the meantime I am just going to let my kiddos use a ping pong ball or another small plastic ball that is lightweight and can’t break anything or hurt anyone.  Not a big deal but I don’t want you to think I forgot about it!

24 Bocce Ball Marci Girl Designs

Louise, thank you for having me.  I truly hope you guys will give this tutorial a try, even if you only make one ball for your kiddos, it is a quick and rewarding project.  Your kids will go nuts for it too, trust me, my oldest has been dying to get his hands on them.

Be sure to stop back by for more!
SRTP15button

Sept 7th- Debbie from A Quilter’s Table

Sept 9th- Jennifer from Busy Being Jennifer

Sept 11th- Ari from Max California

Sept 16th- Stacey from Boy, Oh Boy, Oh Boy Crafts

Sept 18th- Karly from Paisley Roots

Sept 21st- Louise from I’m Feelin’ Crafty

Sept 23rd- Narelle from Cook, Clean, Craft

Sept 25th- Al from Shaffer Sisters

Sept 28th- Rachel from Let’s Begin Sewing

Sept 30th- Marci from Marci Girl Designs