When we go most places the kiddo leaves with a handful of legos…. Then he drops the legos in the car…

So I wanted to make him a lap desk to hold those legos so they don’t end up all over the car! And that’s what we did!
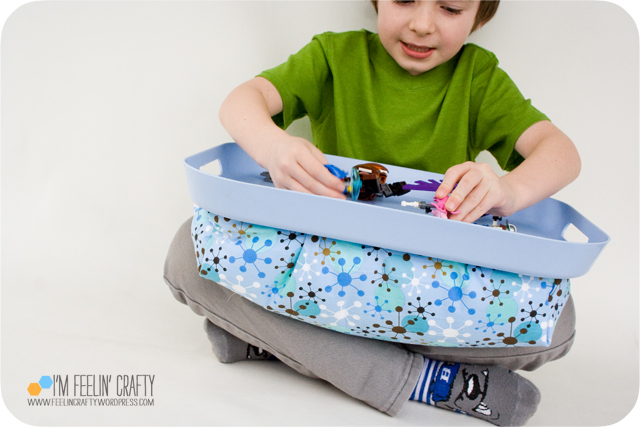
I kept looking for a fun lap desk with sides, but I couldn’t find any since they are mostly made for laptops. Then I was wandering through Goodwill one day and noticed a tray! Oh, yeah! It hit me, I can make it myself. Hello? WHy hadn’t I thought of this before???

Want to make one? It’s super easy! Of course, I got the tray at our local Goodwill. You’ll also need poly fill microbeads, cardboard or foam core, fabric, speed sew, hot glue and some trace paper.
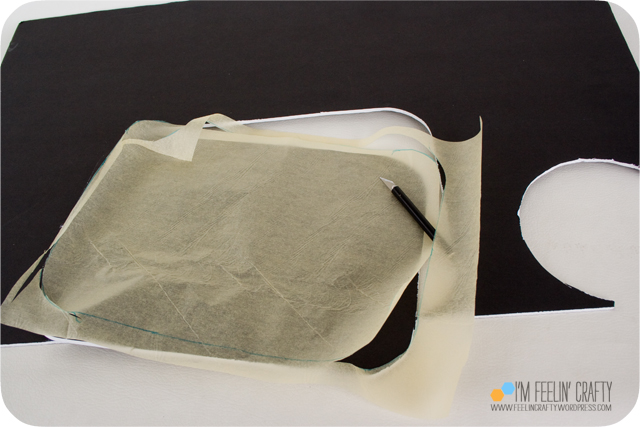
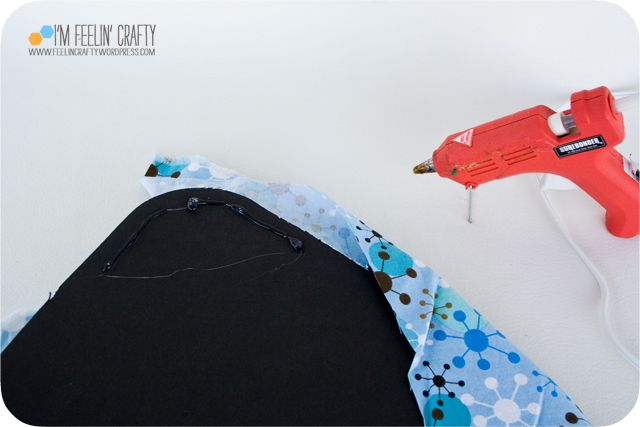
First, you’ll want to trace the outline of your tray and then cut it out of your cardboard or foam core. I used the foam core just becuase it’s what I had closest to me!
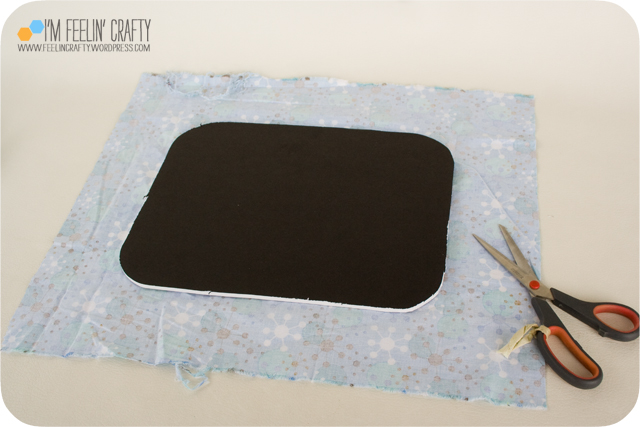
Cut your fabric. I cut mine about 3 1/2 inches larger than my foam core on each side. In hindsight, I’d probably go a bit thinner, maybe 2 1/2 inches.
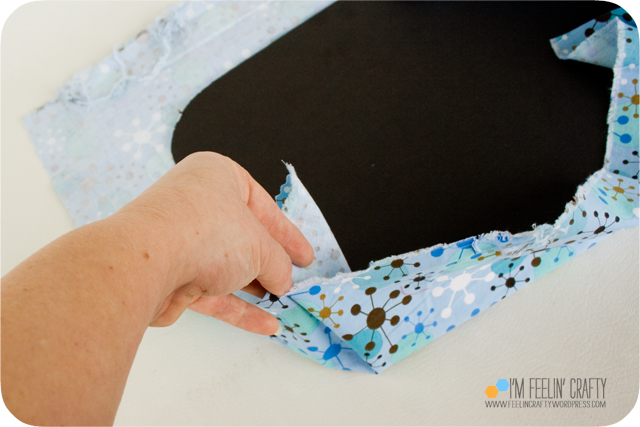

Next, pull up the corners so that you have a triangle of fabric like in the picture above. Pin along the long side of the triangle. Do it for each corner.

And in comes Speed Sew! Have you used this stuff? It’s little blurb is, Don’t sew it, Speed Sew it!’ You put this glue on the fabric, hold it for a minute and it’s like it’s been sewn together! I love it! I’m trying to figure out how to make a no sew quilt for those readers out there that want to make a quilt but don’t sew! Not sure if I’ll be able to do it, but I’m working on it!


Unpin your triangles and glue along the line between the two right sides. Put the glue on a piece of paper or cardboard and use some sort of spreader to apply the glue. I didn’t have great luck with getting the glue where I wanted it when I applied directly to the fabric. Other people might be better at this than I am, but until you know, stick with a spreader!
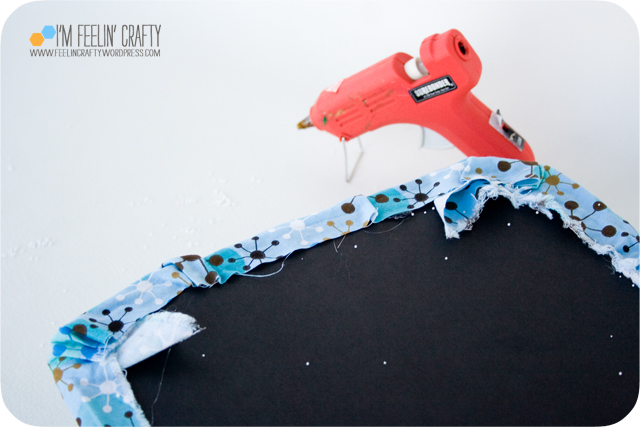
Don’t cut the rest of the triangles!


Center the cardboard back in the middle of the fabric. We’re gluing the fabric to the cardboard. Start with the corners and gather around. Then do 3 sides. Not all four! Just three! Then go around and make sure you have a nice border of hot glue all around.

Use a funnel to fill the lap desk with the micro-beads. This can get messy! They kinda fly around…. So SLOWLY fill the funnel. I tried to speed it up and pour directly into the lap desk. But it made a mess! So I recommend the funnel!
Once the lap desk is filled, hot glue that side closed too! Then push on the lap desk and if you have any holes, micr-beads will start flying! Fill in the gaps if needed!
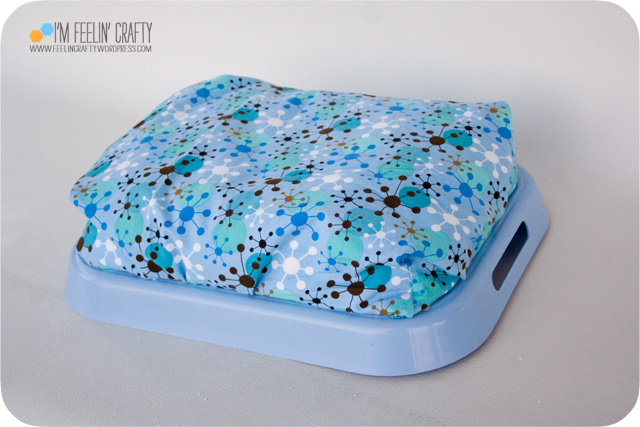
Lastly, hot glue the lap desk to the tray! i had to work fast, before the hot glue dried!

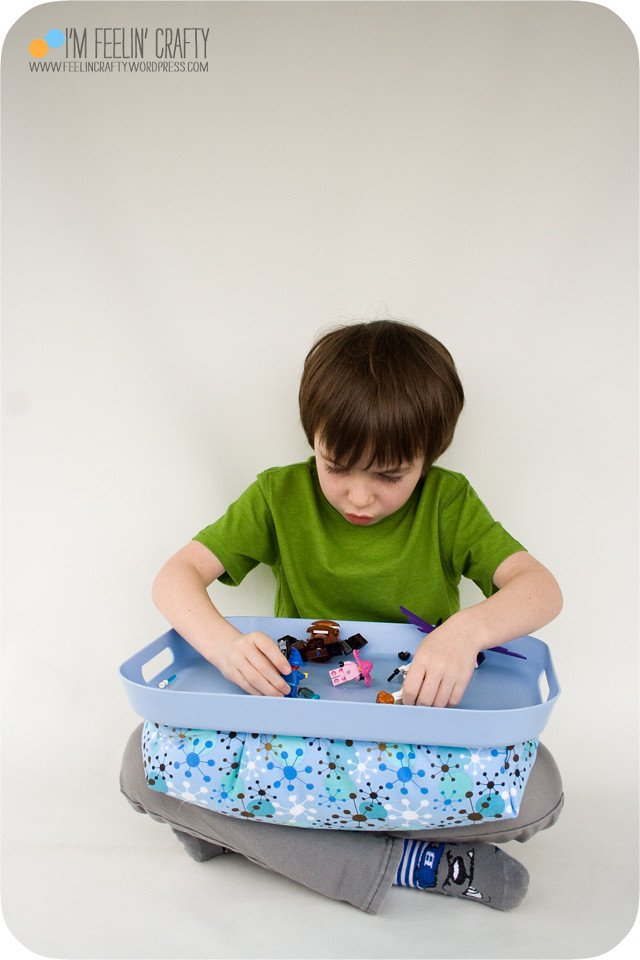
Then give it a test drive! The kiddo was very pleased with it and it ready to take it out on the open road!

What do you think? Would your kiddos like one? I bet they would!! I want one for when I’m crafting in the car on road trips! hmmmm… I might have to make another one!
And now for the giveaway! 2 tubes of Speed Sew! It dries in minutes, doesn’t wash out and can be used for crafts and fabric repairs. I bet it would be a great way to hem things if you don’t want to sew it! I just thought about that!
When you check out their website, you’ll see a bunch of red icons. Click on these for some silly tutorials with Owen Clark and Josh Rimer.
And their FB page has tons of links to other tutorials! I just had even more ideas!!
Giveaway is closed!
Ready to WIN? You have FOUR ways to enter! And come back and leave a separate comment on this post for each entry!
1. Tell us what you’d use Speed Sew for! Or give me another Speed Sew tutorial idea!
2. My blog followers get an extra entry. Leave one comment. (one entry)
3. Follow I’m Feelin’ Crafty on Instagram at @imfeelincrafty. Leave one comment. (one entry)
4. Follow Speed Sew on Facebook. Leave one comment. (one entry)
That’s 4 possible entries! You must comment on this post to win. Sorry, only open to US addresses. The giveaway will close on March 25th at 12 p.m. PST, and we’ll choose one winner using Random.org.
I have been compensated with either payment or product for this post. All opinions are my own, honest opinions!


I would like to try Speed Sew on a particular pair of sneakers that feature a stubborn piece of trim that continues to come loose. Both hot glue and a certain marine cement did not work. Since the sneakers were not inexpensive (and the warranty period expired long ago) I feel that the Speed Sew product could be the easy fix I am looking for. Thanks for the blog and for offering the #SpeedSew giveaway…
What a fun idea for the Lego Lovers in your life! My son (who is fully grown and still loves his Legos) would’ve had a ton of fun with this traveling tray as a kid! One idea I’d use Speed Sew for is a fabric wreath. I’ve seen some really lovely ones that I’d like to make, but hot glue just wouldn’t give it the stability for outdoor use. Speed Sew would be the answer!
I’ve been a Bloglovin’ follower for a long time! Love your ideas!
Hey Great idea, especially for the car, love it!
I think is would be great to have when traveling and need to do a minor garment repair if you don’t have access to needle and thread.
Oh this stuff looks wonderful! Love to have some! Your lap desk would be great for kiddies sick in bed or while travelling in a car. Also great for quick mends!
I follow on Bloglovin!
I love the idea of the no sew lap desk! I can see me making one of those for me to use when I work with beads. I could use it in my recliner. My hands jerk and twitch from time to time and I drop beads. This would be great to help me keep from loosing them.!
I’m a blog follower!
We follow you on Instagram too!
follow them on facebook
your follower
i would use it first for hemming
I have used quick sew for quick hem jobs on dresses, pants, and sleeves just to name a few!
I follow and LOVE your blog! As a beginner, I have found many ideas and directions needed!
I follow Speed Sew on Facebook 🙂
I follow you with bloglovin.
I would use it to glue sparlky bits onto doll clothes t-shirts; maybe real ones for my girls, too!
I have a leather jacket that needs repair to the collar where it has racked on the fold. I was going to place a leather patch on top of the collar and I think the Speed Sew would be perfect to use for the repair. I didn’t even know about Speed Sew until now!
I liked Speed Sew on Facebook.
I’m following you on Instagram as Artists4God. Thanks & God bless! ILuvTheEucharist @ aol.com
I also liked Speedsew on FB as Rose Santuci-Sofranko. Thanks & God bless! ILuvTheEucharist @ aol.com
I was just asked to do a “make it and take it” demo for non-quilters for our local library and was wracking my brain trying to figure out how to do a quilting project without 20 sewing machines. This would be fun to try to let them get the hang if putting pieces together without machines. ( I know there’s the old fashioned way, but “hand” sewing is a 4 letter word!
I follow via bloglovin.
I follow Speed Sew on FB.
I wonder if this would work for covering binders… I love those pretty binders for keeping all my papers neat, but they are so expensive. This could be a fun way to
cover them and actually get the cloth to stick. The last few times I have tried anything like this, the cloth didn’t stick.
I follow you on BL
I love your tray, my grandsons could use this. I would use this on pincushions.
I follow SS on FB.
I followed your blog. Love to have new ones to follow via BlogLovin. Thanks for sharing!
~Crystal
I would use this much needed item for my sewing basket to help me put liners in my crochet bags. I think it will wok amazing! Thanks for sharing!
~Crystal
I followed you on Instagram, I am there too@krystlewvscrochet! Thanks for sharing!
~Crystal
I liked it on Facebook! What a project, your blog is so great. I loooovvveee the desk! So easy and usable! Thanks for sharing! I just love it, so creative!
~Crystal
Speed sew sounds interesting. Does it get stiff (like hot glue, for example) when it dries? I would like to try using it for hemming curtains. I like your lap desk. I think I could live on the couch if I had one of those!
I follow your blog.
I would use it to adhere fabric to a recipe box.